Fettology's ESB Build WIP

Fettology

Hunter
***Updates***
So I thought it would be a good idea to document a few things along my journey to complete my ESB costume.
I currently have:

Flight Suit - Arkady
Vest - Arkady
Neckseal - Arkady
Pouches - Arkady
Helmet - Bobamaker V3
Armor - Fettpride
Gauntlets - MOW
Jetpack - MOW
Wool Cape - MOW
Boots - Imperial Boots
Gloves - Myself
Girth Belt - Horse Girth/ Dyed Myself
Sacros K-11 - Etsy
Jetpack Harness Replica - ?
Ammo Belt - Delta13Mike
EE-3 - Sidewinder - Modded ROTJ
Shoulder Studs - ?
Shin Tools - Found Parts/ Myself
Chest Lights - Fettronics
Nemrod Holster - Toolguy301

I still need the following:

Wookie Braids - Woodman

And I think that's about it???? Maybe I'm forgetting something but if so let me know.

I wanted to share some of my progress on my ESB costume. I recently finished the helmet and am awaiting for some helmet padding that I purchased on Amazon. I read lots of people have used it and its removable so I can wash it after a long day of trooping. Don't want a stinky helmet. lol You can find my helmet post here:

Fettology Bucket Build *Pic Heavy*

I have started to work on the armor. I trimmed out the pieces, and sanded them. I primed them in a matt grey primer and based them out in "Bright Silver" by Floquil. After I gave time for complete drying I masked off the armor as close to as I could using old ESB screen caps/ ref pics I've found on here and google. I then started the green base layer. I know I have read many people asking the correct color of the ESB armor. Some I believe say its not just one color, some say its POG with mists of RLM 62. Some say different stuff so I have decided it is whatever you think looks the best. So here is my setup.

I started off the base with Model master US Med Green. I then did oversprays of Panzer Olive Green (which I didn't see too much of a difference), RLM 62 which I noticed was a lot lighter and more on the tan size, RLM 73 for some darker areas, and finely a mist of Polyscale Earth. I will do a lot more washes of weathering after I add the yellow and some finer details. I also need to add some dulling spray to matt it down a bit. The enamel really likes to dry to an almost satin finish.

IMG_4051.JPG IMG_4052.JPG

As for the knees and shoulders, I used Polyscale Up Armor Yellow. This was my base color for the 3 (knees and one shoulder). I had to do a total of 2 coats to get complete coverage. I then made up a color for the right shoulder bell using Polyscales Up Armor Yellow, Reefer Yellow, and Rock Island Maroon. I don't have exact measurements just whatever looked good to my eye. I then painted the shoulder bell with this mix and think it turned out good. I then took this mix and put a tiny bit in with some straight Up Armor Yellow to get a slight shift in color and that got oversprayed onto the knees to give them that slight variance. This armor as well will get a quick dusting of dulling spray before moving onto the next steps. Any thoughts would be great on improving the armor.
 
Last edited:
Looking good! I love the toe spikes. I may end up using epoxy or some other sort of glue to keep them stuck to the shoe, right now I just have them screwed it on the edges and I epoxied 2 small spikes to the flat center section to keep them from rotating.
 
Thanks! I use to just use the 2 screws on the sides and a small amount of glue in the middle but It never worked too well. so I thought about this and thought it could work. I did do a lot of walking around to test them out and so far so good.
 
Also I wanted to see the color comparison between my armor shade and the screen used ESB. So I went into photoshop and did what I believe they would use in post production with color correction. I took my helmet and armor and did a basic desaturation, cooling filter, and a light lighting adjustment. I think it looks pretty close. So I think I'm on the right track.

Color Compairison .jpg
 
Last edited:
On the esb Helmet there is a couple white paint details over the kill stripes you may be missing. Overall it looks like your headed in a strong direction. Looking forward to seeing your progress!
 
Your colors look very close to mine! I was nervous that it looks pretty different from the movie, but I knew that what it looks like IRL and was it looks like in an almost 40 year old movie are going to be very different things.

I second Ghost_Fett, you are missing the iconic "white thumbprint" on the rear of the killstripes :p I literally dabbed my own thumb in white paint and did about a half dozen "test streaks" before doing it on the helmet. I tried to recreate exactly what I figure happened accidentally by the original helmet painter. I think there is also a second area of white paint that goes on the rear trim and runs onto the back panels slightly.

On another note, your helmet detail is INCREDIBLE. I haven't looked at my own in a couple weeks but I don't think it looks as good as yours. Yours is almost indistinguishable from the reference pics.

The thumb print is my fav so I look for it immediately lol. Just love it lol. I’m weird that way.
 
I'll add the white details. I honestly wasnt sure if the white thumb print was on the ESB helmet or if that was a mistake from a touchup during the SE filming/ exhibits. I feel like every time I see newer photos of the helmet it has more scratches, cracks, and dents that it had in the film. Makes my heart sad seeing it deteriorate. Lol. But I will add these details since I now notice them in the screen caps I have. I also need to get some ear decals so if you guys have any recommendations let me know.
 
Last edited:
I'll add the white details. I honestly wasnt sure if the white thumb print was on the ESB helmet or if that was a mistake from a touchup during the SE filming/ exhibits. I feel like every time I see newer photos of the helmet it has more scratches, cracks, and dents that it had in the film. Makes my heart sad seeing it deteriorate. Lol. But I will add these details since I now notice them in the screen caps I have. I also need to get some ear decals so if you guys have any recommendations let me know.
I hand painted the horseshoes on mine (really badly, but it was my first time hand painting anything since elementary school), but I bought the small black details as dry transfer decals from superjedi. They are AMAZING and so easy to put on. I hate decals which is why I hand painted the horseshoes, but you don't apply the dry transfer decals like a regular decal. You sort of place it where you want it, then rub it on and it adheres to the surface.

If you want decals for the horseshoes, you could try Lucksy31. I never have good luck with applying decals to a curved surface, but in retrospect I would have liked to at least try since I had a really hard time getting them to look right hand painted. They are really cheap, only a couple bucks.
 
So I took some advice and added the white thumb print (talk about nerve wracking) :eek: I also added the white above the kill stripes and what I believe is a little on the back near the panels.

I also went ahead and tried my hand at the ear decals. I had some acrylics and thought I'd give it a shot. They turned out not too bad. Not my favorite but if someone is judging me on my ear decals alone something is wrong with the rest of my suit. Lol :lol:

Also my helmet pads came in from amazon and I gotta say I love them. They Velcro on and can be washed. A must have for my helmet.

IMG_4067.JPG IMG_4068.JPG IMG_4069.JPG
 
Last edited:
Looking great! Those foam pads are where it's at. I just have some layers of foam hot glued in, I might have to make the switch to those type of pads before long. White accents and "decals" look great as well. I feel like the thumbprint really seals in the feeling of that helmet being "yours".
 
So I've been working hard this week to get the armor painted up. I'm pretty happy with the results. I know it may not be the most accurate paint job but overall I'm happy. Although I didn't take really any progress photos I did document what I did in case someone wants some ideas on achieving the look. All my work was done with an Iwata airbrush. I know lots of you may not be comfortable with this but I feel I have way more control over it than spray paints. So here it is.

List of paints I used for the armor.
Model Masters:
US Med Green
Panzer Olive Green 1943
Ger RLM 73
RLM 62
Yellow Zinc Chromate
Br. Dark Green

Poly Scale Acrylic:
Reefer Gray
SP Dark Lark Gray
Earth
Grimy Black
Rust
ATSF Catwhisker Yellow
Up Armor Yellow
Reefer Yellow
Concrete

Floquil Enamel
Bright Silver

I stated my base colors used above in the previous post. A mix of model masters US Med Green, RLM 73, RLM 62, Panzer Olive Grun, and some Earth (poly scale). Once that was dry I removed the masking fluid and began the yellow damage. For this I used model masters Yellow Zinc Chromate. I then added the gray areas around certain chest pieces and the backplate (and yes I know my backplate is ROTJ version). For that I used poly scale Reefer Gray (for the right cheat plate ok the lower corner) and poly scale SP Lark Dark Gray for some of the spatter colors around the emblem. I continued to use the Reefer Gray for the backplate as well.

Once that was done it was off to weathering the armor and toning down the fresh paint look. I did NOT mask off any silver and I'll tell you why afterwards. For this I did it in steps as follows.
1. Model Masters US Med Green to tone down the Reefer Gray used on the right plate. This was more of a mist until I felt it wasn't as noticeable.
2. Model Masters Ger RLM 73 Green was used to darken up around the edges and spots in the middle of armor that needed it.
3. An overspray of Poly Scale Earth. This makes the armor look more dull and dusty.
4. Overspray of Model Masters Br. Dark Green was used for some highlight colors. Being "dark green" you'd think it'd be dark but it's quite the opposite. Lol
5. Overspray of Poly Scale Grimy Black.
6. Poly Scale Rust overspray and heavier near scratches (but not too heavy).
7. Model Masters Panzer Olive Green 1943 overspray.
8. Overspray of Poly Scale Earth.
9. Once your done use some very fine steel wool 0000 and LIGHTLY buff down the armor. This helps blend the colors together and takes any top layers (that sandpaper feel) away.
10. Wipe armor down with a clean cloth or paper towel to remove any paint residue.

Once that was done I went in and did some detail work. I mixed some Model Masters Br. Dark Green and Ger RLM 73 Green (maybe 50/50) and hand painted some darker scratches on the abdomen plate and a few various scratches on the other plates. I then went back in with some Floquil Bright Silver and hand painted some fresh silver. Now we can go back to why I didn't mask off any silver originally. When things get weathered the deepest part is usually the hardest to get to when cleaning (given Boba ever cleaned his armor). So when I go back in with fresh silver I usually just do a spot job of silver around the edges of the damage and maybe a couple of nicks in the deep part. This helps sell the illusion that it's more real. So after adding the Bright Silver I went back in and VERY LIGHTLY buffed down the silver to blend it out.

Now moving onto the knees and shoulders. Again check my previous post for the colors I used for the base but here is what I did after removing the masking fluid.
1. Poly Scale ATSF Catwhisker Yellow was hand painted around the edges of damage. Since I didn't have too many good shots of the shoulders I took liberty to have some fun and make up my own here and there.
2. I mixed some Poly Scale Up Armor Yellow, Rust, and Reefer Yellow (just eyed the color) and did an overspray and heavier in certain areas especially around damage. Again I did NOT mask off any damage areas.
3. Mixed some Poly Scale Concrete and Grimy Black and added the "soot" color around the damage and up the shoulder bells.
4. Poly Scale Grimy Black to pump up the darkness around the damaged areas and centers of the soot color.
5. Overspray of Poly Scale Up Armor Yellow.
6. Overspray of the mix I made from #2 (kind of a similar color to the orange shoulder bell).
7. Overspray of Poly Scale Concrete (I really love this color for some reason).
8. Lightly buff down paint with very fine steel wool 0000. Wipe down with clean cloth or paper towel.
9. Add Floquil Bright Silver to damaged areas (just as a highlight around the edges).
10. Lightly buff down silver with steel wool.

That's it for my armor paint up. Sorry I don't have progress shots. When I get going I get so excited I forget to take them. Lol. Also if anyone has thoughts of anyone selling armor decals let me know cause I can tell you right now I'm not painting them on.

I also painted my shoulder studs. They are aluminum and painted them white. I found a can of spray paint in the garage that was an off white color but still white (not cream). I thought spray paint would stay better than acrylics to metal. So I painted them up for the exception of one. I used a Gray primer so the airbrush paint had something to but to and used Poly Scale SP Lark Dark Gray to paint that one up. I then took one of the white studs, masked it off and painted the red top using Poly Scale Rock Island Maroon. I then lightly dusted them with an overspray of Poly Scale Earth.

IMG_4077.JPG IMG_4074.JPG IMG_4075.JPG IMG_4076.JPG IMG_4087.JPG IMG_4093.JPG IMG_4167.JPG IMG_4166.JPG

I'm also working on my EE-3 right now. I bought an old kit years ago but in ROTJ so now I'm cutting it up and trying to convert it to ESB. I'm taking progress photos and that will be in the next post!
 
Last edited:
So I told you guys I was working on my EE-3 conversion project. I bought a sidewinder kit a long time ago in ROTJ and used it for my first Boba Fett costume. Well years later now I have decided to take it all apart and strip the paint and revamp it for my ESB costume. From what I can tell it's a fairly easy conversion. Some light mods and added parts but that shouldn't be too much trouble. So my project was off and I started to dissemble the pieces I had glued a long time ago. Luckly I only glued the pieces together using super glue so it was easy to pop things off. I was able break it all down to the bare bones without any issues. :D

I had to find a couple of parts first. I had to find a new barrel and the chrome barrel tip. I ran to Lowes and looked around the plumbing aisle. I found a PVC pipe used for drains and a chrome pipe. Not sure the true purpose for these but they looked right and worked for me. So I picked them up. I then took a dremal and cut the block off the barrel of the ROTJ rifle. I then ended up with the block itself. The pipe I picked up from Lowes fit just like a glove! I glued the pipe in place using JB Weld. I then took some 5 min epoxy putty and made a slight buildup around the edges. This is so I wouldn't have to add so much bondo to it. I then added bondo to fill in the gap and have been working on making that narrowing that seems to happen with the original flair gun.

IMG_4153.JPG IMG_4152.JPG IMG_4171.JPG IMG_4190.JPG

The next step I wanted to do is make this half functional. I saw The5thHorseman's post where he converted his kit to a half functional version where the trigger, hammer, and block could be movable. This always made me excited and I wanted to do this for mine. So with it stripped down I got to work reworking a few things.

First off was the hammer. I had cut a good bit off of it years ago in order to attach it to the gun. Now I had to rebuild it using steel stick and some wire inside. I started out printing off a scale of the hammer and based it off that. I bend the wire and drilled holes and mounted the wire using some JB Weld. I then did the same process to the trigger which I had too cut down to glue to the rifle. After that I trimmed up the pieces to be more accurate and then it was off to hollowing out the body. I followed the steps closely and had to test fit every time. There was a lot of back and forth to get things just right but eventually I got them to be snug but not too snug. I added some springs and I have to say I am so happy that we have a special store locally. If you guys every come to central Florida check out "Skycraft." They have literally every type of bolt, screw, electronic parts, fans, etc. So I was able to find a lot of good parts mainly the screws and springs. They are the correct size and have that iconic flat top. Plus it was an excuse to look around again. :rolleyes:

IMG_4147.JPG IMG_4149.JPG IMG_4151.JPG IMG_4163.JPG IMG_4150.JPG

I worked my way around the blaster and got the trigger, hammer, and barrel latch to be spring activated so I can play with my creation. I can't tell you how many times friends broke my trigger trying to pull it. So now they can and it will move. lol Once the pieces were done I broke it all down and started to strip the old paint and glue off the gun. I had some trouble doing this. I tried a few things to remove it but was very sure I did NOT want to sand it. This rifle has so many awesome details like the engraving/ stamping of the name of the gun, numbers, etc. I also didn't want to use any chemicals that were so harsh that it would eat away at what the blaster was made out of. So I was careful of what I used to strip the paint. A few things that worked really well were the green SOS pads, lacquer thinner, and some Jasco Paint and Epoxy Remover. I made sure that once I put it on the pieces that I didn't wait much more time than needed before wiping it off. I didn't have any issues getting the paint stripped and it even removed a lot of the superglue. So that was a bonus. (y)

IMG_4165.JPG IMG_4189.JPG

One thing I wanted was a more realistic looking scope and one thing I though that would work great were these epoxy disks that were located at Michael's crafts in the jewelry making section. They make a pack of them in various sizes. I had to take a dremal with a sanding bit to them to make them a little smaller but once they are glued in place they mimic the look of glass optics. They do have a sticky backing but I removed it using rubbing alcohol and a paper towel. Just rub the glue off and its clean and ready to glue. You will need to glue these on with JB Weld. This is because JB Weld is black/ dark gray color and when its glued to the epoxy it looks like there is no light shining through similar to a scope.

IMG_4184.JPG IMG_4197.JPG IMG_4200.JPG IMG_4202.JPG

And lastly I want to have these pieces as removable as possible due to something breaking and or paint touchups down the road. So I wanted to add additional bolds to the D bracket. I will achieve this through going through the inside of the handle and going out into the D handle. So with that said I have to have my grip removable so I can access those bolts. I did this using 3 magnets and some pins to keep it aligned. I counter sank some earth magnets and used washers on the corresponding areas. This gives me some wiggle room if my measurements are off. I also placed 3 pins to keep the handle aligned. I'm not 100% sure if this will work the best but it was my first thought.

IMG_4198.JPG IMG_4199.JPG IMG_4204.JPG IMG_4207.JPG IMG_4208.JPG

I painted everything up and here is what I used color wise.
Poly Scale:
Grimy Black
Concrete
Earth
Rust
ATSF Catwhisker Yellow
PRR Maroon
Rock Island Maroon
Up Armor Yellow

Model Masters:
US Med Green
Yellow Zinc Chromate

I painted all the parts minus the stock with Grimy Black. It's a nice shade of black without being too dark. Almost a grayish/ black than a dark black. Plus it weathers really well so I'm excited for that process. For the stock I started off with a 50/50 mix of Concrete and Earth. I based the stock out in this. I then made a mix of Rust, US Med Green, PRR Maroon, Rock Island Maroon, Yellow Zinc Chromate, and ATSF Catwhisker Yellow. Now could I have gone and bought a wood color sure but I'm cheap and already had this paint so I used my color knowledge and made a wood color. Red and Green makes brown. Yellow brightens it up and the Catwhisker makes that rich color more of a pastel. I used the rust to shift the tone to that wood color and used Rock Island Maroon to make it more of a reddish wood.

IMG_4196.JPG

I then took a bit of this mixture and put it into a separate cup. I added a touch more US Med Green to darken it up and a touch of Grimy Black to shift it to a darker wood color. This would be used for the wood grain and some darker areas on the stock. I then took the lighter of the browns and sprayed it onto the stock making sure I didn't get 100% coverage. You still want a small bit of that highlight color (the 50/50 mix) to come through. I then hand painted some wood grain onto the stock. I tried my best to get a realistic wood grain and looked at some wood grain photos prior. I then took the darker mix and added it in areas that needed darkened (the cutout and areas on the stock) almost like wear and tear. I then sealed the stock with a couple dustings of gloss spraypaint to get a satin/ glossy finish.

IMG_4205.JPG IMG_4206.JPG

And thats about it for now. I'll update when it all comes together. (y)
 
Last edited:
Looking real good! I love seeing sidewinder blaster builds! Also, just fyi, there shouldn't be a large dent or damage behind the right shoulder on the back plate. That dent is for ROTJ not ESB.
 
Ok so I have some updates with the blaster and some soft parts. First off I'd like to start with the blaster since that's where I left off.

So I ended up touching up the stock for a better wood grain look. I did some highlights and shadows to make it look more like wood which I believe it did however it's now on the darker side. I felt like the screen used EE-3 has a reddish brown stock and mine is just brown at this point. I didn't want to completely reprint it cause I kinda like it so I decided why not make a real wooden stock.

IMG_4264.JPG IMG_4265.JPG

So that's what I did. I glued 2 pieces of 1x6 together making sure I got a tight bond. Lots of wood glue and lots of clamps. After a good 12 hrs of drying I unclamped the wood and traced out the stock. I got the basic shape cut out my hand and used a dermal to file down the areas needed. I also used heavy duty files I had around the shop. I do a lot of woodworking for fun so I have lots of toys to choose from. :D Once I got the shape I took a palm sander with 60 grit to really file down the rough patches and round things out. Overall I think it turned out really good. I stained the stock with a minwax wood stain called "gunstock" ironically. Lol. I think it's a great base for the stock before weathering. I think I may go back and put another coat of stain to help make a richer color. I also found some accurate screws and blind nuts from to local store (skycraft). Love that place. Always here the photos. I think it's a good start. I'll seal it with some polyurethane semigloss and will start weathering it. I also bought some stock rings from amazon and will screw those into the buttstock once it's done. I made the sling using a leather strap and the recommended link of 30.5" which I believe Art mentioned in the conversation of the sling tutorial. It was a great length in my opinion but I'll get better photos later on. I also have been working on the barrel and will fill in a few spots that seem to dip down. But it's coming together slowly.

IMG_4266.JPG IMG_4268.JPG IMG_4269.JPG IMG_4270.JPG IMG_4274.JPG IMG_4275.JPG IMG_4221.JPG

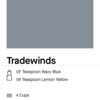
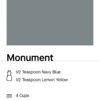
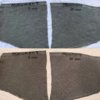
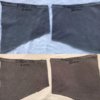
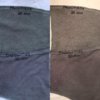
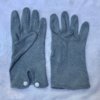
On a different note I bought some parade gloves and have been debating on the colors to dye them. I've seen where lots of people have died them black then bleached them, some people have used pearl gray RIT dye, and some have done the navy blue. I then went to RIT dyes website Rit Dye and saw they have way more color options than your basic out of the bottle colors. They even ask what are you dying and tell you the amount needed so that was cool. I looked around the color swatches while looking at reference and the colors I thought looked close were "tradewinds" and "monument." They both took lemon yellow and navy blue rit dye liquid. Just different measurements. So I mixed up 2 test batches and did 4 color tests. I had never dyed fabric before like this so I wanted to see what the color shifts would be having it dyed for 5 mins and 30 mins. I didn't see too much difference but there is some. It may be hard to see in photos but in person there is a VERY small difference. Not enough that I think anyone would notice. So after the tests I took photos of them both indoors and outdoors. You can see a major color shift from natural light to warm tungsten lights. I'm basing my color tests off natural light cause even convention hall lights are brighter than your typical house lights. I ended up going with "Monument" because I felt it had more colors than just gray. I know I may get some flack from people but I should also state this costume is being made for me cause of my love for the character. It's very therapeutic for me and it helps me get through life. Lol. I don't plan on joining the 501st so I'm not too worried at making "requirements" and I want this to be a fun stress free project. I want it accurate but stress free. Ok back on topic. :p I think the monument color looks the best in most of the references I have and I always try to remember about the color filters they use (almost always cooking filters) as well as the desaturation and such. So I think this will be a good mid ground. **** Inoticed that when dying different types of fabrics (100% cotton vs cotton blends) that the color does change. So with that said maybe make slight adjustments as needed to get the color you desire. I bought a few pairs just in case and made slight adjustments to my dye bath. ****

11431314-FB1E-455E-8A2A-FDDFC9BE6E35.jpg E79C2189-80C2-4C37-9FA5-5DB6C0541467.jpg 2D5A8482-8912-49FD-B772-C30862EFAE47.jpg 5341E3E6-B9DE-48BF-8F54-322BB101FA87.jpg A9F304D6-302D-4DBA-AF66-C95CEFFDE4C7.jpg 82821863-2B5C-4137-8DFB-B7981D6A1FBB.jpg

That's all the update I have for now but will be posting some progress of my EE-3 when I can. I have something really fun in store for this build.
 
Last edited:
Just wanted to post the photos of the gloves all dried. Again I dyed them using the monument formula and I think it turned out pretty good. The first photo was taken inside under normal "warm" lights and the second was taken outdoors under natural lighting. I'm very happy with the color and think once it's weathered and the tackle twill pads are added that it will look great! Hope this helps.

IMG_4310.JPG IMG_4311.JPG
 
Last edited:
Im really liking this build so far... lots of good ideas! nice work! I did notice that your shoulders are ROTJ..not that huge a deal but just a FYI :)
 
This thread is more than 5 years old.

Your message may be considered spam for the following reasons:

  1. This thread hasn't been active in some time. A new post in this thread might not contribute constructively to this discussion after so long.
If you wish to reply despite these issues, check the box below before replying.
Be aware that malicious compliance may result in more severe penalties.
Back
Top