You are using an out of date browser. It may not display this or other websites correctly.
You should upgrade or use an alternative browser.
You should upgrade or use an alternative browser.
Fettology's ESB Build WIP
- Thread starter Fettology
- Start date
intwenothor
Well-Known Hunter
Is this the BM V3 helmet?
Fettology
Hunter
Yea my armor is actually ROTJ but I changed my direction of which version I was wanting to build. So I know there a few differences but for now the armor will do. I may fill in the backplate dent but I'm not too worried about it for now.
And yes it's a Boba Maker V3. Very nice product. Took about a year to receive but worth it. It was ready for paint straight out of the box! That saved me a chunk of time right there.
And yes it's a Boba Maker V3. Very nice product. Took about a year to receive but worth it. It was ready for paint straight out of the box! That saved me a chunk of time right there.
Fettology
Hunter
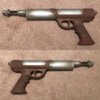
So I've been out of pocket for a bit. It I have updates for you guys!!! So a few weeks ago I took a chance and bought a Scaros sidearm from Etsy (I know there tons of awesome kits here) but I thought I'd give it a shot. It was a 3D printed kit and from the photos it looked to be really solid quality. I'm sure some of the experts out there will see some issues with it but for me it was perfect and a reasonable price too. It came from Germany and only took a few days to print. Shipping only took maybe a week total so it wasn't a bad waiting game.
I received it in kit form and did a little bit of trimming and sanding. The sanding really wasn't as bad as I was expecting. The resolution on this print was very nice and little sanding was needed. I primed the pieces and assembled the kit. A very snug fit (one reason I like 3D printed kits). I added a spring for the trigger to move and that was about it. I just need to add some bondo on the seams and paint it up. It's a very nice solid kit. Very sturdy which I like yet lightweight. I have left the top "door" off and will fashion some magnets or something to keep it closed that way if my trigger spring breaks I can fix it without having to cut everything up. I bought a can of Krylon Ruddy Brown Primer which I found on amazon. The photo was of white primer but the title and description said otherwise. So we'll see when it comes in. I also bought a few of the Humbrol #100 just in case that's a bust. I looked at the tamiya primer but wasn't sure if it was the right color. I think the ones I saw were "red oxide" but I figured these 2 choices should be good.
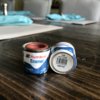


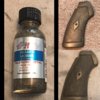
Moving along I have been working on my EE-3 still. I have added a few things I know aren't screen accurate but it was fun for me and I think it looks cool. But that's just my opinion. So first off I repainted my handle. I really didn't like the color cause it was a mat finish and I felt the screen accurate one has more of a metallic sheen to it. So I went to the hobby shop and bought some Alclad paint in Pale Burnt Metal. I love this paint when doing metal effects. It's the same stuff they used on Iron Mans costume. I believe the actual helmet was sent out to be gold plates but that was only for the hero shots. The rest of the suit was done using Alclad. Anyway I painted this up as well as my shin tool (which I'll talk about in a bit). After weathering it I liked it way better than the mat finish. It's not really bright but has a nice metallic look.

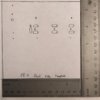
I looked for hours and hours for a good template (that made since to me) for the flash tube. I first wanted to know the length to cut it and secondly where all the holes go. That was a nightmare cause I found so many issues with things not lining up. I finally pulled up as many photos as I could of the MPP tubes and the other variants that have been used as well as screen shots and came up with my own template modified from the ones I downloaded. Maybe it's just me but searching the forms suck. It's so difficult to find what I'm looking for. But none the less I got my template made (and I'll post a diagram of it for those who may need it) and got to work cutting and drilling the holes. I think it came out pretty good. I even took time to engrave the letters onto the tube. I have a SUPER tiny engraving bit and it did the job perfectly. I then weathered it using Poly Scale Grimy Black and some Model Masters Jet Exhaust. I then took some steel wool and lightly buffed it down and took some paint off in some areas. I then went back over with an overspray of Grimy Black and once again buffed it down a tiny bit. I think it turned out pretty good for a Lowes scratch build. Lol


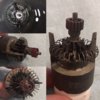
Another thing I was working on was something to hold the flash tube to the main barrel. To do this I made a coupling that fits inside both tubes (half and half) but I couldn't just leave it that way. I had to spice up the inside to make it look cooler than just a "plug" inside. So I was off to Skycraft and picked up a bunch of weird parts. Some glue and paint later and I had my firing mechanism for inside the flash tube. I then made a few other pieces to go into the barrel towards the hammer and a few pieces to make it look more "functional" than just a hole. Now I know some will say that's now how the EE-3 works but it was fun for me to just play and put something cool in there.
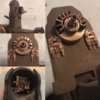
And lastly I have my shin tools. I bought the squeegee and the mixer from BH Photo and got them in the other day. I trimmed the squeegee and made my anti security blade using the left over parts and used old xacto knives handles as the stylus. I painted them up and distressed them. I also used the Alclad to paint my survival knife and I think it came out pretty good too. Good color in my opinion. I just have to pick up a tube and paint that up with some Grimy Black and call that a day.


That's it for now. I'll have more to update next time!
I received it in kit form and did a little bit of trimming and sanding. The sanding really wasn't as bad as I was expecting. The resolution on this print was very nice and little sanding was needed. I primed the pieces and assembled the kit. A very snug fit (one reason I like 3D printed kits). I added a spring for the trigger to move and that was about it. I just need to add some bondo on the seams and paint it up. It's a very nice solid kit. Very sturdy which I like yet lightweight. I have left the top "door" off and will fashion some magnets or something to keep it closed that way if my trigger spring breaks I can fix it without having to cut everything up. I bought a can of Krylon Ruddy Brown Primer which I found on amazon. The photo was of white primer but the title and description said otherwise. So we'll see when it comes in.


Moving along I have been working on my EE-3 still. I have added a few things I know aren't screen accurate but it was fun for me and I think it looks cool. But that's just my opinion.


I looked for hours and hours for a good template (that made since to me) for the flash tube. I first wanted to know the length to cut it and secondly where all the holes go. That was a nightmare cause I found so many issues with things not lining up. I finally pulled up as many photos as I could of the MPP tubes and the other variants that have been used as well as screen shots and came up with my own template modified from the ones I downloaded. Maybe it's just me but searching the forms suck. It's so difficult to find what I'm looking for. But none the less I got my template made (and I'll post a diagram of it for those who may need it) and got to work cutting and drilling the holes. I think it came out pretty good. I even took time to engrave the letters onto the tube. I have a SUPER tiny engraving bit and it did the job perfectly.


Another thing I was working on was something to hold the flash tube to the main barrel. To do this I made a coupling that fits inside both tubes (half and half) but I couldn't just leave it that way. I had to spice up the inside to make it look cooler than just a "plug" inside. So I was off to Skycraft and picked up a bunch of weird parts. Some glue and paint later and I had my firing mechanism for inside the flash tube. I then made a few other pieces to go into the barrel towards the hammer and a few pieces to make it look more "functional" than just a hole. Now I know some will say that's now how the EE-3 works but it was fun for me to just play and put something cool in there.


And lastly I have my shin tools. I bought the squeegee and the mixer from BH Photo and got them in the other day. I trimmed the squeegee and made my anti security blade using the left over parts and used old xacto knives handles as the stylus. I painted them up and distressed them. I also used the Alclad to paint my survival knife and I think it came out pretty good too. Good color in my opinion. I just have to pick up a tube and paint that up with some Grimy Black and call that a day.


That's it for now. I'll have more to update next time!
Last edited:
intwenothor
Well-Known Hunter
The MPP should extend 4 3/4 inches or approx 120mm from the end of the barrel. This length includes the part that will be obscured by the front barrel mount. I first gave this number in post 4 of this thread.
Blaster - ESB EE3. Search for barrel mounts found parts discussion.
Blaster - ESB EE3. Search for barrel mounts found parts discussion.
deathxcircle
Active Hunter
Nice work! I've been trying to find an accurate MPP but will probably have to have a tube made. What are the distances between the hole groupings? I seem to recall that they are not laid out as simply as NSWE positions on the accurate tube.
Fettology
Hunter
So the past few weeks have been so crazy and I have hardly had any time to work on the costume. My daughter has been in the NICU since she was born and we are happy to say that after almost 11 months of being there she is finally home!!!!!  We are so happy to finally get her home and feel like "real" parents for once. So we have been enjoying our time with her and I have put this on hold for the time being.
That being said I have gotten some time to snap some photos of my progress and thought I'd take a minute to update you guys.
I finished painting my K-11 and it turned out pretty good I think. I used the Krylon Ruddy Brown as my base color and used some testor spray paint as the silver base. It's an enamel and sets up really nicely. I then distressed it using Polly Scale earth, rust, and grimy black. I then used steel wool 0000 to take down the color.
I also got a MOW wool cape and I have to say I LOVE it!!! It's an awesome material, drapes well, and the colors look great! I distressed it and tathered the bottoms.

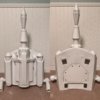
I also purchased a MOW jetpack and it's a great piece too. I have just assembled it and got the basic pieces done. I still need to sand and finish the jetpack before painting. Everything is removable and is assembled using nuts and bolts. I also found an awesome way to get an affordable light for my beacon. I hollowed out the one that came with my kit and used a dremel to cut out the holes. I need to refine the slots but overall it worked great. I bought the lights at Joann Fabrics but I think I've seen them at michaels crafts too. They are mini LED lights and have 3 functions: steady on, blinking, and fade. They were $19.99 but with a 50% off coupon it's a steal at $10. So that was great. I did cut almost half of them off cause I only needed 20 bulbs in total (folded back and forth). I then used heat shrink tubing to black out the ones I didn't need and to make it look clean. Pretty basic but a great option to lights. They also come in various colors so that's nice.

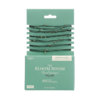
I also got a girth belt and dyed it using the minute stain meathod. It's more on the brown side but I don't know if I'm 100% convinced the ESB belt was more crimson red like some say. So I played it safe and did a reddish brown.

And lastly I painted my harness a bit to weather it like the AOSW photos. Just something fun that no one will ever see.


That being said I have gotten some time to snap some photos of my progress and thought I'd take a minute to update you guys.
I finished painting my K-11 and it turned out pretty good I think. I used the Krylon Ruddy Brown as my base color and used some testor spray paint as the silver base. It's an enamel and sets up really nicely. I then distressed it using Polly Scale earth, rust, and grimy black. I then used steel wool 0000 to take down the color.

I also got a MOW wool cape and I have to say I LOVE it!!! It's an awesome material, drapes well, and the colors look great! I distressed it and tathered the bottoms.

I also purchased a MOW jetpack and it's a great piece too. I have just assembled it and got the basic pieces done. I still need to sand and finish the jetpack before painting. Everything is removable and is assembled using nuts and bolts. I also found an awesome way to get an affordable light for my beacon. I hollowed out the one that came with my kit and used a dremel to cut out the holes. I need to refine the slots but overall it worked great. I bought the lights at Joann Fabrics but I think I've seen them at michaels crafts too. They are mini LED lights and have 3 functions: steady on, blinking, and fade. They were $19.99 but with a 50% off coupon it's a steal at $10. So that was great. I did cut almost half of them off cause I only needed 20 bulbs in total (folded back and forth). I then used heat shrink tubing to black out the ones I didn't need and to make it look clean. Pretty basic but a great option to lights. They also come in various colors so that's nice.


I also got a girth belt and dyed it using the minute stain meathod. It's more on the brown side but I don't know if I'm 100% convinced the ESB belt was more crimson red like some say. So I played it safe and did a reddish brown.

And lastly I painted my harness a bit to weather it like the AOSW photos. Just something fun that no one will ever see.


Last edited:
Fettology
Hunter
Wanted to post an update on my progress. I've been working on my MOW Jetpack and gauntlets. The craftsmanship on these are amazing! I absolutely love my kits. They have required minor cleanup and assembly.
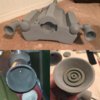
For the jetpack I've been working on refining the becon and think it's coming along nicely. I was also looking for the thruster inserts and found something similar to the photos. I went to the supply store and found a crutch rubber foot and thought it looked very close. I thought for $0.75 each you can't go wrong. So I picked them up and cut the base off them and glued them inside the thrusters. I will end up making the hole larger but for now it's a good start. I put a side by side comparison and I think it's close.


The gauntlets have been coming along too and both are primed and ready for paint. I wanted to get a light for the right Gauntlet and figured I'd swing by joann fabrics and pick up some floral LED's. With coupon it was $4. It's about 4' of lights but I cut off all but the first one. It works like a charm and looks great. I also got the correct switches from eBay and those look great as well. The hose I found was from old stock and is super flexible and is already yellowed. I ran a cord through the tube and into the back of the Gauntlet. I placed 2 pins in it that way the cord is secured in place. I then used shrink wrap tubing and some nylon webbing to attach a small snap buckle that will go under the jumpsuit. I'll hopefully start painting this weekend. Can't wait.
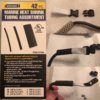
I used marine heat shrink tubing from harbor freight because it has an adhesive inside that's activated once the heat is applied. It makes sure your nylon and tube are firmly secured.

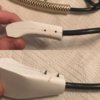
2 pins were added all the way through to ensure the cable stays in place. This was an extension cord I got for about $2.

A few pins and a nylon screw allows me to bold thisnto the Gauntlet but keeps the piece from swiveling.


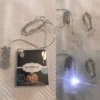
The LED's from Joann Fabrics. They are located in the floral/ wedding aisle and are normally $6.99 but with a coupon they can down to $4. I cut all the LED's off except for the first one. It uses 2 button style batteries and is extremely small and bright.


Gauntlets primed and ready for paint.
For the jetpack I've been working on refining the becon and think it's coming along nicely. I was also looking for the thruster inserts and found something similar to the photos. I went to the supply store and found a crutch rubber foot and thought it looked very close. I thought for $0.75 each you can't go wrong. So I picked them up and cut the base off them and glued them inside the thrusters. I will end up making the hole larger but for now it's a good start. I put a side by side comparison and I think it's close.


The gauntlets have been coming along too and both are primed and ready for paint. I wanted to get a light for the right Gauntlet and figured I'd swing by joann fabrics and pick up some floral LED's. With coupon it was $4. It's about 4' of lights but I cut off all but the first one. It works like a charm and looks great. I also got the correct switches from eBay and those look great as well. The hose I found was from old stock and is super flexible and is already yellowed. I ran a cord through the tube and into the back of the Gauntlet. I placed 2 pins in it that way the cord is secured in place. I then used shrink wrap tubing and some nylon webbing to attach a small snap buckle that will go under the jumpsuit. I'll hopefully start painting this weekend. Can't wait.

I used marine heat shrink tubing from harbor freight because it has an adhesive inside that's activated once the heat is applied. It makes sure your nylon and tube are firmly secured.


2 pins were added all the way through to ensure the cable stays in place. This was an extension cord I got for about $2.

A few pins and a nylon screw allows me to bold thisnto the Gauntlet but keeps the piece from swiveling.


The LED's from Joann Fabrics. They are located in the floral/ wedding aisle and are normally $6.99 but with a coupon they can down to $4. I cut all the LED's off except for the first one. It uses 2 button style batteries and is extremely small and bright.


Gauntlets primed and ready for paint.
Fettology
Hunter
So I have finally have finished the jetpack. I have ordered my decal and is on the way. Other than that it's pretty much done. I am very excited about it since it's a huge part of the costume. It was a MOW kit and again the quality was fantastic!!! I painted it with a sandable primer. I did a coat and sanded it with some 320 grit. After it was primed I masked off the damage using masking fluid and then used some testor spray paint in the Aliminum color to cover the entire pack. I painted each piece separately (i.e. The rocket, body, thrusters, and back panel). Once it was throughly dry I used my Iwata airbrush to base out the pieces in the Model Masters Grun RLM 62 which was the same color as my gauntlets. It's a fantastic base color and looks close to the ref photos. I then did oversprays of Poly Scale Concrete, Earth, and Grimy Black. I darkened some areas around the damage and went heavy on that. The over sprays of Concrete and Eatth help dull out the color and make it very close to the ref photos. I then unmasked everything and used some steel wool 0000 to buff down and blend the colors together. I then went back in and did more overaprays of Rust, Earth, and Grimy Black. This helps fill out some of the silver making it looked worn and used. Again I used some steel wool to buff and blend the colors together. I then mixed up some custom yellow for the fuel caps. I used a combo of Polly Scale Up Armor Yellow, Reefer Yellow, Rust and Model Masters Yellow Zinc Chromate to achieve the cap color. I just eyeballed it but I think it came out close. After that was painted I then moved onto the reds on the piano keys. I used PS Rock Island Maroon for the jetpack rocket collar as well as the keys, the thruster bottoms and the decal on the bottom front of the jetpack. I then used some Testor paint in prime gloss red (then ones you can buy at michaels and hobby lobby) for the red on the thruster centers. Once that was painted I went in and did the dark Green/ black color for the accent pieces on the body and the thrusters. For this I used MM Ger RLM 73. I then went in and did a few more oversprays of the same colors as before and then did a heavier overspray of MM RAF Interior Green. This really helps blend the colors together and turn it to that ESB color. Again I buffed the colors together and cleaned the jetpack off with a dry paper towel. I went back in and did some damage by hand using Floquil Bright Silver. I then did the dark grey spots around the damage using PS Gulford Gray I also used some silver leaf rub n buff to help blend the damage together but didn't get a updated photo of that. I will get a better photo later on.


I painted my light beacon with gloss black enamel and then used Alclad Chrome to paint the silver color. I also used Alclad Pale Gold on the top. Once that dries completely (about 24 hrs) I used some steel wool to buff the color to a shine and toned it back down using some PS Grimy Black. I also filled the cap with some clear silicone so that the light is diffused and isn't so intense. I think the results of that is better than not.
I assembled the pack, attached my jetpack hooks and added the back panel and tried it on for a spin. The harness needed some adjusting to the lower racket. Mainly bending it in slight ways to help it contour the jetpack frame mounts better. I'll have to get a photo wearing it as well. But for now here are the photos I have. The first photo is outdoors under a patio using natural light. The others are inside my house and not color corrected. Hopefully that will help you see some color variance. Enjoy!


I painted my light beacon with gloss black enamel and then used Alclad Chrome to paint the silver color. I also used Alclad Pale Gold on the top. Once that dries completely (about 24 hrs) I used some steel wool to buff the color to a shine and toned it back down using some PS Grimy Black. I also filled the cap with some clear silicone so that the light is diffused and isn't so intense. I think the results of that is better than not.

I assembled the pack, attached my jetpack hooks and added the back panel and tried it on for a spin. The harness needed some adjusting to the lower racket. Mainly bending it in slight ways to help it contour the jetpack frame mounts better. I'll have to get a photo wearing it as well. But for now here are the photos I have. The first photo is outdoors under a patio using natural light. The others are inside my house and not color corrected. Hopefully that will help you see some color variance. Enjoy!


Last edited:
Fettology
Hunter
So a little update on my costume. I just got in my Imperial Boots in today and I gotta say they are top notch! The quality and materials are fantastic! Here are a couple of photos of them fresh out of the box and my paintup.


I also got my cod and butt plate assembled and used Builders technique for attaching them to you and together. I used a police inner belt that I picked up at my local army supply store. It ran me about $8 so that was great. I used nylon bolts and nuts as well as some PVC sheets cut to size to adhere the belt to the armor. I also made a jig so that the PVC would form to the bolt and not burn my hands.


I got a scrap block of wood and drilled the 1/4" hole all the way through. This is the thickness of the screws I got. I then drilled a countersink style hole in the wood that was the size of the head of the screw. I only went as deep as the thickness of the head of the screw. When the screw is placed in the wood it should be flush or close to being flush. I then cut small squares of PVC sheet and drilled a small hole in it. This hole should be about half the size of the screws. I then used a heat gun to heat the PVC plastic up. Once pliable I pushed the screw into the plastic and my wood jig then quickly flip it over and press it firmly onto a solid surface. Once a few seconds pass I would flip it back over and push the bolt out leaving the plastic with a nice dimple like space for my screw.


Once I had enough made I sanded the backs and used JB Weld to glue them to the buttplate. I waited 24 hrs then measured the pieces out and used a soldering iron to "drill" holes through the inner belt (since the belt is mostly nylon). I then attached the belt to the buttplate. I also made the thong strap using some white elastic. I played around with some colors to match the screen acurate one and found that using the gray clothing spray paint mixed with some 99% alcohol thins it out giving you a nice wash of color. I cut the elastic and mixed the paint and alcohol and soaked the elastic for a few mins. I then pulled it out and dried it off. Best part is its fast drying cause the alcohol flashes off quickly. Once done your left with a nice greyish thong! Man Im so excited!

I also think I may repaint the dome and cheeks of my helmet to make it more screen accurate. I am just not happy with the Panzer Olive Green that I used for those parts. I did some tests and think I may go with the "custom mix 1" color I made. Let me know what you guys think about the color.


And lastly I wanted to update you guys with my jetpack. I got a few pieces and touched up some paint to make it more accurate. I bought some 3D printed dental files and gauntlet darts from Toolguy301 and the quality was amazing. Super excited about them! I used some acrylics I found at Michaels that give one file that metallic blueish green hue as well as a testor color for the red file and think it's pretty spot on. I also got my decal and weathered that a bit too. Thats it for now but will keep posting on my journey.


I also got my cod and butt plate assembled and used Builders technique for attaching them to you and together. I used a police inner belt that I picked up at my local army supply store. It ran me about $8 so that was great. I used nylon bolts and nuts as well as some PVC sheets cut to size to adhere the belt to the armor. I also made a jig so that the PVC would form to the bolt and not burn my hands.


I got a scrap block of wood and drilled the 1/4" hole all the way through. This is the thickness of the screws I got. I then drilled a countersink style hole in the wood that was the size of the head of the screw. I only went as deep as the thickness of the head of the screw. When the screw is placed in the wood it should be flush or close to being flush. I then cut small squares of PVC sheet and drilled a small hole in it. This hole should be about half the size of the screws. I then used a heat gun to heat the PVC plastic up. Once pliable I pushed the screw into the plastic and my wood jig then quickly flip it over and press it firmly onto a solid surface. Once a few seconds pass I would flip it back over and push the bolt out leaving the plastic with a nice dimple like space for my screw.


Once I had enough made I sanded the backs and used JB Weld to glue them to the buttplate. I waited 24 hrs then measured the pieces out and used a soldering iron to "drill" holes through the inner belt (since the belt is mostly nylon). I then attached the belt to the buttplate. I also made the thong strap using some white elastic. I played around with some colors to match the screen acurate one and found that using the gray clothing spray paint mixed with some 99% alcohol thins it out giving you a nice wash of color. I cut the elastic and mixed the paint and alcohol and soaked the elastic for a few mins. I then pulled it out and dried it off. Best part is its fast drying cause the alcohol flashes off quickly. Once done your left with a nice greyish thong! Man Im so excited!

I also think I may repaint the dome and cheeks of my helmet to make it more screen accurate. I am just not happy with the Panzer Olive Green that I used for those parts. I did some tests and think I may go with the "custom mix 1" color I made. Let me know what you guys think about the color.


And lastly I wanted to update you guys with my jetpack. I got a few pieces and touched up some paint to make it more accurate. I bought some 3D printed dental files and gauntlet darts from Toolguy301 and the quality was amazing. Super excited about them! I used some acrylics I found at Michaels that give one file that metallic blueish green hue as well as a testor color for the red file and think it's pretty spot on. I also got my decal and weathered that a bit too. Thats it for now but will keep posting on my journey.


Last edited:
Fettology
Hunter
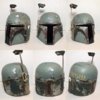
So I ended up reprinting the dome and cheeks this week. Couldn't really stand the color I went with originally. I am overall happy with the color and think it looks better than it did before. It was a custom mix as stated above and think it's close to the real deal.  Below are some photos of the repainted helmet and a comparison shot of the screen used helmet and the original paint job vs the new color.


Aside from that I received my ammo belt from Delta13Mike and the quality is outstanding! I am so thrilled to get it in and have an amazing addition to my suit. I will lightly weather it using leather shoe polish so I'll update you guys on that.


Aside from that I received my ammo belt from Delta13Mike and the quality is outstanding! I am so thrilled to get it in and have an amazing addition to my suit. I will lightly weather it using leather shoe polish so I'll update you guys on that.


toofastrobot
Active Hunter
Man I haven’t used that helmet color mix in years. Glad to see it being put to use and improved!
Fettology
Hunter
Well I have finally assembled my EE-3 and it's almost fully complete. The only thing I have left to do is buy sole accurate screws for the scope attachments and make the wire at the bottom of the scope bracket to hold it in place. Other than that I think I'll call it a finished rifle. I may do some additional weathering but think it's at a good spot for now. May need some fresh eyes on it before I go too ham on the weathering. 


sutt_hero_rotj
Active Hunter
That was a sidewinder kit correct?
Fettology
Hunter
That was a sidewinder kit correct?
Most of the kit yes. It use to be his ROTJ kit that I bought a while back and finished. Then when I started this project I decided to go with ESB so I converted it using some parts I found locally as well as some 3D printed parts.
Similar threads
- Replies
- 15
- Views
- 453


