You are using an out of date browser. It may not display this or other websites correctly.
You should upgrade or use an alternative browser.
You should upgrade or use an alternative browser.
Bobamannen’s ESB build
- Thread starter Bobamannen
- Start date
-
- Tags
- 501st build building help esb
Bobamannen
Hunter
Bobamannen
Hunter
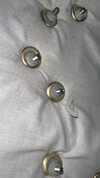
I've made holes in the vest and attached the grommets, with the exception of the shoulder bells for now. I'm still waiting on the nylon bolts and washers to continue. I'm excited to see if the armor will be a hit or miss when I start attaching it!

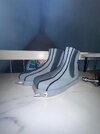
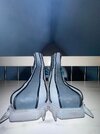
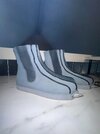
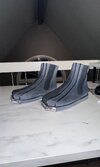
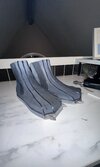
I've also ordered several shades of the original grey paint used on the shoes to touch up the areas where I accidentally spilled black leather paint.

I've also ordered several shades of the original grey paint used on the shoes to touch up the areas where I accidentally spilled black leather paint.
Last edited:
Bobamannen
Hunter
This post will be a bit heavy on pictures.
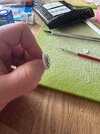
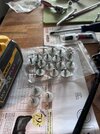
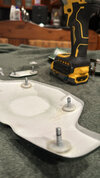
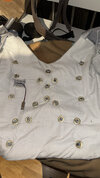
Today, I mounted the armor onto the vest using M5 and M8 washers, M5x20 machine screws, and glue/epoxy. The assembly was done as illustrated below, with glue applied between each washer. To ensure a secure bond, I used a nut to hold everything in place while the glue dried, though this step isn't shown in the photos.
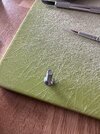
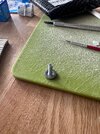
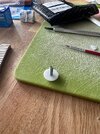
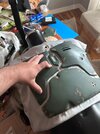
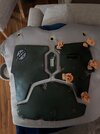
Once I was satisfied with the result and the glue had fully hardened, I removed all the armor parts and applied a second layer of epoxy around the washers and on top of the bolts. Since I used metal screws instead of the intended nylon ones, I was able to use a magnet inside some fabric to hold the screws in place while the adhesive cured.
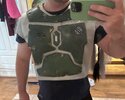
Overall, I'm pleased with how it turned out, though I regret placing the collar too low. Maybe next time, I’ll get it just right.
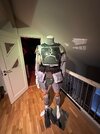
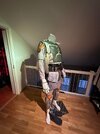
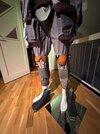
Next on the list was dealing with the spilled black leather paint on the shoes. I found a paint that closely matches the original color and carefully touched up the spots. Once that was done, I added some weathering to blend it in, then lightly sanded the area to keep it subtle—didn't want to overdo it. The shoes are looking much better now!
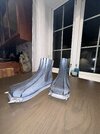
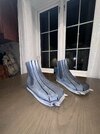
Today, I mounted the armor onto the vest using M5 and M8 washers, M5x20 machine screws, and glue/epoxy. The assembly was done as illustrated below, with glue applied between each washer. To ensure a secure bond, I used a nut to hold everything in place while the glue dried, though this step isn't shown in the photos.


Once I was satisfied with the result and the glue had fully hardened, I removed all the armor parts and applied a second layer of epoxy around the washers and on top of the bolts. Since I used metal screws instead of the intended nylon ones, I was able to use a magnet inside some fabric to hold the screws in place while the adhesive cured.


Overall, I'm pleased with how it turned out, though I regret placing the collar too low. Maybe next time, I’ll get it just right.


Next on the list was dealing with the spilled black leather paint on the shoes. I found a paint that closely matches the original color and carefully touched up the spots. Once that was done, I added some weathering to blend it in, then lightly sanded the area to keep it subtle—didn't want to overdo it. The shoes are looking much better now!


Last edited:
The chemical stirrer and squeegee arrived today. Here are some WIP photos and the finished shin tools. I'm a bit uncertain if I should weather the entire sonic beam weapon or just the part that sticks out of the pocket(?).
View attachment 243184View attachment 243183View attachment 243182View attachment 243181
View attachment 243180View attachment 243179
Looking sweet!!
Can I ask is the Squeegee painted or is it stock color?
Thanks
Bobamannen
Hunter
Thank you! I decided to keep the squeegee in its original color, giving it one full round of weathering across the entire piece. After that, I did a subtle second pass just above the pocket lineLooking sweet!!
Can I ask is the Squeegee painted or is it stock color?
Thanks
Bobamannen
Hunter
I decided to treat myself to a stunning pair of metal ears from Minutefett, beautifully painted by NixFx. They turned out amazing and complement my Minutefett helmet, which was also painted by NixFx, perfectly. Cant wait for these to arrive!!


Bobamannen
Hunter
I've always wanted to add a sound effects to my Boba Fett costume, so I decided to order a Cosvox sound effect unit loaded with Boba Fett's iconic lines. After some research, I realized it’s more practical to purchase a finished product rather than trying to assemble all the components myself. To complete the setup, I plan to order a compact Bluetooth speaker that can fit into one of the flightsuit pockets, along with a Bluetooth adapter for the unit's 3.5 mm aux jack. The unit allows multiple sounds to be triggered with a single button, with up to 8 minutes of high-quality audio.

The plan is to mount the device inside one of the costume's gauntlets, with the buttons discreetly placed maybe on the Alco key sor concealed within the glove with the included buttons.
The plan is to mount the device inside one of the costume's gauntlets, with the buttons discreetly placed maybe on the Alco key sor concealed within the glove with the included buttons.
Bobamannen
Hunter
More acquisitions! I’ve ordered a few more key parts for my Boba Fett costume, and it's almost complete now.
- Resin whipcord files (Cantina Dude) – printed locally in Norway. I will start working on the whiocord when I’m home from offshore
- Dental files ESB style (minutefett)
- New metal knee darts (minutefett)
- Metal visor clips (minutefett)
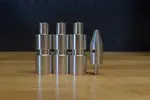
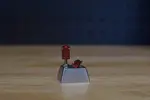
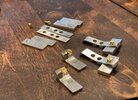
(- 4th mystery shintool, Metal flamethrower and metal ear set by minutefett, painted by NixFx – shipping with the other minutefett parts)
- Visor (Bobamaker)
- Chin cup with straps (Bobamaker)
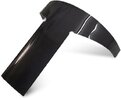
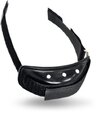
(pictures for reference)
- Resin whipcord files (Cantina Dude) – printed locally in Norway. I will start working on the whiocord when I’m home from offshore


- Dental files ESB style (minutefett)
- New metal knee darts (minutefett)
- Metal visor clips (minutefett)


(- 4th mystery shintool, Metal flamethrower and metal ear set by minutefett, painted by NixFx – shipping with the other minutefett parts)
- Visor (Bobamaker)
- Chin cup with straps (Bobamaker)


(pictures for reference)
Last edited:
Bobamannen
Hunter
Shipment day! Today, I received exciting news from sunny California Minutefett has packed everything and it's ready to ship. Huge thanks and big shoutout to him for helping me make the final adjustments on the gauntlets, free of charge. It’s a true testament to how amazing the Fett community can be! Now, the wait begins for its arrival here in Norway!


Looking amazing man. Have you messed with the Cosvox audio kit yet? I just purchased their kit (the version that includes an amplifier) but I like your idea of using bluetooth. I also was researching buying individual components but decided that an all-in-one kit was a better option. Especially for the price. It think adding an amp will make it more useable.
Bobamannen
Hunter
Me too! Excited to complete this costume after allGlad to see this reaching the finish line after that rough start!
It looks like porch pirates made off with the audio kit from my mailbox, huge bummer! Fortunately Amazon is sending a replacement.Looking amazing man. Have you messed with the Cosvox audio kit yet? I just purchased their kit (the version that includes an amplifier) but I like your idea of using bluetooth. I also was researching buying individual components but decided that an all-in-one kit was a better option. Especially for the price. It think adding an amp will make it more useable.
I've got all the other parts I need, except for the audio unit itself. I'll just have to do a bit more research to figure out how to get everything set up to work fully via Bluetooth with the speaker.
Wow this build is looking great! What part of Norway are you in? I have a few Norwegian friends and one's in the 501 over there and seems like they have a lot of fun!
Thank you friend! I’m on the west coast of Norway, between Stavanger and Bergen, in a city called Haugesund. I don’t know any members here yet, but I’m definitely willing to travel. Once my build is complete, I’ll send it in for approval!
Bobamannen
Hunter
First time suiting up in a full Boba Fett costume There are still a few tweaks to make, but it's getting there!
Here are a few adjustments on my list to get it just right, let me know if you spot anything that could use improvement let me know!
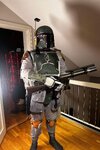
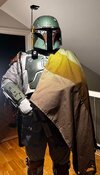
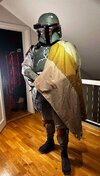
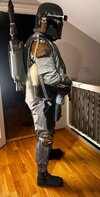
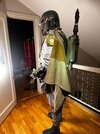
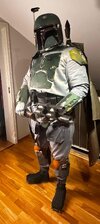
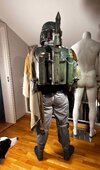
Here is how it turned out
Here are a few adjustments on my list to get it just right, let me know if you spot anything that could use improvement let me know!


- Chin Cup: Not used properly in the photos, lol.
- Neck Seal: Needs to be updated; I'm planning to buy one to attach to the flight suits I got from CB Props which will be a bitt wider and longer.
- Cape: Not the intended cape—my wife couldn’t attach the MOW cape since the screws on the studs were too short.
- Vest: Needs adjustments, especially with the jetpack on. The bottom of the vest flares up, as seen in the photos. I’m considering shortening the back straps or checking if it’s a sizing issue with the vest.
- Hose to Right Gauntlet: Needs to be shortened, as it’s tricky to keep it attached to the gauntlet since the hose itself are kind of stiff.
- Knee armor: Needs to be higher up, maybe sew some velcro on the flight suit and attach velcro on the knees to keep it in place.
- Weathering on Shins: Needs additional spray paint to better match the shoes.
- Pulce-40 Blaster: The top piece around the tube and the metal rod both need to be removed.


Here is how it turned out

Bobamannen
Hunter
Thanks brother!I can feel the nylon screws through my flight suit I can't imagine metal ones!
Suit up is looking really good!
Bobamannen
Hunter
My first public appearance in costume was a big success! Here is some photos;
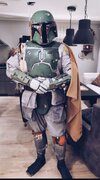
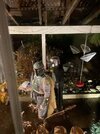
I’ve submitted photos to the GML with the help from my partner, even though she’s not exactly a fan of the whole Boba Fett dress up procedure! It took quite a while to get everything on, which made the process a bit of a hassle, and I felt like the final look was a bit rushed, not as polished as I’d hoped. One issue I noticed was with the kidney armor: the back piece sticks out, and the girth belt doesn’t sit properly over it. I’ll likely need to shorten the piece and drill a new hole to get a better fit.
Here are the photos I sent to the GML:
Recent Fixes
- Chin Cup: Corrected placement for a secure fit.
- Cape: Replaced the original with a MOW cape and swapped in a longer bolt.
- Vest: Tightened the jetpack harness, which was too loose and interfered with attaching the jetpack properly.
- Right Gauntlet Hose: Shortened and added a string to secure it to the jetpack harness.
Bonus Fixes
- Gauntlets: Added Velcro for better security after the magnets on the left gauntlet failed during Halloween.
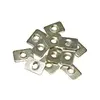
- Armor Nuts: Switched to T-nuts for the bolts, replacing the nylon ones previously used.
Remaining Fixes
- Shin Weathering: Needs more weathering to blend better in with the shoes.
- Pulce-40 Blaster: The top piece around the tube and metal rod need to be removed.
- Kidney Armor Adjustment: Planning to shorten it by drilling a new hole for improved fit.
Last edited:
Looking good man! Paint work and weathering looks really good.
I am not the boba fett esb expert here, so take everything that I say with a grain of salt. I am only adding a few points since you asked for some feedback. One thing that I would consider is maybe adding an extra strip of velcro at the back of the flak vest so that you can tighten it up a bit. It looked really good in the initial photo that you took when you mounted the armor earlier in this thread, but in your full suit-up photos it looks like its slightly too big (just slightly, it looks like it wants to stick out away from the flight suit in the front). I think if the flak vest was just a little tighter it would look perfect. You did mention the vest in your fix-it list so you may already be planning on tightening it.
The only other thing I would mention is actually about a similar problem I am having. I noticed that we are working with the same flight suit and one detail I found is that the shin tool pockets are sewn in a little bit too high up on the legs. Mine has the same issue, and it brings the shin tools very close to my knee armor. The spacing between the thigh pouches and shin tools should be larger. I am about to move my shin tool pockets down a few inches towards my ankles, I think that it will make a big difference and should be easy enough sew them back on. To me, it looks like the bottom of the shin tool pockets should be at about the level of the top of the boots/ankles going by some reference photos.
photo order: reference/mine/yours


I think that it would be helpful to see a full suit-up outdoors or next to open windows during daylight to get some bright lighting on the costume, it is a little hard to see the finer details with indoor lighting (I know, suiting up is a complicated process so easier said than done lol. Overall though everything is looking really good! Keep up the awesome work.
I am not the boba fett esb expert here, so take everything that I say with a grain of salt. I am only adding a few points since you asked for some feedback. One thing that I would consider is maybe adding an extra strip of velcro at the back of the flak vest so that you can tighten it up a bit. It looked really good in the initial photo that you took when you mounted the armor earlier in this thread, but in your full suit-up photos it looks like its slightly too big (just slightly, it looks like it wants to stick out away from the flight suit in the front). I think if the flak vest was just a little tighter it would look perfect. You did mention the vest in your fix-it list so you may already be planning on tightening it.
The only other thing I would mention is actually about a similar problem I am having. I noticed that we are working with the same flight suit and one detail I found is that the shin tool pockets are sewn in a little bit too high up on the legs. Mine has the same issue, and it brings the shin tools very close to my knee armor. The spacing between the thigh pouches and shin tools should be larger. I am about to move my shin tool pockets down a few inches towards my ankles, I think that it will make a big difference and should be easy enough sew them back on. To me, it looks like the bottom of the shin tool pockets should be at about the level of the top of the boots/ankles going by some reference photos.
photo order: reference/mine/yours
I think that it would be helpful to see a full suit-up outdoors or next to open windows during daylight to get some bright lighting on the costume, it is a little hard to see the finer details with indoor lighting (I know, suiting up is a complicated process so easier said than done lol. Overall though everything is looking really good! Keep up the awesome work.
Similar threads
- Replies
- 128
- Views
- 26,603

