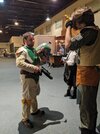
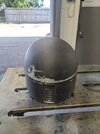
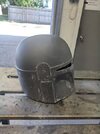
TheLavaMelon's budget build (WIP)

I read that you were going to be fixing the costume up post-dance? Are you planning to upgrade even more? If so, whats on the horizon?
Your belt looks a little narrow and I'd open open up the barrel of your blaster.
The main thing I want to do, is redo the flak vest and use the proper armor attachment method. The velcro allows the armor to flap around and it's super easy to slap it off if you're not careful.

I'm not happy with any of the soft parts that I made, except for the ammo pouches. The girth belt, ammo belt, and flak vest/neck seal will all be redone eventually. The blaster will likely be replaced as well.

I also plan on re-painting the armor and helmet, but that is something I will need to work up to. I need to learn how to use an airbrush and either order or learn how to mix paints.

All that said, the costume was a hit!
Please make sure you get pictures of the group from the party too.
Happy to provide!

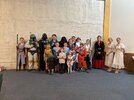
Here's the whole group:
PXL_20201016_005504014.jpg
Top row: Dark Rey, Boba (me), Darth Vader, Lando (I here that he just liked the cape), Emperor Palpatine, Han, Leia, Rey, Padme (decoy), and two people from Pride and Prejudice (I guess).
Middle row: C-3PO, Padme, Padme, Jyn Erso, Luke
Bottom row: Baby Yoda, Kyle Katarn (at your service...), BB-8, R2-D2
Total: 18 Star Wars characters!

Unfortunately, Baby Yoda was turned around for the best photo. Here he his with BB-8:
PXL_20201016_022547305.jpg
Both of them won their respective costume contests, under 13 boys/girls.

There was also a group contest, but we lost to the Scooby-Doo Gang. (We would've gotten away with it too, if it weren't for those meddling kids...)

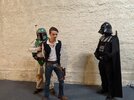
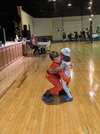
I didn't see this, but I'm glad photos exist:
PXL_20201016_003655534.jpgPXL_20201016_003657164.jpg

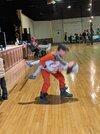
And a couple of action shots:
PXL_20201016_005045956.jpgPXL_20201016_003558960.jpg

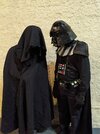
Oh, and there was another Mandolorian:
PXL_20201016_002744198.jpgPXL_20201016_002804988.jpg


Overall I am very pleased with how the costume worked out. I only had a couple of malfunctions. One of the girth belt buckles tore off, and somebody I danced with slapped off my collar armor. I wish I could do more swing moves, but that's the price I pay for such a cool costume. At least I can waltz!

Thank you all for your help. It is greatly appreciated.

Best regards,
- TheLavaMelon
 
TheLavaMelon
That's really cool! Glad to hear all worked out well and the pics are great!

If you're looking for a write up, on how I did my Grommet/Armor Method, feel free to check out my WIP thread. I've been told that my write up on installing the grommets was helpful. (Word of caution though - my WIP thread is getting lengthy ;))
My WIP Link:

For soft parts...if you're looking to DIY those pieces from scratch. I do believe that Strider made all his from scratch. (He's got a WIP too).
Strider's WIP link is:

-Iron
 
TheLavaMelon, I've been following your build from the beginning when you posed the question about whether or not it was possible. I just started my ESB build in August and I have to say that I'm impressed and inspired by what you were able to learn and pull off from square one less than a month ago until last night. This whole build process is way more involved, daunting and costly than I ever imagined but I'm in it for the long haul and look forward to seeing your upgrades down the road. Thanks for sharing!
 
That's what happens. When I found the TDH I scraped most of 1993 scracth build. I started all over, just keeping a few parts. It is never done.
 
Great stuff here TheLavaMelon - I have seen similar posts from people asking exactly what you did and after receiving input they flake out, realizing it might be more than they could take on.

You did the opposite, took on the challenge, pushed yourself and took the input and kindness of this community and applied it in a very short period of time. The results are great for A. What you needed the costume for and B. The amount of time that you had to bring something together!

Hopefully you learned a few things about the costume, about this community and about yourself and your capabilities! Stick around and build upon what you’re done!

Also, my 2 cents: you can rattlecan armor! I started this project not knowing how to use an airbrush, and rattlecanned pretty much everything! “You can dooooo it”
 
Whereas I used only a few rattlecans on some things but 95% of my build was done with an airbrush. Me, having ZERO time on an airbrush, got it in June as part of a Fathers day gift. Since then I learned quite quickly how to use it. Additionally I have zero art training, but found I have a creative side doing chalk artwork. (See my WIP for more details on the chalk) but I found it wasn't that hard to use the airbrush. I find that I have WAY more control over the amount of paint thrown onto an object than rattlecans. Just ones opinion.

-Iron
 
Hey Y'all, thanks for all of the kind words!

I kinda feel bad for disappearing, especially since I haven't even used the gauntlets I was donated yet (sorry!). It boils down to that work slowed down a lot more than usual over the holidays and people weren't paying. Things have picked up quite a bit though, so I have some time now : D

I've decided to start with re-painting the helmet. I'm going to take this one step at a time because rushing through it like I did last year did not go well. I ended up getting frustrated a lot and having to continue anyway because of my deadline. I'm going to be a lot more chill about this build going forward. Especially since I don't need it for Halloween, I have a couple of other options for that and we aren't all going as Star Wars characters (at least, not that I know of).

Also, my 2 cents: you can rattlecan armor! I started this project not knowing how to use an airbrush, and rattlecanned pretty much everything! “You can dooooo it”
I used rattle canned most of costume. I only used my airbrush for finer details. It can be done, just not the easiest path.
Whereas I used only a few rattlecans on some things but 95% of my build was done with an airbrush. ...... I find that I have WAY more control over the amount of paint thrown onto an object than rattlecans.
These are all good points, but I'm probably going to end up going the airbrush route. Mostly because I want to use rustoleum paint and their color selection in rattlecans is limited. I'll be able to mix paints if I do an airbrush.

On a related note, the "airbrush" I was using was actually for sandblasting. That explains why it was going so terribly XD

Anyways, on to the status update:

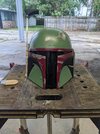
Here's what I'm starting with:
PXL_20210429_230912955.jpg

Unfortunately I wasn't very careful with storing the helmet and so bent the rangefinder shell. I'm not too worried as my brother has a 3d printer and I never put the lens in anyway.
PXL_20210429_231022766.jpg

I used gorrilla glue to fasten the ears, so I used a painters razor to get most of it off, I will have to sand this before I prime again.
Before:
PXL_20210429_231440980.jpgPXL_20210429_231445098.jpgPXL_20210429_232120797.jpg
After:
PXL_20210429_231836435.jpgPXL_20210429_232042134.jpgPXL_20210429_232404890.jpg

I also pulled out the foam I used to make it sort of fit properly, and the visor:
PXL_20210429_232102379.jpgPXL_20210429_233401213.jpg

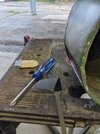
I started using acetone and paper towels to strip the paint off. It was at this point I realized, this was going to take a while:
PXL_20210429_232509724.jpg

I spent about an 45 minutes on it and decided to call it before I got too impatient.
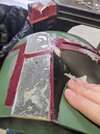
Here's where I am currently:
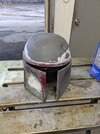
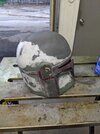
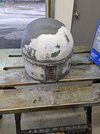
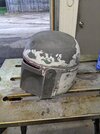
PXL_20210430_001258127.jpgPXL_20210430_001301381.jpgPXL_20210430_001305057.jpgPXL_20210430_001308999.jpg

I've learned a few things in this venture:
- This takes a lot of acetone and paper towels
- The primer requires more elbow grease than the later coats
- Red paint is a pain in the a** to get off, somehow even harder than the primer
- The detail sections are probably going to have to be done with scraping tools, or just left with some paint in there

That does it for this update, I'll try to work on this at least once a week but I can't make any promises with how fickle my work schedule can be.

Thanks for reading!

Regards,
- TheLavaMelon
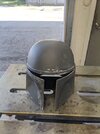
 
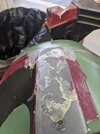
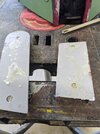
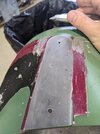
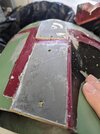
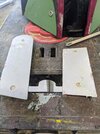
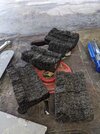
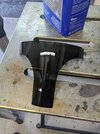
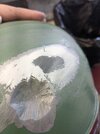
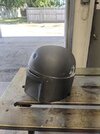
Quick update for y'all. I haven't had much time to work on it this week, but I stripped almost all of the paint and picked up an airbrush and some enamel and acrylic paints to test with. By the way, a stiff brush really helps with paint stripping.

I also have some plans on the masking that should interest y'all. Stay tuned for that.

Has anybody worked with Testors model paints? I picked up a set to test because I like the durability of enamel. The spray paint I previously used was rustoleum enamel for the same reason.

If anybody has recipes for the colors using Testors paints then that would be really helpful.

Regards,
- TheLavaMelon
 

Attachments

  • xttlCWWRcVyEDkHgDVWpomBd.jpg
    xttlCWWRcVyEDkHgDVWpomBd.jpg
    43.2 KB · Views: 92
  • wRSeseVtLJXIJjBOHQNglPjy.jpg
    wRSeseVtLJXIJjBOHQNglPjy.jpg
    46.7 KB · Views: 87
  • ziPeBzOMlJrUnIQOmYLWJyIi.jpg
    ziPeBzOMlJrUnIQOmYLWJyIi.jpg
    43.5 KB · Views: 89
  • tACpWLFTSOjLZVYsCqRXMZAr.jpg
    tACpWLFTSOjLZVYsCqRXMZAr.jpg
    41.9 KB · Views: 88
This thread is more than 2 years old.

Your message may be considered spam for the following reasons:

  1. This thread hasn't been active in some time. A new post in this thread might not contribute constructively to this discussion after so long.
If you wish to reply despite these issues, check the box below before replying.
Be aware that malicious compliance may result in more severe penalties.
Back
Top