drewthecostumer
Hunter
Hey y'all!
I have a strange passion for paint accessibility and transparency in the Fett community, and all of our ancient paint guides promote out of date/discontinued/neigh impossible to get paints, and that is just such a drag. Humbrol's cans SUUUCK, Model Masters is out of business and the stock is dying out, and don't even get me started on Floquil. ArchiveX will be the number one way to go always from here on out. However, they're very expensive and they're UK based, so shipping is yuck.
For this guide, I will be buying wayyyyy too many paints, all cheap, all US domestic, and attempting to get the best result out of bottle. Not all colors will be perfect out of the bottle (looking at you, greens), but I intend to do the best I can for us! I will be working my way through all of ESB, and then ROTJ. I doubt I will go on to any PP1/2/3/19 versions after that because

 but who knows! I'll likely be providing large updates with new parts every 4-6 Months.
**Disclaimer** I am not the greatest painter in the world, and I am not the end-all-be-all authority with colors. I've been in this game for a moment, and I do think I'm pretty good, but I'm sure some jabroni is going to say my yellow, orange, or purple isn't the right shade, and that's okay! There isn't a right answer! Feel free to mess with my colors, or to alter at will! Switch out this for for that, and what have you! If you want to lean into more or less overspray, do it! This is just the optional starting place I wish I had when I started in 2012.
Anyway! Onto the tutorial. First up: ESB Shoulders and Knees
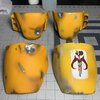
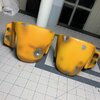
My buddy Keegan had this cool theory that the shoulders and knees are all the same base colors with varying degrees of overspray, and since my parts were in need of a repaint, I gave that a go! Turns out I think he's dead-on as usual. All paints (after the rattlecans obviously) and laid with my Iwata Eclipse Dual Action Airbrush.
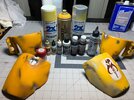
The Paint List is as follows, and in a rough order:
-Rustoleum 2X Flat White Primer (Use your favorite Primer, though I do recommend white)
-Rustoleum 2X Metallic Aluminum (Use your favorite Silver)
-Montana Gold "Yellow Cab"
-Vallejo Game Color "Scrofulous Brown"
-Vallejo Model Air "Russian AF" (grey)
-Vallejo Model Color "Black" (I own about 8 different blacks, this is the thickest and most opaque. That's important later.)
-Tamiya Flat Red
-Createx White
-Createx Transparent Black
-Createx Transparent Brown
-Golden Shading Grey
All of these paints are currently in production, they can be bought from several sources, and the most expensive thing listed is the Montana Yellow Cab at around $10.
Tutorial:
I didn't take pictures of every step, but the process was:
-Prime
-Silver
-Mask
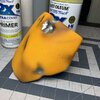
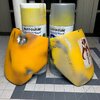
-Taxi Cab everything
-Set Left Shoulder aside
-Mist Left Knee with Scrofulous Brown until content. Set aside.
-Mist Right Knee with Scrofulous Brown until content. Set aside.
-Mist Right Shoulder with Scrofulous Brown until content. Set aside.
At this point, your plates should be varying degrees of orange. My rule of thumb was that any two adjacent plates (Left Shoulder/Knee, Left/Right knee, or Right Knee/Shoulder) shouldn't look very far off from each other, but when compared to any other plate, the difference should be jarring. This is tricky to get, but don't sweat it! If you over do the orange, mist some Taxi Cab over it and work up from there! Continuing on...
-Left Shoulder:
-Gives the lightest most uneven misting of Scrofulous Brown ever just to upset the perfect yellow canvas.
-Spray Golden Shading Grey sparingly over the heavier areas indicated by reference, research, and RafalFett's painting templates. This weathering is mostly transparent and therefore should be eased on slowly. Concentrate on the outer edges, we'll hit the middle after the Mythosaur is applied.
-Remove Masking
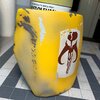
-Apply "rectangle," stencil. I used and always recommend Fett 4 Real for his stencils. They are superb.
-I used straight Createx White for this. Some people use Ivory, but I find the yellow underneath gives plenty of ivory tones to my white. It took 2/3 coats of the white for full coverage.
-Apply the "Mythosaur," stencil.
-I used Flat Red with a tiny dollop of the Black, and I was pretty happy with that.
-Remove stencils, and give yourself a high five!
-Mist and age on and around the stencil with Transparent Brown, Shading Grey, and the smallest amount of Transparent Black.
-Mix the Vallejo Black and the Createx White to create the grey "smears," on the front side of the plate, and brush them on. The color should be the same as the Russian AF, so use that for reference. "but Drew, why don't we just use the Russian AF??" Because that's an airbrush specific paint, and is too thin for brushing consistency!
-For the fine grey mist on the front of the plate, thin the Russian AF down by a lot (Or mix with a transparent base), and ease it on.
-Add a few controlled splatters for taste. Or don't. I did. Your call!
Left Knee, Right Knee, Right Shoulder:
-These are wayyy easier than the Left Shoulder. Concentrate a Transparent Brown mist on areas indicated by the three Rs. Reference, Research, and RafalFett's Templates. The black is too intense for this, methinks, but that's opinion.
-Remove masking
-Shoot your silver with a little bit of Transparent Black to upset the silver spots.
-Add a few controlled splatters for taste. Or don't. I did. Your call!
And you're done! Did I talk too much? Did I talk too little? Did you follow this process? What would you like a break down of next? Tell me about it in the comments!
I have a strange passion for paint accessibility and transparency in the Fett community, and all of our ancient paint guides promote out of date/discontinued/neigh impossible to get paints, and that is just such a drag. Humbrol's cans SUUUCK, Model Masters is out of business and the stock is dying out, and don't even get me started on Floquil. ArchiveX will be the number one way to go always from here on out. However, they're very expensive and they're UK based, so shipping is yuck.
For this guide, I will be buying wayyyyy too many paints, all cheap, all US domestic, and attempting to get the best result out of bottle. Not all colors will be perfect out of the bottle (looking at you, greens), but I intend to do the best I can for us! I will be working my way through all of ESB, and then ROTJ. I doubt I will go on to any PP1/2/3/19 versions after that because
**Disclaimer** I am not the greatest painter in the world, and I am not the end-all-be-all authority with colors. I've been in this game for a moment, and I do think I'm pretty good, but I'm sure some jabroni is going to say my yellow, orange, or purple isn't the right shade, and that's okay! There isn't a right answer! Feel free to mess with my colors, or to alter at will! Switch out this for for that, and what have you! If you want to lean into more or less overspray, do it! This is just the optional starting place I wish I had when I started in 2012.
Anyway! Onto the tutorial. First up: ESB Shoulders and Knees
My buddy Keegan had this cool theory that the shoulders and knees are all the same base colors with varying degrees of overspray, and since my parts were in need of a repaint, I gave that a go! Turns out I think he's dead-on as usual. All paints (after the rattlecans obviously) and laid with my Iwata Eclipse Dual Action Airbrush.
The Paint List is as follows, and in a rough order:
-Rustoleum 2X Flat White Primer (Use your favorite Primer, though I do recommend white)
-Rustoleum 2X Metallic Aluminum (Use your favorite Silver)
-Montana Gold "Yellow Cab"
-Vallejo Game Color "Scrofulous Brown"
-Vallejo Model Air "Russian AF" (grey)
-Vallejo Model Color "Black" (I own about 8 different blacks, this is the thickest and most opaque. That's important later.)
-Tamiya Flat Red
-Createx White
-Createx Transparent Black
-Createx Transparent Brown
-Golden Shading Grey
All of these paints are currently in production, they can be bought from several sources, and the most expensive thing listed is the Montana Yellow Cab at around $10.
Tutorial:
I didn't take pictures of every step, but the process was:
-Prime
-Silver
-Mask
-Taxi Cab everything
-Set Left Shoulder aside
-Mist Left Knee with Scrofulous Brown until content. Set aside.
-Mist Right Knee with Scrofulous Brown until content. Set aside.
-Mist Right Shoulder with Scrofulous Brown until content. Set aside.
At this point, your plates should be varying degrees of orange. My rule of thumb was that any two adjacent plates (Left Shoulder/Knee, Left/Right knee, or Right Knee/Shoulder) shouldn't look very far off from each other, but when compared to any other plate, the difference should be jarring. This is tricky to get, but don't sweat it! If you over do the orange, mist some Taxi Cab over it and work up from there!
-Left Shoulder:
-Gives the lightest most uneven misting of Scrofulous Brown ever just to upset the perfect yellow canvas.
-Spray Golden Shading Grey sparingly over the heavier areas indicated by reference, research, and RafalFett's painting templates. This weathering is mostly transparent and therefore should be eased on slowly. Concentrate on the outer edges, we'll hit the middle after the Mythosaur is applied.
-Remove Masking
-Apply "rectangle," stencil. I used and always recommend Fett 4 Real for his stencils. They are superb.
-I used straight Createx White for this. Some people use Ivory, but I find the yellow underneath gives plenty of ivory tones to my white. It took 2/3 coats of the white for full coverage.
-Apply the "Mythosaur," stencil.
-I used Flat Red with a tiny dollop of the Black, and I was pretty happy with that.
-Remove stencils, and give yourself a high five!
-Mist and age on and around the stencil with Transparent Brown, Shading Grey, and the smallest amount of Transparent Black.
-Mix the Vallejo Black and the Createx White to create the grey "smears," on the front side of the plate, and brush them on. The color should be the same as the Russian AF, so use that for reference. "but Drew, why don't we just use the Russian AF??" Because that's an airbrush specific paint, and is too thin for brushing consistency!
-For the fine grey mist on the front of the plate, thin the Russian AF down by a lot (Or mix with a transparent base), and ease it on.
-Add a few controlled splatters for taste. Or don't. I did. Your call!
Left Knee, Right Knee, Right Shoulder:
-These are wayyy easier than the Left Shoulder. Concentrate a Transparent Brown mist on areas indicated by the three Rs. Reference, Research, and RafalFett's Templates. The black is too intense for this, methinks, but that's opinion.
-Remove masking
-Shoot your silver with a little bit of Transparent Black to upset the silver spots.
-Add a few controlled splatters for taste. Or don't. I did. Your call!
And you're done! Did I talk too much? Did I talk too little? Did you follow this process? What would you like a break down of next? Tell me about it in the comments!

