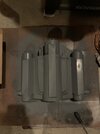
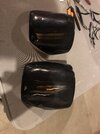
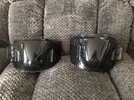
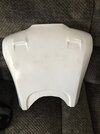
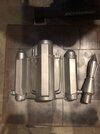
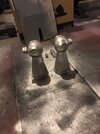
mjwierzb12/22 - filled some apoxie to the areas that needed to be corrected for a more accurate Boba jet pack. I’ll let it dry and then sand off the excess!
The rough job looks good man!
")
-Iron
mjwierzb12/22 - filled some apoxie to the areas that needed to be corrected for a more accurate Boba jet pack. I’ll let it dry and then sand off the excess!

Thank you sir!
")
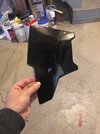
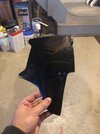
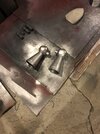
May have to use this method for the chest plate, thanks for the tip! For the back plate I basically made some tiny holes by poking with my cutters (drilling probably would’ve been a lot easier lol). Basically I just tried to cut and sand (using sand paper) it to my liking, a file may actually work better.A trick for cutting slits in any material.
Do a rough cut to make an opening. Sometimes I just drill a bunch of holes. Then use a file to slowly work the opening until you get it where you want it.
There are scissors out there specifically for cutting plastic too. You should be able to pick them up at your local hobby shop or craft store.
They are cheap and worth every penny. I like the curved version.
Amazon.com: Hobbypark 2-Pack RC Body Trimming Scissors Set, 1 Straight & 1 Curved Scissor for RC Vehicle Truck Buggy Lexan Plastic Bodyshell Helicopter Canopy: Toys & Games
Amazon.com: Hobbypark 2-Pack RC Body Trimming Scissors Set, 1 Straight & 1 Curved Scissor for RC Vehicle Truck Buggy Lexan Plastic Bodyshell Helicopter Canopy: Toys & Gameswww.amazon.com
A set of needle files come in real handy. You’ll need them when it comes to the small areas on the helmet. I got mine at Harbor Freight Tools.May have to use this method for the chest plate, thanks for the tip! For the back plate I basically made some tiny holes by poking with my cutters (drilling probably would’ve been a lot easier lol). Basically I just tried to cut and sand (using sand paper) it to my liking, a file may actually work better.


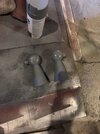
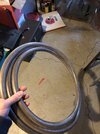
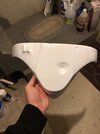
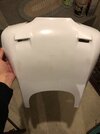
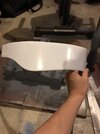
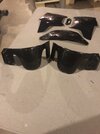
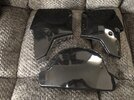
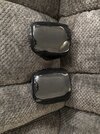
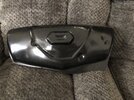
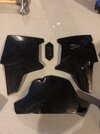
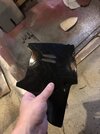
Knee pads are done! Man, what a process it was cutting all that excess plastic. Very pleased with the way everything turned out. I’m going to give the armor a nice bath before starting paint! Also, does anyone have a preferred method for getting the knee darts attached? I’m wondering if drilling holes is the preferred method or just gluing them right on? I feel as if they’re put into a indent or hole, they’ll be more sturdy and less likely to break off.1/13 - Chest and abdomen plates are trimmed! Still have to cut the slots on the left chest plate out still, we will get to that. Also pretty pleased with how the jet pack thrusters turned out with the apoxie. Those are drying from another round of being sanded and primed. Also my hoses have dried from weathering; I lightly misted a mixture of black and brown spray paint to get the desired color. Knee pads are next!
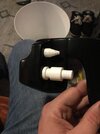
Ahhhh I see! Thanks for the tip, also a plus that you got MF armor as well so this should work perfectly. Thank you very much, if I need more pics I’ll let you know but I think I should be good for now!I got MF armor as well this is how I did the knee armor I drilled a small pilot hole then put the resin block inside of the knee and got a bigger drill bit and cored out the remaining plastic to match the holes and slid the pieces into the knees with the resin block inside the abs plastic armor. I can send more pics if that will help
Of course just let me know! Hope it goes wellAhhhh I see! Thanks for the tip, also a plus that you got MF armor as well so this should work perfectly. Thank you very much, if I need more pics I’ll let you know but I think I should be good for now!
I’m gonna try and see if I can clean them up a bit more, do you just use a normal file that you would use on nails LOL sorry if that’s a stupid question! I did use a little bit of sandpaper, tried to get in there as best as I could.I would use a square file to clean up the slots in the chest piece that’s what I used and it worked very well on the ABS plastic that the armor is made of!