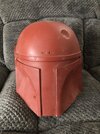
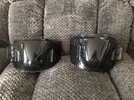
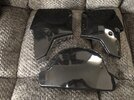
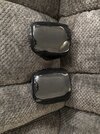
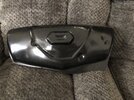
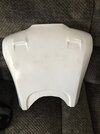
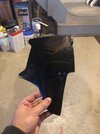
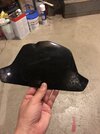
NEW BOBA FETT ROTJ BUILD

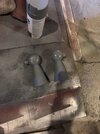
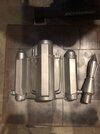
1/4 - Hey everyone! Sorry it has been awhile, I hope you had an awesome Christmas and New Year! I was in Florida for a week, visiting Disney and going to Galaxy’s Edge for the first time with my girlfriend. It was really awesome! Unfortunately, everyone else in my house got COVID just after I had left so I haven’t been able to return home just yet. However, my armor has finally arrived from MinuteFett! Once I get home, I’ll be sure to open it up and send pictures. Also, my brother was kind enough to sand down the apoxie on the jet pack and get it some primer on it. Result is attached!
 

Attachments

  • BDE9E193-7B05-4822-ACF9-E46A781F6A02.jpeg
    BDE9E193-7B05-4822-ACF9-E46A781F6A02.jpeg
    1.3 MB · Views: 117
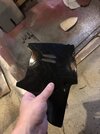
1/10 - hey everyone! Finally was able to come home and crack open my new boba armor! I gotta say, I’m pretty pleased with the way everything looks! It’s going to be a lot of trimming and sanding but I’m looking forward to the task. Also, MF accidentally sent me a pair of gauntlets so I got another set of those (not pictured).
 

Attachments

  • D3116FE0-2D35-406C-9023-B02E322DF925.jpeg
    D3116FE0-2D35-406C-9023-B02E322DF925.jpeg
    1.9 MB · Views: 136
  • 02A284C0-67B0-4F00-A226-385360C4F0A0.jpeg
    02A284C0-67B0-4F00-A226-385360C4F0A0.jpeg
    1.6 MB · Views: 142
  • 028467EB-5365-4313-9C89-93FA9EFC416D.jpeg
    028467EB-5365-4313-9C89-93FA9EFC416D.jpeg
    4.2 MB · Views: 135
  • A142416E-7BF0-4C0A-A5ED-215C8679BC7D.jpeg
    A142416E-7BF0-4C0A-A5ED-215C8679BC7D.jpeg
    3.8 MB · Views: 136
  • 9F05260F-A46F-4228-9862-0F91056A5337.jpeg
    9F05260F-A46F-4228-9862-0F91056A5337.jpeg
    2.1 MB · Views: 130
  • 390C1ADC-642B-4FDA-9F90-BC95059C7065.jpeg
    390C1ADC-642B-4FDA-9F90-BC95059C7065.jpeg
    3.2 MB · Views: 123
  • 761B76B0-4EE9-45F3-94C5-5F9DFE9BF53C.jpeg
    761B76B0-4EE9-45F3-94C5-5F9DFE9BF53C.jpeg
    1.4 MB · Views: 146
You definitely got some work ahead of ya! But overall it looks good. I’m excited to see how it all turns out for ya! (y)
 
Last edited:
1/11 - got some trimming done! Overall pretty happy with the result, this stuff is super easy to work with! The strap slots on the back plate were tough to cut, but I tried my best. You won’t even really be able to notice them anyways with the straps hanging out the back.
 

Attachments

  • D63C6DF9-79E5-4746-A953-DD751D5C42AD.jpeg
    D63C6DF9-79E5-4746-A953-DD751D5C42AD.jpeg
    1.2 MB · Views: 126
  • C72FD946-8562-44C1-9715-306BB8D2FEF8.jpeg
    C72FD946-8562-44C1-9715-306BB8D2FEF8.jpeg
    1.2 MB · Views: 132
  • 9439277D-7CD2-4B8C-B8ED-0632F458EE2F.jpeg
    9439277D-7CD2-4B8C-B8ED-0632F458EE2F.jpeg
    1.3 MB · Views: 124
1/12 - got some more cutting done! Shoulders, collar, and diamond are finished! Shoulders were the toughest so far.
 

Attachments

  • D97FDA9D-E55E-4206-ACCE-B8382C6583BF.jpeg
    D97FDA9D-E55E-4206-ACCE-B8382C6583BF.jpeg
    1.4 MB · Views: 117
  • 92A03381-3192-492A-A1EC-E8E32DE4243C.jpeg
    92A03381-3192-492A-A1EC-E8E32DE4243C.jpeg
    1.7 MB · Views: 114
A trick for cutting slits in any material.
Do a rough cut to make an opening. Sometimes I just drill a bunch of holes. Then use a file to slowly work the opening until you get it where you want it.
There are scissors out there specifically for cutting plastic too. You should be able to pick them up at your local hobby shop or craft store.
They are cheap and worth every penny. I like the curved version.

May have to use this method for the chest plate, thanks for the tip! For the back plate I basically made some tiny holes by poking with my cutters (drilling probably would’ve been a lot easier lol). Basically I just tried to cut and sand (using sand paper) it to my liking, a file may actually work better.
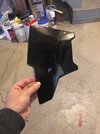
 
May have to use this method for the chest plate, thanks for the tip! For the back plate I basically made some tiny holes by poking with my cutters (drilling probably would’ve been a lot easier lol). Basically I just tried to cut and sand (using sand paper) it to my liking, a file may actually work better.
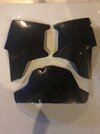
A set of needle files come in real handy. You’ll need them when it comes to the small areas on the helmet. I got mine at Harbor Freight Tools.
 
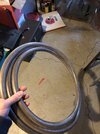
1/13 - Chest and abdomen plates are trimmed! Still have to cut the slots on the left chest plate out still, we will get to that. Also pretty pleased with how the jet pack thrusters turned out with the apoxie. Those are drying from another round of being sanded and primed. Also my hoses have dried from weathering; I lightly misted a mixture of black and brown spray paint to get the desired color. Knee pads are next!
 

Attachments

  • 67977F45-41A2-40A4-805F-6EC63DE08429.jpeg
    67977F45-41A2-40A4-805F-6EC63DE08429.jpeg
    1.4 MB · Views: 105
  • 1970B1A9-9AE7-42FB-A867-3CD4CA1EFDCD.jpeg
    1970B1A9-9AE7-42FB-A867-3CD4CA1EFDCD.jpeg
    1.7 MB · Views: 118
  • 57AD9631-FF14-4F33-88E2-4570301075E5.jpeg
    57AD9631-FF14-4F33-88E2-4570301075E5.jpeg
    1.3 MB · Views: 98
  • BB83D7D4-979A-4C08-8339-BFDA671C1ABF.jpeg
    BB83D7D4-979A-4C08-8339-BFDA671C1ABF.jpeg
    1.4 MB · Views: 105
  • 4382F9D5-E718-404B-846D-CCE15D15A936.jpeg
    4382F9D5-E718-404B-846D-CCE15D15A936.jpeg
    1.6 MB · Views: 98
  • 9A4977F9-38BC-4EDB-B2B1-1DE76AF815C4.jpeg
    9A4977F9-38BC-4EDB-B2B1-1DE76AF815C4.jpeg
    1.7 MB · Views: 104
1/13 - Chest and abdomen plates are trimmed! Still have to cut the slots on the left chest plate out still, we will get to that. Also pretty pleased with how the jet pack thrusters turned out with the apoxie. Those are drying from another round of being sanded and primed. Also my hoses have dried from weathering; I lightly misted a mixture of black and brown spray paint to get the desired color. Knee pads are next!
Knee pads are done! Man, what a process it was cutting all that excess plastic. Very pleased with the way everything turned out. I’m going to give the armor a nice bath before starting paint! Also, does anyone have a preferred method for getting the knee darts attached? I’m wondering if drilling holes is the preferred method or just gluing them right on? I feel as if they’re put into a indent or hole, they’ll be more sturdy and less likely to break off.
 

Attachments

  • 1DA5B57A-DAB3-4624-B0EE-DEF10E09C840.jpeg
    1DA5B57A-DAB3-4624-B0EE-DEF10E09C840.jpeg
    1.2 MB · Views: 96
I got MF armor as well this is how I did the knee armor I drilled a small pilot hole then put the resin block inside of the knee and got a bigger drill bit and cored out the remaining plastic to match the holes and slid the pieces into the knees with the resin block inside the abs plastic armor. I can send more pics if that will help
 

Attachments

  • 6F794B47-9638-4956-8994-138AE17D5C9C.jpeg
    6F794B47-9638-4956-8994-138AE17D5C9C.jpeg
    1.4 MB · Views: 100
I got MF armor as well this is how I did the knee armor I drilled a small pilot hole then put the resin block inside of the knee and got a bigger drill bit and cored out the remaining plastic to match the holes and slid the pieces into the knees with the resin block inside the abs plastic armor. I can send more pics if that will help
Ahhhh I see! Thanks for the tip, also a plus that you got MF armor as well so this should work perfectly. Thank you very much, if I need more pics I’ll let you know but I think I should be good for now!
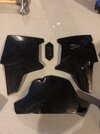
 
1/16 - I got the slots cut out on the chest plate! Thank you Lazerjock for the tip using the drill. That’s exactly what I did and I think I turned out pretty solid! I also laid down some silver on my jet pack. Also begun the initial holes on the knee pads, I’m using Spicy Fett’s method (not pictured).
 

Attachments

  • D7987E78-6296-43D8-AFF4-0B38C2835303.jpeg
    D7987E78-6296-43D8-AFF4-0B38C2835303.jpeg
    1.3 MB · Views: 112
  • BEA20B59-78B5-47C6-838C-C07D87F62809.jpeg
    BEA20B59-78B5-47C6-838C-C07D87F62809.jpeg
    1.5 MB · Views: 121
  • 9D98FEDD-BBBC-4860-8E4E-7D697C7FF9CE.jpeg
    9D98FEDD-BBBC-4860-8E4E-7D697C7FF9CE.jpeg
    1.4 MB · Views: 108
  • 12CFB23D-46D5-45FA-84B2-0DBB7BCAAACB.jpeg
    12CFB23D-46D5-45FA-84B2-0DBB7BCAAACB.jpeg
    1.7 MB · Views: 94
  • 6C89D7C3-6A62-44E4-8A24-17A77D321B5D.jpeg
    6C89D7C3-6A62-44E4-8A24-17A77D321B5D.jpeg
    1.7 MB · Views: 101
I would use a square file to clean up the slots in the chest piece that’s what I used and it worked very well on the ABS plastic that the armor is made of!
I’m gonna try and see if I can clean them up a bit more, do you just use a normal file that you would use on nails LOL sorry if that’s a stupid question! I did use a little bit of sandpaper, tried to get in there as best as I could.
 
This thread is more than 2 years old.

Your message may be considered spam for the following reasons:

  1. This thread hasn't been active in some time. A new post in this thread might not contribute constructively to this discussion after so long.
If you wish to reply despite these issues, check the box below before replying.
Be aware that malicious compliance may result in more severe penalties.
Back
Top