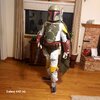
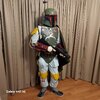
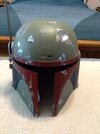
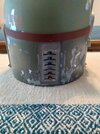
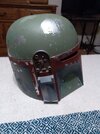
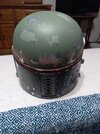
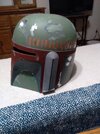
My ROTJ Boba Build

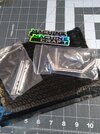
Got parts in from MachineCraft today!
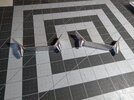
MachineCraft.jpg Boot Spikes.jpg

Love that they send stickers, totally gonna rep them!

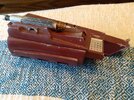
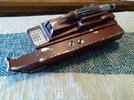
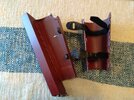
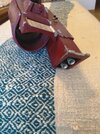
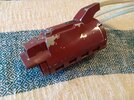
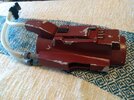
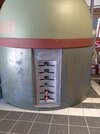
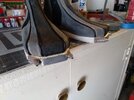
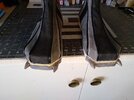
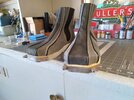
Managed to finish up (mostly) my shin tools. Still need to weather the stylus rods and I only have electrical tape right now. Gonna have to track down some gaffer tape (which is what I think was used?) so it looks more accurate. For the Sonic Beam Weapon I used the same orange I used for the kill stripes on my helmet which is Hacienda Tile. The 2 oranges look very similar to me, so I figured I would use it. I then used the Golden Shading Grey I used on my boots for the weathering, I watered it down a little so the shading would go on more gradually. I applied all the paint with cut up bits of sponge I bought at the dollar store, I've done a decent amount of painting this way and has worked well for me especially with stencils. This also helps with paint that doesn't have particularly good flow, which if you've never heard the term it refers to a paint's ability to "flatten" out so to speak, and not show brush or roller marks. Testors (which I have used a lot) is notorious for flow problems, so this is how I've been combating this dilemma. I also clear coated it after I put the electrical tape pieces on it in an effort to help keep them there. I found this thread helpful when putting them together, and of course, Rafalfett's Templates
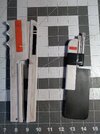
Shin Tools Complete - 01.jpg Shin Tools Complete - 03.jpgShin Tools Complete - 02.jpg
 
Last edited:
Got parts in from MachineCraft today!

View attachment 235950 View attachment 235949

Love that they send stickers, totally gonna rep them!

Managed to finish up (mostly) my shin tools. Still need to weather the stylus rods and I only have electrical tape right now. Gonna have to track down some gaffer tape (which is what I think was used?) so it looks more accurate. For the Sonic Beam Weapon I used the same orange I used for the kill stripes on my helmet which is Hacienda Tile. The 2 oranges look very similar to me, so I figured I would use it. I then used the Golden Shading Grey I used on my boots for the weathering, I watered it down a little so the shading would go on more gradually. I applied all the paint with cut up bits of sponge I bought at the dollar store, I've done a decent amount of painting this way and has worked well for me especially with stencils. This also helps with paint that doesn't have particularly good flow, which if you've never heard the term it refers to a paint's ability to "flatten" out so to speak, and not show brush or roller marks. Testors (which I have used a lot) is notorious for flow problems, so this is how I've been combating this dilemma. I also clear coated it after I put the electrical tape pieces on it in an effort to help keep them there. I found this thread helpful when putting them together, and of course, Rafalfett's Templates
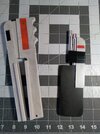
View attachment 235951 View attachment 235953View attachment 235952

Looks awesome! Thank you for your support!
 
I got my gauntlets pretty much done so figured I could show them off, the only thing I think I need is that red flat top LED. I've been having trouble finding actual red ones, the ones I've seen are all clear with a red light, so if anyone can help with that I'd be grateful.

My gauntlets are all sintra, using WOF's Templates. Main exception to this are RafalFett's Greeblies of course, and a few other things.

Left Gauntlet
L Gauntlet Complete - 01.jpg L Gauntlet Complete - 02.jpg L Gauntlet Complete - inside.jpg
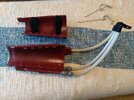
The rocket is mostly wood (used to be a handle from a shovel or something), that I carved the grooves into. The tip is sintra, and the very tip is some steel rod and a Lego. The switch underneath the rocket is the end of an old drill bit. I have one piece of piano hinge on the inside (which is both glued and screwed in, the screws also go into the flamethrower to help hold it on), and magnets on the other side. I added Velcro to aid in putting them on, but they help keep them in place as well. I also put a screw to hold the rocket on the inside.
L Gauntlet Nozzles.jpg My flamethrower nozzles are currently a type of drop-in concrete bolt anchor. I found these in my grandfather's barn after we relocated, I know they are pretty old because they don't make them like this anymore. They look decent enough but plan to eventually replace them with Machinecraft parts.

Right Gauntlet
R Gauntlet Complete - 01.jpg R Gauntlet Complete - 02.jpg R Gauntlet Complete - inside.jpg
My darts are pieces of steel wire I filed into shape, and the hose connections are the actual brass pieces I got at the hardware store. I also put Velcro on the inside of this one and piano hinge on both sides (also with screws as well)
R Gauntlet Hose.jpg I decided to use a buckle for the hoses, I first put holes in the hose and ran 2 pieces of leather lace through, then tied the lace on both sides. I then wrapped the nylon strap around that same spot and sewed it on. When I sewed on the strap that holds the buckle, I ran the needle between the hoses and out the opposite side creating a sort of sleeve for the hoses.

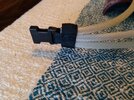
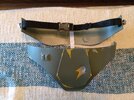
I also sort of turned my kidney plate into a belt with the aid of some nylon strap and a buckle, I did this basically in lieu of adding Velcro:
Kidney Belt.jpg Cod Piece.jpg
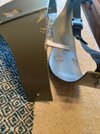
and countersunk some washers into the holes on my cod piece where the screws come through. The holes got a little worn over the years, so this will help protect it.

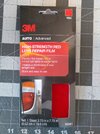
Lastly, I've got myself some chest lights, and this is what I used for the red plastic over the chest slots, available at any auto parts store:
Red Film for Chest.jpg
 
Been a while, haven't had much time to work on my Fett, I did finish my boots and I started to finish up the painting and other things on my bucket. I got the dental files and calculator circuit board installed, I just scored it a bunch with an Xacto to cut the keyholes out.

Helmet Back.jpg Spikes 01.jpg Spikes 02.jpg Spikes 03.jpg

I also donned the costume for May 4th, here's the banner I made:

Happy May 4th.jpg

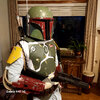
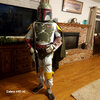
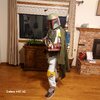
I had made some changes to the costume from the last time I put it on, mainly it seemed like my jetpack needed to be a little higher so I adjusted my harness to account for it. This time, since the top of the harness was a decent bit higher on my back, it pulled the back armor so much the collar choked me. I've always had a problem getting these parts to fit together right, it's not easy to adjust the costume while wearing it (really wish I had a mannequin!) Anyway, I've been trying to figure out how to alleviate this some, but think I am basically looking at either shortening my harness, or reforming my back armor so it fits around the harness better, anyone else had problems like this and what did you do about it? Thanks

Here's a few more pics too!
20230503_195844.jpg 20230503_195921.jpg 20230503_195949.jpg 20230503_195954.jpg 20230503_200630.jpg
 
Last edited:
Looking good so far! Definitely needs some weathering to make it all fit together!
Thanks man! Yeah the weathering is gonna be a process, I've started trying to grey up the vest by essentially just getting it dirty (I've literally been dusting my house and rubbing it all over the vest! :lol:). Though for something white it really doesn't want to stay dirty lol.
 
Life has kept me pretty occupied lately, I got bronchitis which knocked me out for a while, but I was well enough to go on vacation which was good. So I've been doing my best to carve out some time to finish my helmet, I've gotten a decent amount done so I wanted to post some progress pics:

Helmet Progress 01.jpg Helmet Progress 02.jpg Helmet Progress 03.jpg Helmet Progress 04.jpg

It's coming along, I still have a stack of stencils to cut out, but I'm getting closer!
 
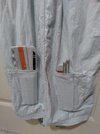
I finally finished my flightsuit! Sewing on the pockets I found really tedious, but I got it done! It fits me pretty snug and I think I did a pretty good job. The hardest parts were sewing on the sleeves, which I ended up sewing on by hand, and figuring out how to put the two pieces together. Check it out!
View attachment 234877View attachment 234878View attachment 234879View attachment 234880View attachment 234881
Now I'm about to do some dye samples, so with any luck, it'll also be dyed by the end of the day!
This looks awesome! I did mine in the opposite order and dyed my flight suit and extra fabric for pockets and the double sleeves and now I’m about to sew on all those additional pieces. I only started sewing for this project and was able to complete the cape and stitching just fine but I’m really intimidated to do all these additions to the flight suit, especially the pockets. Did you find any templates or tutorials to follow or did you figure it all out yourself? It looks so great! I’ve had no luck finding any directions on these parts which has me at a stalling point
 
This looks awesome! I did mine in the opposite order and dyed my flight suit and extra fabric for pockets and the double sleeves and now I’m about to sew on all those additional pieces. I only started sewing for this project and was able to complete the cape and stitching just fine but I’m really intimidated to do all these additions to the flight suit, especially the pockets. Did you find any templates or tutorials to follow or did you figure it all out yourself? It looks so great! I’ve had no luck finding any directions on these parts which has me at a stalling point
bobawife,
Thanks for the compliment, I appreciate it! I learned to use a machine just so I could sew together stuff for the costume, so I haven't been sewing all that long either, it really isn't too difficult though. I understand being a little intimidated but you can do it! For the pockets, I used WOF's templates which you can find HERE. The biggest difficulty I found was sewing the pockets onto the suit itself, there really isn't a way to do it with a machine so you have to do it by hand, this also posed other problems since all the threading shows and I had to use cotton thread. It sucks hand sewing with cotton thread, it breaks often, so if you've already dyed the suit and are using poly thread that is already colored it might be easier. For the sleeves, I had to create my own pattern (which you can find HERE) the information there may be useful to you, but you may want to use the pattern from your long sleeves to help create the pattern for the short sleeves so you can match up the angles. I hope all that is useful and good luck!
 
Ok, so I've been working on getting the dome of my helmet all painted and there's something that was starting to bother me. So I've been using a gray for the "base metal" color of the stencils. On the back it looks fine, but as I started to move onto doing the base metal on the dome, it just didn't look right. I went back to scour over the reference images and discovered that on the dome it looks way more green than grey, so I went back over the parts I did in green and am much happier with how it looks. Here are the images side by side (Green vs. Grey):
Helmet(Green Base) 01.jpg Helmet Progress 01.jpg


I think it looks much more how it is supposed to, but this leads me to a question. Is all the Base Metal color green? The back still looks grey to me, and there are even a few parts on the dome that look more grey than green as if there is both. Further, the helmet pics for reference up on 501st looks like he also used both green and grey.

For now, I'm going to leave the back grey because to me it looks like there are both colors. Here's the couple other pics I took as well.
Helmet(Green Base) 02.jpg Helmet(Green Base) 03.jpg
 
It still looks way off, almost to the point that it looks weird. Not sure what you are seeing but it definitely ain't it.... however the green for the dome and red you used looks good!
 
It still looks way off, almost to the point that it looks weird. Not sure what you are seeing but it definitely ain't it.... however the green for the dome and red you used looks good!
Not exactly sure what you mean, the color I have now could more closely match the actual dome color because in the reference pics, the two colors look very similar. I'll try to explain:
Boba-Fett-Return-of-the-Jedi-Helmet-05.jpg
Boba-Fett-Return-of-the-Jedi-Helmet-09.jpg

The parts I've circled in red look green and are very similar to the dome color.
The parts I've circled in blue look grey even though they are supposed to be the same color.

The 501st Picture looks the same:
ROTJHelmetUPDATED2MEG.png
 
bobawife,
Thanks for the compliment, I appreciate it! I learned to use a machine just so I could sew together stuff for the costume, so I haven't been sewing all that long either, it really isn't too difficult though. I understand being a little intimidated but you can do it! For the pockets, I used WOF's templates which you can find HERE. The biggest difficulty I found was sewing the pockets onto the suit itself, there really isn't a way to do it with a machine so you have to do it by hand, this also posed other problems since all the threading shows and I had to use cotton thread. It sucks hand sewing with cotton thread, it breaks often, so if you've already dyed the suit and are using poly thread that is already colored it might be easier. For the sleeves, I had to create my own pattern (which you can find HERE) the information there may be useful to you, but you may want to use the pattern from your long sleeves to help create the pattern for the short sleeves so you can match up the angles. I hope all that is useful and good luck!
Thank you so much! Those are both incredibly useful. Oh man I should have thought through the thread color before deciding to dye first for sure haha. I’ll need to find a close color match or need to dye the thread myself. Thanks for the resources!
 
Oh man I should have thought through the thread color before deciding to dye first for sure haha
Yeah, most thread won't dye because it's polyester. Even poly-blend threads I've never really been able to truly dye. If you want to dye the thread you gotta get 100% cotton, it's usually easy to spot because the spools are different color (more of an orangish than off-white color). On the plus side, there are so many colors of thread, I'm sure you can find a close match.
 
Yeah, most thread won't dye because it's polyester. Even poly-blend threads I've never really been able to truly dye. If you want to dye the thread you gotta get 100% cotton, it's usually easy to spot because the spools are different color (more of an orangish than off-white color). On the plus side, there are so many colors of thread, I'm sure you can find a close match.
Another great tip, thank you!
 
Ok, so in order to figure out this color issue, I took Raf's stencils and isolated the Base Metal color that he used. This is what I got...
Base Metal Color.jpg

it's kind of this light olive green color, put it up against a true grey and you can really see it.
Base Metal Color(gray and green).jpg

So I did my best to match this color, here is how it is looking so far, I still have some more to do.
Helmet (olive base metal) 01.jpg


Helmet (olive base metal) 02.jpg
 
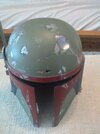
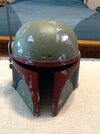
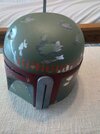
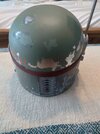
A little update, nearly done painting, just gotta do the silver on the upper cheeks and some of the finer details. I also am replacing my RF stalk with one from MachineCraft (also got flamethrower nozzles!) so now it's time for me to scratch build a new rangefinder for it. (also why the ear is missing)

Helmet 95% 01.jpg Helmet 95% 02.jpg Helmet 95% 03.jpg Helmet 95% 04.jpg
 
This thread is more than 1 year old.

Your message may be considered spam for the following reasons:

  1. This thread hasn't been active in some time. A new post in this thread might not contribute constructively to this discussion after so long.
If you wish to reply despite these issues, check the box below before replying.
Be aware that malicious compliance may result in more severe penalties.
Back
Top