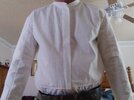
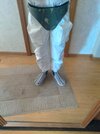
My ROTJ Boba Build

Mythosaur
If you're not intersted in joining the 501st and merely using it as a guide, then I say do as you please. And cool thing is if you decide for 501st approval, you would need only to remove them from the shin pockets!
;)

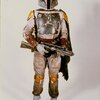
To that end, I know one of the better well know Boba Images we all have is this one, which shows him as not having it. And what I think the CRL is basing this off of....
Boba Fett - ROTJ Screen Pic.jpg

....of course this is just a best guess on my part.

I've seen a couple other pics of Boba Fett Stuntman without them too. I'd be curious what images or screen shots you are referring to that shows he had either the Survival Knife or Jetpack Adjustment tool (or both) during filming of RoTJ....
Boba Fett Tuntman - Pic 1.jpg

Boba Fett Stuntman - Pic 2.jpg


Best,
-Iron
 
I've seen a couple other pics of Boba Fett Stuntman without them too. I'd be curious what images or screen shots you are referring to that shows he had either the Survival Knife or Jetpack Adjustment tool (or both) during filming of RoTJ....

That's the thing, I'm going off memory of what I heard was rumored to have happened. Whether it's true or not, I don't know as I don't have any proof, but as you pointed out it is missing in all the pictures we have here. So yeah, I made it basically just for fun. :)
 
That's the thing, I'm going off memory of what I heard was rumored to have happened. Whether it's true or not, I don't know as I don't have any proof, but as you pointed out it is missing in all the pictures we have here. So yeah, I made it basically just for fun. :)

Mythosaur
It's all good. I carry around a Tracking Fob in my hip pouch for fun too. I pull it out from time to time.
The Mandalorian and My Tracking Fob.jpg

I can imagine Boba had a few of these on his person when he was hunting, yeah?
1674599897503.png


-Iron
 
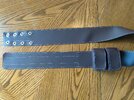
So I've been on the journey of creating a more movie accurate ammo belt and pouches than what I currently have using the info provided HERE. (Big thanks to StrumFett and RafalFett for that!!! Super job compiling all the info there!) My old pouches I had bought online and though they were not the correct size, I always figured I could alter them. The problem was finding vinyl to match to make the belt out of, so I scraped altering the old ones and decided to just make new ones out of the material I got for the belt. Here's my progress:
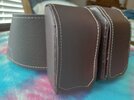
Ammo belt1.jpgammo pouch color.jpg
In the first picture the material looks really dark, so I added the second one which shows the color a little better. Now, while I know the color is a little dark, after comparing it to photos, I believe it is extremely close to what was used, maybe a shade or 2 off. Particularly this picture:
Boba Fett.jpg
There are others, but this is the best example. I also believe that some of you guys have used this same material as well for your belts (for reference, I got it at Hobby Lobby from the big rolls of vinyl, this one is called Chocolate Deco.) I would also like to point out that light changes the color and it was pretty difficult for me to get a good picture of the true color, for this reason is why I didn't try to source the vinyl online, but rather purchase in person. I loathe buying fabric online, you really can't ever tell the true color.

I will say this is time consuming, I've messed up A LOT doing this and even though I'm familiar with a machine, I am no tailor. I also can only machine the main body and flap, the sides I've been hand sewing on, I can't figure out how to put it together on the machine due to size and need to not show stitch marks. I also have been making a cardboard skeleton for the inside so they are rigid and appear full, I then stitch it shut as they can't really carry anything.

Crafting the belt has also made me reflect on whether I want to apply to the 501st or not, I've kind of always just done this for fun, but since I've moved the prospect of joining sounds more inviting. I also tend to doubt myself and whether my gear would be good enough to join, even though I've done my best to be as accurate as possible, it's things like the belt color that would suck to get disqualified for. Anyways, thanks for reading, post more progress when I'm finished!
 
Mythosaur
Sounds like you're a true to heart DIY'er.

For me....working with Leather was never a strong suit. So I turned to Delta13Mike and got one of his ROTJ Ammo Belts.....
Ammo Belt - Delta Leatherworks 1.jpg

(...and yes, I realize in the pic above the belt is upside down - hehehe!)

About a year after I was done with that I decided to build a Static Jawa Prop. As you know the Jawa's have leather bandoliers. For this, I opt'd to try leather working out. I found a template for the pouches online and decided to use that. And like you I went a got a roll of leather from Hobby Lobby....
Hobby Lobby - Roll of Brown Leather.jpg

I also picked up some sam browne studs and caps to hold the leather together.....and result was this....
Leather Pouches.jpg


Also, doesn't look too bad on my Jawa....
Photo Oct 01, 5 53 58 PM.jpg


Cheers,
-Iron
 
@Mythosaur
Sounds like you're a true to heart DIY'er.

For me....working with Leather was never a strong suit. So I turned to @Delta13Mike and got one of his ROTJ Ammo Belts.....

Yeah, I'm all about making stuff, that's half the fun! Luckily, vinyl is a lot easier to work with instead of leather, biggest concern is melting it with the iron when I crease it, but I've had good luck so far!

Also, that Jawa is awesome!
 
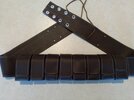
I've finally finished my ammo belt! (Using the info found HERE.) Took a while and I remade a couple of the pouches, but I feel it came out pretty good.
Ammo Belt Complete.jpg
I was plagued with problems from the beginning with this project, many things weren't coming out right when I started. But pretty much just like all things, the process got easier the longer I did it. I also addressed the problems with my wife, who suggested I try a different needle. After consulting the information she obtained from her sewing classes, found out sometimes stretch needles are used for vinyl, but microtex needles are used for artificial leathers (Also, said to avoid leather needles. Didn't try it, but I imagine they rip the vinyl.). Since the vinyl isn't really stretchy and I was almost positive most of my problems were stemming from the needle grabbing the fabric, I chose microtex. They are also sharp and not a ball point like universal needles, so I figured the sharpness would help. While I still had problems, the change of needle I believe helped.

Also, as I mentioned before, I hand sewed the sides on and neglected my thimble through the first half. Don't do that if you plan on doing this, my fingers got all messed up!
 
Another piece of advice I forgot to give, I used a ladder stitch to piece together the pouches, it looks like this:
Ladder stitch.jpg
When you push your needle through the fold like I have shown here, the trick is to almost go through both layers but not quite, because you don't want the stitch to show on the other side. If you go too shallow with your needle, you risk ripping the stitches out. If you've done some leatherwork, or beadwork like lazy stitch, the process is very similar because you often don't want to go all the way through the leather. It also helped to have a needle with some decent weight to it but not huge.
 
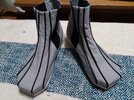
I've finally ordered some MoW boots! I'm happy I was able to get some since getting a pair of good boots is becoming increasingly difficult. Of course I've thought about trying to DIY it, but it's hard to find boots that even look similar. Can't wait to get them!
 
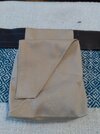
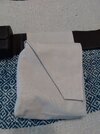
Today I've decided to fit up my flak vest a little better and bought some color remover to lighten it up, hopefully it works out. I also made my hip pouches which need weathering still.
Flak Vest-Before.jpg Right Hip Pouch.jpg Left Hip Pouch.jpg
 
Well, any attempt to chemically alter my flak vest has ended with very little result. While I believe it is slightly different, it really only pulled color out of my velcro (in photos it doesn't look any different).

Vest after.jpg

While I have successfully been able to lighten it up some (my spats are made from the same material), the color is MAYBE light enough for ESB, definitely not ROTJ. I think the only thing that worked was setting it out in the sun. It may work, it just takes forever and I really don't want to have to remake it, it was hard enough the first time.
 
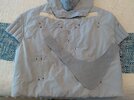
So I was helping out a new member in Japan, Hokafett, who wants to make his own vest and I realized I never posted how I made mine. I first found a t-shirt pattern online and altered it to have a seam up the back where I have a zipper. I know that isn't screen accurate, but I didn't want to have the chance of the velcro coming loose, besides it is completely covered up.
Flak Vest Back.jpg
I put a layer of batting between two layers of fabric to give my vest a padded look like it does in the movies, I cut the pieces out first and sewed the layers together first before putting it together. Give yourself extra fabric, you can always cut it out if you don't need it, you can't add fabric.
Layers.jpg
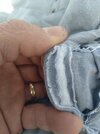
The sleeves I had to guess at how big they were, and I intentionally had them bigger at first. Here I folded a piece of fabric, cut it to shape, and put the batting between the fold; I then quilted it. In the end, my sleeves are about 4.5 inches by 10 inches. Also, beware of the arm holes on your t-shirt pattern, they are often larger than they need to be. I had to alter mine significantly for the hole to be small enough.
Vest Sleeve.jpg
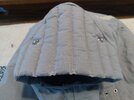
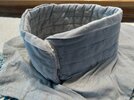
I also made my neck seal out of the same material, and while my inside is quilted, here is where I will disagree with something about. I think the neck seal is pleated, not quilted. I have gone over the pictures so many times and I know I will probably get static for it, but the end of the day, that is what I think it looks like. I made both a quilted section (also folded with batting between), and a section of pleats just sewn to another piece of fabric and it looked so much more like the real deal. I also sewed my pleated piece to my quilted piece which gave my neck seal a good thickness.
Neck Seal.jpg
Anyways, I lost my pattern for the vest since we moved so I can't provide any of that. These were the major things that I could think of when I made my vest, but if I think of anything else I'll post it. Thanks!

Edit: I was poking around looking for other stuff on here and came across Darth Mule's Vest Tutorial, and he used the same template I used and his sleeve pattern looks just like what I came up with.
 
Last edited:
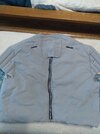
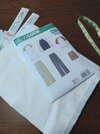
So the other day I went and got some fabric and started building myself a flightsuit. I'm starting with white and I'm gonna dye in the color, I also got cotton so I won't have any trouble dyeing it. (I double checked it too, I can dye it.)
Flightsuit Ingredients.jpg
I took the pants pattern from the PJs and made some pretty good bottoms. I'm still working on the top, but I just took the same vest pattern and used it for this. I'll have more on that later and pics when I finish!

I also came up with a solution to my vest problem which has been pretty much staring me right in the face. The vest is actually made out of tackle twill, so I bought some that has an adhesive back. So I'm just gonna take my vest apart, stick on the tackle twill and then sew it back together. I also bought white which I'm probably going to just try to get dirty enough to be the off white, pretty confident this stuff would never dye because it is 100% polyester. I also picked the white because I didn't want to risk anything else being too dark. Hopefully it will all go as planned, seems simple enough, wish me luck!
 
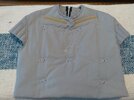
Ok guys, so I've been hard at work putting together my new flightsuit trying to get all the details right. I'm nearly complete, pretty much just have to add the thigh and shin pockets, take a look:
New Flightsuit.jpg
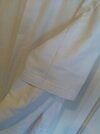
I think I got the stitching on the short sleeves pretty close, I used this pic as a reference:
Boba-Fett-Costume-First-Prototype-Assembly-02a.jpgFlightsuit sleeves.jpg
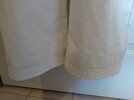
I'm not sure about the ankles though, does anyone know if this looks acceptable? It's hard to find a good pic of the stitching there, I'm probably not looking in the right spot.
Flightsuit Ankles.jpg
 
DISASTER!!!

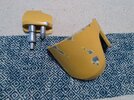
So last night I was getting partially suited up, trying to make sure I'm sewing the shin pockets onto the right place when my knee armor broke!
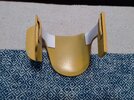
Knee armor disaster.jpg
Really sucks because the first time I wore my costume, I broke the other one which I "fixed"...
Knee armor 1st disaster.jpg
I always intended on actually fixing it and just reinforcing the other one so it wouldn't break, but now I don't know what to do...
Do I remake them? or just keep trying to fix them? This is an obvious weak point, and I'm not sure if I fix it that it will stay together. I've also been rethinking how and where I attach the elastic, anyone want to give me pictures of how they attach theirs? I've been considering just gluing it straight to the armor, or maybe using a screw, but I don't know what would be the better option. Any help here would be greatly appreciated, thanks in advance.
 
Mythosaur
Oh man.....that does suck. I'm sorry to hear and see that. I'm bummed for you as well. I'd keep em' and try to fix them a little I wouldn't put too much time and effort into them. Just out of curiosity, are the knee armor 3D prints? I was always worried about having something like that happen with brittle 3D printed parts and often wondered how people address it.

My knee armor is from Boba Maker and he molds his armor using ABS Plastic, and the flexibility is very nice and forgiving. So for the knee strap I simply used a piece of elastic and velcro, like this....
Iron's Knee Strap - Velcro Placement.jpg

Iron's Knee Armor - Velcro Placement.jpg


The large grey velcro is for fixing it to my flight suit. (I don't know of anyone who simply uses JUST the elastic strap) While the white velcro on my knee armor is for the elastic strap.
Velcro, Cod and Knee Armor Placements.jpg


I hope the knee armor of yours gets resolved!

-Iron
 
Just out of curiosity, are the knee armor 3D prints?
No, I made mine out of sintra using WOF's templates like the rest of my armor. Usually the sintra seems to hold up well and have some flexibility in all other areas except the knees. I think it's the sharp curve there. (or rather the sharp curve of the knee puts all the stress on the material at that point)

So for the knee strap I simply used a piece of elastic and velcro, like this....
I like that, looks like it would work well too. I always figured I would have to add some velcro to the knee of my flightsuit because the armor just doesn't stay up. Thanks man! I appreciate the help, think I'll do the same thing.
 
Last edited:
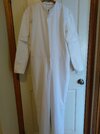
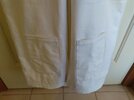
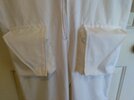
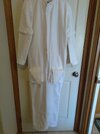
I finally finished my flightsuit! Sewing on the pockets I found really tedious, but I got it done! It fits me pretty snug and I think I did a pretty good job. The hardest parts were sewing on the sleeves, which I ended up sewing on by hand, and figuring out how to put the two pieces together. Check it out!
Shin Pockets.jpgThigh Pockets.jpgFlightsuit Complete.jpgFlightsuit fit top.jpgFlightsuit fit bottom.jpg
Now I'm about to do some dye samples, so with any luck, it'll also be dyed by the end of the day!
 

Your message may be considered spam for the following reasons:

If you wish to reply despite these issues, check the box below before replying.
Be aware that malicious compliance may result in more severe penalties.
Back
Top