Lowberg's ROTJ SE Build

Same Rust oleum ones you used, Nantucket blue, harvest peach, and same red. I liked your results so much I thought there's no reason to fart around trying to airbrush the main colors and mix paints up. I am going to take a small leap of faith and use the base white primer coat as my white. I hit the thrusters with it already and like the look of it so it's worth a shot. It will be a good test on the thrusters to see how it reacts with my Tamiya paints for shading and weathering.

I liked how they turned out too. I really wanted to airbrush mine this last time around, but I really couldn’t find any colors I liked straight out of the bottle and I really didn’t want to do a lot of mixing.
 
One thing missing from my kit was the back door. I bought the jetpack kit 2nd hand from someone who never got around to building it and apparently they lost it. So today I cut out a piece of sintra to the approximate shape, formed it with a heat gun the best I could and epoxied some steel tabs and magnets in to hold it on secure. I just need to remember my trusty suction cup jetpack adjustment tool so I can get the panel off :lol: Although in a pinch I'm sure it could be pried off easily with a flathead.

448167655_1119127292487358_2388173340160002135_n.jpg

448174614_846813424014797_5855984197818830972_n.jpg


Last thing I want to do is drill holes for my jetpack hooks and the 2 front rivets and then it's time to prime.
 
Shot some red today. I ended up using Rustoleum Claret Red as a base color. I also put the white down on the jetpack.

I'm going to let things cure for a few days and then this weekend I'll paint up the rocket, rocket base and thrusters as they all have their basecoats cookin' right now too.

448275502_1021126079615713_1382127530287266404_n.jpg
 
I'm going to let things cure for a few days and then this weekend I'll paint up the rocket....

Yea so that totally didn't happen. I was too excited so today I....

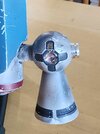
Painted my thrusters:
For my own records (so I can use a similar combination on the fuel tanks later) my order of paints were...
  1. Rustoleum Satin White Base Coat.
  2. Tamiya Flat Black for Striping.
  3. Tamiya IJN Grey XF-87 Misted (Lighter grey)
  4. Tamiya Dark Grey XF-24 Misted
  5. Tamiya Nato Brown XF-68 Misted


cef9ec46-8113-4a2f-bd83-fbae1178e6f5.jpg


Rocket Base. Same colors.

448483021_871655258317078_3631769895825262201_n.jpg


Rocket Was
Rustoleum Metallic Silver
Masking Fluid for Damage
Tamiya Red-Clear

Will Darken up with a little misting later.

448404732_7339570852818644_7519667524245970435_n.jpg


Hopefully when someone else is researching this jetpack, this can be helpful to them.
This is all 3 sides of the rocket I used to free-hand the damage masking.

Screenshot 2024-06-20 212940.png
 
So put down the Rustoleum Claret red on the jetpack body this morning and had an immediate reaction which spider webbed.
Very odd since had no problem with it over the same white on fueltank caps and it's the same weather, same can. I must have not mixed the can enough or sprayed too heavy.

Anyways very disheartening to say the least, I will attempt to save what I've started on the body but I'm making the decision to pivot to airbrush acrylics for the rest of the jetpack body. I just can't risk anymore rattlecan reactions, especially once I get further down the line with the colors.
 
Editing this post: Gave rattle cans one more shot, at least for the blue. The Rustoleum Nantucket blue went on without incident.
I'll do the yellow with a Archive X SP armor yellow as a base, to have more control and have a similar vibe to my shoulders
Looking at the reference, they are similar in shade and most likely used the same base yellow color before misting

Screenshot 2024-06-22 135431.png
 
Last edited:
Rustoleum blue has been curing for about 72 hours so I think were are safe to say it was a success and can move on to the yellow.

Looks very naked without the yellow, weathering, and damage.

448794890_371569155547186_1480158273647584130_n.jpg


Planning ahead a bit, I did some weathering misting tests over the blue on scrap and it always amazes me how much this affects the base color.

448363531_1806107919801479_2736910130857814244_n.jpg


It looks to me like the entire jetpack was misted with dark grays and even some brown.

weathering 2.JPG
 
And we have.... the yellow!!!
Did this with Airbrush, Archive X SP Armour Yellow with a very light misting of Rust, mostly for highlights in some areas.

448785776_2164055083966229_6756442863677602358_n.jpg
448795381_2711426602351266_8864102473621975955_n.jpg


Looking like an action figure toy all squeaky clean... next up is to change that!
 
I started the topical application of silver last night. I used Saral transfer paper to stencil on the main silver damage for the middle blue section. The excess stencil lines will easily rub away with an eraser. This is the only area I'm going to use a stencil as a guide, as it's the first thing you see when you look at the jetpack, the rest I will eyeball with reference photos. Will be adding the white scratches and chipping overtop.

448866413_472753198786537_7216985012356744282_n.jpg

448722226_3587367648195434_7050223424587616669_n.jpg
 
Lot of progress accomplished over the past couple days.
Got most of the main silver damage down, except for the side edges of the jetpack and small dots and scratches. Gotta do the bottom as well.

The absolute HARDEST part for me of doing the SE jetpack is differentiating between the silver damage and white damage damage in reference photos, especially when they appear layered on top of one another. I'll probably do a round of white damage next and then circle back to see what I missed.

I also painted the black striping and symbols on the fuel tanks as well as installed Machine Craft's thruster greeblies.
Starting to look like a jetpack!!!!

448723449_1022300979456650_3611296830319647461_n.jpg
 
Looks awesome. You did a really good job.
That’s looking wonderful!

Thank you guys, I really appreciate the kind words. This has been the most fun part of the costume build for me, hands down.
Did my first pass of white damage and scratches. I goofed up a few areas but my brain is pretty fried after flipping back and forth through reference photos lol

I used some fine tip paint pens from Michaels for the fine scratches which worked great but I was disappointed that they stopped working very quickly. I will have to find a similar alternative for my crafting toolbox because they were a joy to use.


448854528_1132665534483177_8007134985253091255_n.jpg

448867961_1251762639463378_3671355364472704008_n.jpg

448784171_491605026682683_8711549554131370748_n.jpg

448715422_1549783138936155_6122451012004988152_n.jpg
 
Took a little time off from this project but now it's back to business!

On the home stretch for the jetpack now.
Got the piano keys painted and epoxied on, did all the scratches and damage on the rocket base and painted the lettering on the main yellow tube.

I've also started to continue the white chipping damage onto the back top edge of the body.

Basically all that's left to do for paint is the fuel tank cap scratches and get those epoxied on.

1000014824.jpg
1000014823.jpg
 
While looking at my reference collection I noticed an interesting detail on the rocket I haven't encountered before. There appears to be some sort of wire or ring that just flops around the base of the rocket. I don't believe this was there during the ROTJ era of this jetpack, but you can see it in both the Special Edition promo photos and the exhibit tours reference. I thought this was pretty neat and obscure so I added a metal ring to my rocket, painted to match.

Screenshot 2024-09-01 191532.png

456991573_1049598650288386_1946061968543055119_n.jpg


After that I basically did a big sprint of work... painting the fuel tank caps, detailing the thrusters paint chips and scratches, getting all my metal parts painted and on, working on the backside...

I need to get a vent for the bottom, and the charging plate greeblies but other than that I'm calling this guy DONE!
I knew painting the jetpack was going to be a lot of work, but holy cow! I don't know some of y'all do multiples of these :lol:


456374645_1554923758792739_3846472633072625772_n.jpg

457088232_378858078417581_205944391031141197_n.jpg

456436059_864179598627205_698066567537936909_n.jpg


456305710_506605172012756_2186409826873547927_n.jpg

457105870_460144723689847_8010611318684238538_n.jpg
 

Attachments

  • 456941508_1065719208460114_7385515129281699352_n.jpg
    456941508_1065719208460114_7385515129281699352_n.jpg
    163.7 KB · Views: 19
  • 456244275_1025381425573964_315466583052759272_n.jpg
    456244275_1025381425573964_315466583052759272_n.jpg
    125.1 KB · Views: 18
I mounted my chest armor on my vest for the first time since it was painted tonight. Very exciting moment!! Felt so cool to throw it on.

My vest is definitely a little bit snugger since I got it made for me over a year ago.
I would blame the washer but that's not it, so I will blame the refrigerator for shrinking my vest instead ;D
I've got some personal goals to hit so now I have even more motivation!

First Armor Fitting2  (Large).jpg


I think I'll eventually shorten the flak vest 1/2" to allow the ab plate to scooch up just a bit higher. But I will wait to assess tailoring until I see how the backplate and jetpack pulls things around.

First Armor Fitting Compare (Large).jpg


One thing that didn't jump out to me until I looked at the side by side photo is my chest diamond seems to be pretty undersized.
It's possible MinuteFett does not scale the diamonds to match his different sized vaccum form armor sets and only scaled the chest plates.
It's a simple shape and small so I'm going to 3D model and resin print a larger one.
 

Your message may be considered spam for the following reasons:

If you wish to reply despite these issues, check the box below before replying.
Be aware that malicious compliance may result in more severe penalties.
Back
Top