What Paint Colors? RESOLVED -Now BKBT Build Log

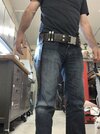
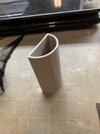
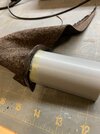
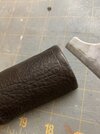
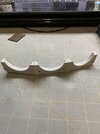
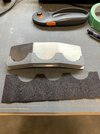
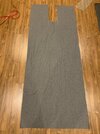
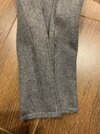
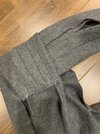
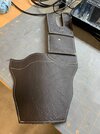
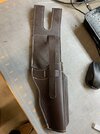
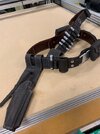
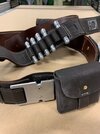
That is the whole reason I am doing this build log, to try and document what has worked for me (or what hasn't). I did a partial suit up last night and the leg armor is working out great. I like the fact that everything is glued together and nothing is shifting when I walk.
 
I worked on the soft parts this weekend and did most of a suit up. I will be working on the cape and gun belt in the coming weeks. The belt is just a stand in for the time being.
88C08423-7C41-4F0B-B03A-73EA93B7846F.jpeg
 
Nothing big to report but I wanted to show how I am attaching the armor and modifying the suit. I added velcro for the leg armor, 2 strips to hold it firmly in place.
IMG_1328.jpg

I added stirrups to the pant legs to keep the pants in the boot and from riding up when I am slipping on my shin armor.
IMG_1377.jpg

I also added darts to the back of the waist so the pants fit better, although I will still be using a webbed belt with this.
IMG_1378.jpg
IMG_1379.jpg

Lastly, I added a velcro strip to keep the cumberbund in place so it doesn't slip down.
IMG_1380.jpg
 
I haven’t updated in a while but have been busy with the leather belts. I started by taking some measurements with armor on and crafting a belt from heavy paper to get my pattern. Once I was happy I transferred to leather, gluing and stitching everything in place. Since the leather I am using is very lightweight, I added a veg tan layer to the inside to keep the shape and dyed this.
 

Attachments

  • A27AF0E4-47B2-4DD1-8CA9-C62AF0473A76.jpeg
    A27AF0E4-47B2-4DD1-8CA9-C62AF0473A76.jpeg
    1.1 MB · Views: 206
  • 8863DC5C-DE03-4CFD-9685-632DCDB69109.jpeg
    8863DC5C-DE03-4CFD-9685-632DCDB69109.jpeg
    1.5 MB · Views: 193
I made all of the pouches functional and stuffed them with foam to keep their shape. The flat bandolier pouch keeps closed with a hidden magnetic clasp.
 

Attachments

  • 7710B2FC-176F-40D5-8955-7357A3478EF2.jpeg
    7710B2FC-176F-40D5-8955-7357A3478EF2.jpeg
    1.7 MB · Views: 166
  • C3520C9E-F460-484C-9737-6DC0323CB860.jpeg
    C3520C9E-F460-484C-9737-6DC0323CB860.jpeg
    2.8 MB · Views: 192
The front D pouch I 3D printed a form and glued and wrapped in leather. I have seen many people use a tube shape but it is definitely a D shape
 

Attachments

  • DFCEF3AA-AC34-4FD8-81EC-6F8D198AC9BD.jpeg
    DFCEF3AA-AC34-4FD8-81EC-6F8D198AC9BD.jpeg
    1.2 MB · Views: 189
  • E4F7CDD2-0201-423E-A6F3-7B4239CB93D3.jpeg
    E4F7CDD2-0201-423E-A6F3-7B4239CB93D3.jpeg
    1.2 MB · Views: 179
  • B43D6143-3A21-430A-83FB-6876313A7DC0.jpeg
    B43D6143-3A21-430A-83FB-6876313A7DC0.jpeg
    1.1 MB · Views: 179
I printed the base for the grav charges and made a card stock template for the aluminum plate. The plate was cut out and screwed to the base from behind with some M3 screws that I countersunk. I have since wrapped in leather and the grav charges fit nice and snug. I will be gluing these in with some silicone as I don’t plan on making them functional.
IMG_1457.jpg
 

Attachments

  • 1A5E0FD1-1712-4588-9657-3D987F3E8A13.jpeg
    1A5E0FD1-1712-4588-9657-3D987F3E8A13.jpeg
    1.2 MB · Views: 165
  • 3FB0F436-89BC-42F4-BA87-E7AE468BA835.jpeg
    3FB0F436-89BC-42F4-BA87-E7AE468BA835.jpeg
    1.4 MB · Views: 174
  • 11524C72-0ECB-4C32-97AD-DD78841DD645.jpeg
    11524C72-0ECB-4C32-97AD-DD78841DD645.jpeg
    1.7 MB · Views: 182
Last edited:
I forgot to post pics of the cape. I used a Melton wool as that was what was available to me and it has the texture of felt. I cut a u shape for the neck and the two tails I folded over and sewed closed so this will just slip over my head.
I put a couple of blind stitches in the neck area so the material would stay folded over and not show a raw edge.
 

Attachments

  • 675A1966-05B8-435F-831A-5EEDD16B0D9F.jpeg
    675A1966-05B8-435F-831A-5EEDD16B0D9F.jpeg
    1.6 MB · Views: 198
  • A9C37E74-898E-4DBE-B29F-57E3F019F9CF.jpeg
    A9C37E74-898E-4DBE-B29F-57E3F019F9CF.jpeg
    2.5 MB · Views: 191
  • 83F93133-88BC-4E92-996A-916950A84C4C.jpeg
    83F93133-88BC-4E92-996A-916950A84C4C.jpeg
    2.4 MB · Views: 179
  • 373D9A43-8352-4630-9942-769C73265DFA.jpeg
    373D9A43-8352-4630-9942-769C73265DFA.jpeg
    2 MB · Views: 187
  • 6F5816CB-C479-4A2B-8157-20A66AC5FE05.jpeg
    6F5816CB-C479-4A2B-8157-20A66AC5FE05.jpeg
    2.2 MB · Views: 198
Hey! Great job so far! Just wanted to say I utilized your paracord method for lacing the right shin and so far it seems to work very well!
 
The gun belt is pretty much done! It seemed like a fairly easy outing at first, just a few belts, but there is layer upon layer and lots of details. Having made many Jango rigs, I would say this was more work. I lined the holster with some veg tan and dyed it brown so it will hold it's shape once I have wet formed it to the pistol. This is all on the inside so not visible. I had to figure out how I was going to construct and in what order as there are just some details that can't be put in after. Last was closing up the holster.
 

Attachments

  • IMG_1453.jpg
    IMG_1453.jpg
    76.6 KB · Views: 169
  • IMG_1454.jpg
    IMG_1454.jpg
    78.2 KB · Views: 160
  • IMG_1456.jpg
    IMG_1456.jpg
    74.2 KB · Views: 160
  • IMG_1455.jpg
    IMG_1455.jpg
    75.9 KB · Views: 168
Final fit. I just have to figure out how to attach the grav charges. I am thinking I'll print up a couple of belt clips as I don't really want to screw this to the belt, but that may end up being the way I go with it.

Keep in mind everything is loose fitting as the armor will fill out a few inches
IMG_1460.jpg

IMG_1458.jpg
IMG_1459.jpg
 
I attached the grav plate tonight and ended up using some chicago screws for an easy method. Since I didn't want functional charges I glued these in with E6000 so they are removable if needed. If I decide I want a functional charge then I can remove the middle one and no screw will be seen. I also weathered the belt lightly tonight so I am calling this done!
IMG_1478.jpg
 

Attachments

  • IMG_1476.jpg
    IMG_1476.jpg
    52.2 KB · Views: 180
  • IMG_1475.jpg
    IMG_1475.jpg
    64 KB · Views: 164
  • IMG_1474.jpg
    IMG_1474.jpg
    64.1 KB · Views: 161
  • IMG_1473.jpg
    IMG_1473.jpg
    59.4 KB · Views: 150
  • IMG_1477.jpg
    IMG_1477.jpg
    63.1 KB · Views: 166
Last edited:
Lastly, I added a missing detail to the right gauntlet. I originally printed the flamethrower but wasn't happy with the final print so I managed to convince my machinist buddy to model and make one for me. I also added the small silver detail by texturing some foil tape. A little weathering and DONE!

IMG_1479.jpg
IMG_1480.jpg
IMG_1481.jpg


I'll post up a link to the Etsy store he is setting up.
ThinkBox_logo2_mono.jpg
 
I’m one of those guys that always keeps tinkering. I couldn’t find the proper closure studs online so used snaps originally. I didn’t like the domed look and they were slightly too large, so I made my own studs. I think they look closer now.
65A31944-8477-483F-B1BF-4BB766B4E0F7.jpeg
 
This thread is more than 2 years old.

Your message may be considered spam for the following reasons:

  1. This thread hasn't been active in some time. A new post in this thread might not contribute constructively to this discussion after so long.
If you wish to reply despite these issues, check the box below before replying.
Be aware that malicious compliance may result in more severe penalties.
Back
Top