bigkidbiggertoys
Well-Known Hunter
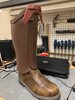
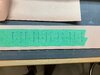
The inner circumference of the standard shin armor is about 13" at the base and tapers in to about 12" at the smallest point.
I decided against modifying the boot and am making a new set of shin armor. I have taken the existing file and stretched from front to back so it doesn't look too wide from the front. I will end up needing a bit of padding as I have chicken calves but it should work out in the end. For the record, the top outside circumference of my boot is about 14.25"
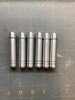
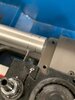
These look fantastic- nice work!!I have also started machining the metal parts. These are the first parts I have turned on my metal lathe. There is a bit of a learning curve but the parts are getting more consistent as I go and gain some experience. Not to machinists tolerances but good enough for Cosplay!
Any use of magnets with your build... for gauntlet closure, etc. ?
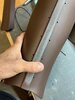
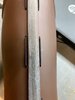
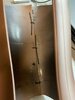
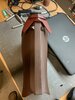
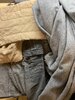
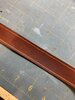
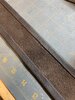
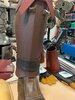
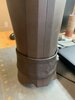
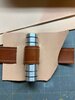
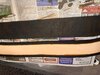
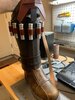
Nice work!! Did you do your boots?A few updates but I'll first start with the lower leg armor. I printed off a new set that I modified to fit the boot I have so I don't have to modify the boot. I opted to use a paracord lace for the front under the center plate and I glued the plate in place so it won't move around. The paracord acts like a hinge when I put on the armor and snaps back into place. The only thing I would change is my lacing pattern. After I finished it occurred to me there was a better way but this works well so I will leave it alone.
Nice work!! Did you do your boots?
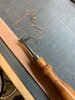
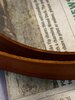
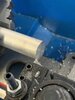
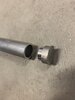
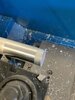
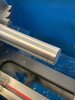
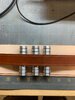
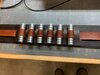
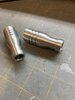
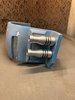
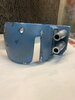
Those are so awesomeI worked on some more metal pieces today. As I wanted the leg ammo hollow to keep it light and screen accurate, I opted to use tubing and spun some end caps. The first 3 pics you can see me facing the material and then cutting a shoulder into solid aluminum for the end cap. I ended up cutting the diameter slightly larger than the tube and threw the end cap into the freezer and heated the tube before pressing them together. No glue needed and they are not coming apart! I then turned the assembly to get a nice consistent diameter and finish and lastly, cut the grooves with a parting blade and finished the ends with a small radius.