robotzo
Hunter
So this is a thing I have needed to do a for a long time. I have had this Woodman ESB ammo belt made with vintage white vinyl sitting around collecting dust for years, and I guess the reason I put it off for so long is that I believed that I would have to dye it which I did not want to do lol.

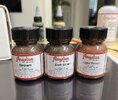
One day, it occurred to me that I could use Angelus brand leather paints that I had lying around from my days as a sneaker customizer. I don't know why I never thought about it sooner, and I guess I just thought that maybe leather and vinyl might not have the same properties and the paint wouldn't bond correctly. Now if you're not familiar with Angelus, they make a very diverse lineup of paints that are specifically for painting leather, and fabrics. It will flow through an airbrush and it will brush on smooth with a brush. I decided to test a couple shades of brown on the back of one of the ammo pouches.


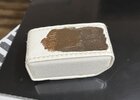
Using a paint brush to try out the Brown and Dark Brown, I painted the UNPREPPED surface of the vinyl, I will expand on this a little later. For now, I was satisfied with the color, but my main goal was to find out whether the paint would bond or not. Wouldn't you know it, the paint bonded perfectly. I scratched at it and rubbed at the paint to see if it would come off and only when I used an exacto blade to scratch did it slightly mark. On top that, the paint had a natural glossy finish that can be seen on the screen worn belt which was also a goal of mine. Happy with my test, I felt good about moving on and decided to run with Angelus Brown to start.
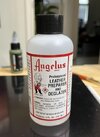
Now I had great results without prepping the surface on my test, but for the actual paint-up, prep work is necessary. Unless you're working with raw leather, this stuff is usually going to have a factory varnish on it that will need to be removed before we paint. Acetone will work just fine if you have that on hand but can be a little harsh and may eat some small holes and tear up the surface if you apply too much. I recommend getting Angelus leather preparer and deglazer if you can. It works great and is not as harsh on the surface as acetone.

Use some gloves and apply to the surface with some cotton balls using circular motions to rub away the factory varnish. You will start to notice that the surface of the leather/vinyl will start to look dull and have a tacky feel to it which is exactly what you're looking for. This stuff came off relatively easy for me, so it only took about 10 minutes at most to do the whole belt and pouches. The left side of the image below is the factory finish vs the right side that has been prepped.

Once everything has been prepped, you can move onto painting your belt. You can paintbrush it on, or you can airbrush like I did. If you go the airbrush way, you will need to get some Angelus brand 2-Thin which a thinner specific to this type of paint. Water is not recommended by the manufacturer for thinning. This is where this stuff becomes a pain in the rear lol. Angelus paints are very thick and goopy and needs a lot of thinning. It's also a pain to clean out of an airbrush because it dries quickly, so be wary of that. Make sure you clean out your brush really good because this stuff loves to stick to hard-to-reach places.
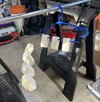
So to paint the pouches, I just hung them up with some hangers and tossed the belt over a coat rack.

My approach to painting this was not at all to get perfect coverage. We all probably know that the proto belt was white vinyl, and just painted over at some point. The original white material can be seen in some areas of the original belt where they may not have gotten the best coverage when painting. Maybe they were in a hurry and just hit it as quick as they could idk, I'm sure somebody here will know a lot more about it than what little I know. With that in mind and like I said, perfect coverage wasn't my goal. I wanted uneven layers, splotches here and there to add a little depth and to see where I stood once it was all dry and I could see it on my mannequin.


I am very happy with how it turned out! I got that glossiness that I wanted although there is a little bit of a texture that is a result of the material and not the paint. Normally I would seal this with a varnish, but I am considering going maybe a little darker with my paint color. I don't know if this is too much, too little or just right in terms of glossiness. With my girth belt being a little on the brown side, I feel like it warps my perception of the color. Might need to hit the girth belt with some more red and see how I feel. I would love the opinions of everyone else! I hope I didn't miss anything and look forward to some feedback!
One day, it occurred to me that I could use Angelus brand leather paints that I had lying around from my days as a sneaker customizer. I don't know why I never thought about it sooner, and I guess I just thought that maybe leather and vinyl might not have the same properties and the paint wouldn't bond correctly. Now if you're not familiar with Angelus, they make a very diverse lineup of paints that are specifically for painting leather, and fabrics. It will flow through an airbrush and it will brush on smooth with a brush. I decided to test a couple shades of brown on the back of one of the ammo pouches.


Using a paint brush to try out the Brown and Dark Brown, I painted the UNPREPPED surface of the vinyl, I will expand on this a little later. For now, I was satisfied with the color, but my main goal was to find out whether the paint would bond or not. Wouldn't you know it, the paint bonded perfectly. I scratched at it and rubbed at the paint to see if it would come off and only when I used an exacto blade to scratch did it slightly mark. On top that, the paint had a natural glossy finish that can be seen on the screen worn belt which was also a goal of mine. Happy with my test, I felt good about moving on and decided to run with Angelus Brown to start.
Now I had great results without prepping the surface on my test, but for the actual paint-up, prep work is necessary. Unless you're working with raw leather, this stuff is usually going to have a factory varnish on it that will need to be removed before we paint. Acetone will work just fine if you have that on hand but can be a little harsh and may eat some small holes and tear up the surface if you apply too much. I recommend getting Angelus leather preparer and deglazer if you can. It works great and is not as harsh on the surface as acetone.

Use some gloves and apply to the surface with some cotton balls using circular motions to rub away the factory varnish. You will start to notice that the surface of the leather/vinyl will start to look dull and have a tacky feel to it which is exactly what you're looking for. This stuff came off relatively easy for me, so it only took about 10 minutes at most to do the whole belt and pouches. The left side of the image below is the factory finish vs the right side that has been prepped.
Once everything has been prepped, you can move onto painting your belt. You can paintbrush it on, or you can airbrush like I did. If you go the airbrush way, you will need to get some Angelus brand 2-Thin which a thinner specific to this type of paint. Water is not recommended by the manufacturer for thinning. This is where this stuff becomes a pain in the rear lol. Angelus paints are very thick and goopy and needs a lot of thinning. It's also a pain to clean out of an airbrush because it dries quickly, so be wary of that. Make sure you clean out your brush really good because this stuff loves to stick to hard-to-reach places.
So to paint the pouches, I just hung them up with some hangers and tossed the belt over a coat rack.

My approach to painting this was not at all to get perfect coverage. We all probably know that the proto belt was white vinyl, and just painted over at some point. The original white material can be seen in some areas of the original belt where they may not have gotten the best coverage when painting. Maybe they were in a hurry and just hit it as quick as they could idk, I'm sure somebody here will know a lot more about it than what little I know. With that in mind and like I said, perfect coverage wasn't my goal. I wanted uneven layers, splotches here and there to add a little depth and to see where I stood once it was all dry and I could see it on my mannequin.
I am very happy with how it turned out! I got that glossiness that I wanted although there is a little bit of a texture that is a result of the material and not the paint. Normally I would seal this with a varnish, but I am considering going maybe a little darker with my paint color. I don't know if this is too much, too little or just right in terms of glossiness. With my girth belt being a little on the brown side, I feel like it warps my perception of the color. Might need to hit the girth belt with some more red and see how I feel. I would love the opinions of everyone else! I hope I didn't miss anything and look forward to some feedback!
