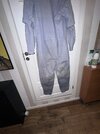
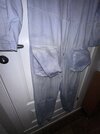
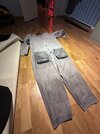
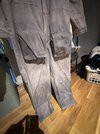
General DrToothache's ESB Boba Fett

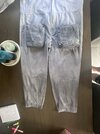
New soft parts just arrived! I honestly am really happy with the custom flight suit that I have been working with over the past few years. I learned a lot working with it and trying to make it more accurate such as sewing, tailoring, weathering, dying etc. I was really happy with the final result and I think that it would be just fine as my permanent flight suit going forward, but I wanted to get something a little more accurate.

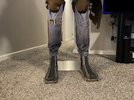
There were a few things that bothered me about my flight suit. For one, the thigh pouches are a little too small, even after stuffing them until they almost exploded. I was also having issues finding the correct fabric to make the hip pouches perfectly match. The third issue was the shin tool pouches not being large enough to fit all of the proper shin tools, so I had to compromise in the way they rested in the pouches.

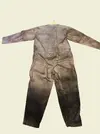
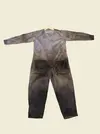
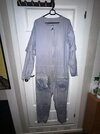
Christian from KriptonTop was having a sale a few months ago so I picked up the flight suit, neck seal, gloves, flak vest, cape and hip pouches. All of the items he sent are very nice! Fits me perfect as well. The only issues I've found are minor. One is that the flak vest is gray, I would have preferred it being a white so that I can weather it to the proper color. Honestly though the thickness of it and material used does seem to look slightly more accurate than my MOW vest. It also has the proper opening on the back rather than opening on the sides like the MOW vest.
flak vest.jpg
flak vest 2.jpg


I like the gloves as well, however the white cotton twill fabric for the fingers looks slightly too thin. They are a darker color of gray for the base glove though when compared to the BobaMaker gloves (which are also very nice). BobaMaker's ESB gloves use a lighter gray, like something in between ESB and ROTJ gloves in my opinion.

gloves.jpg
Capture.JPG


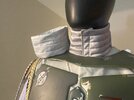
I really like the neck seal that I received. It is a little more "puffy" than the MOW neck seal that I have been using.

neck seal.jpg


Here is a picture of a side-by-side comparison of the flight suits, neck seals and gloves on my mannequin (previous weathered flight suit on left, new flight suit on right):

IMG_9752.JPG

Overall I think that the flight suit is a move in the right direction. One thing I want to change though is the placement of the shin tool pouches as they are sewn a little too high on the flight suit and don't leave a lot of space for the knee armor. This should be an easy enough fix with my seam ripper and sewing machine. I love the look of the larger hip/thigh pouches though. These might actually be slightly too big when compared to reference photo's but that's okay with me, just excited to start weathering...again lol.
 

Attachments

  • neck seal.jpg
    neck seal.jpg
    2.2 MB · Views: 25
Yesterday I began the weathering process on the new flight suit. For the first part I used mostly powders. I know that a lot of people used watered down acrylic paints for weathering but I really am a fan of powders because I feel like I have a lot more control when using them.
List of products used:
  1. Charcoal Powder
  2. Huge Miniatures weathering powders:
    1. Gunmetal
    2. Ash
    3. Sand
    4. Peat
    5. Pure White
Here are some photos of the initial results.

IMG_9789.jpg
IMG_9788.jpg
IMG_9787.jpg

IMG_9784.jpg
IMG_9785.jpg
IMG_9786.jpg


After starting the weathering, I am really starting to like the new flight suit. The next step will be applying the dirty down spray and some brushed watered down acrylics, particularly around the shins and thigh pouches.
 
Those powders worked great!

I am a huge fan of dirty down and it is washable. The black always flows out quicker than the other colors in my experience.
Thanks Buda! I do love dirty down as well, it's nice knowing that if you over-do it you can wash some of it out. That's good to know about the black washing out quicker, I didn't realize that!
 
First off I just want to say your build is awesome build!

I used Dirty Down also on mine, but as a Boba noob, I went way overboard the first time, haha. It didn’t wash out completely and left some stains. Here’s how it looked before washing it:

IMG_1024.webpIMG_1025.webp
and after two trips through the washing machine:

IMG_3285.jpegIMG_3289.jpegIMG_3286.jpeg

I reapplied it to the flightsuit while it was still damp, which gave a better effect. Still needs more weathering on the shins, though!
After washing, the suit seems to have turned a bit gray—at least it looks that way in the photos.
IMG_3644.jpegIMG_3646.jpegIMG_3660.jpeg
 
First off I just want to say your build is awesome build!

I used Dirty Down also on mine, but as a Boba noob, I went way overboard the first time, haha. It didn’t wash out completely and left some stains. Here’s how it looked before washing it:

View attachment 244507View attachment 244508
and after two trips through the washing machine:

View attachment 244509View attachment 244510View attachment 244511

I reapplied it to the flightsuit while it was still damp, which gave a better effect. Still needs more weathering on the shins, though!
After washing, the suit seems to have turned a bit gray—at least it looks that way in the photos.
View attachment 244513View attachment 244514View attachment 244515
Thank you! Awesome of you to share some pics. I definitely had a similar experience when I used dirty down on my last flight suit lol. I washed mine in the bath tub until it faded enough and then added more like you did and used a rag/makeup pads to add powders. I think mine turned out alright in the end. You're weathering looks really good, especially after washing it. I think if you added a little more to the shins like you said it would be perfect.

With my new flight suit I definitely tried to use the dirty dowwn lightly. I will share the results soon to see what you guys think. Going to do another round of powders first to finish it up.
 
Update on weathering. So far I have finished with powders and Dirty Down. Going to apply some watered down acrylics to the shins for finishing touches.
2.jpg


The flight suit is a little short on the mannequin, but it fits me perfectly! I'm not as genetically gifted as my 6ft mannequin lol.
Here's a blurry picture of me test fitting the flight suit. (It's so hard to do photos by yourself at home...). I will upload some high quality photos with me in the full kit soon.

3.PNG
 
Used Earth Colors acrylic paints to add some more detail to the shin weathering and thigh pouches.


IMG_9880.JPEG
IMG_9881.jpg


IMG_9882.JPEG
IMG_9883.JPEG
IMG_9865.jpg


I also finished up the temporary EE-3. Will be replacing with Andy Meyers' version once it arrives, just needed something for the upcoming Steel City Con! Did some weathering and the mock wood stock. I'm pretty happy how it turned out.

IMG_9876.jpg
IMG_9872.jpg
IMG_9873.jpg

IMG_9874.jpg
IMG_9875.jpg

IMG_9877.jpg
 

Attachments

  • IMG_9879.JPEG
    IMG_9879.JPEG
    999.3 KB · Views: 22
Last edited:
Weathering looks fantastic! (y)
Thank you! Still need to touch up some areas of weathering but I think it's getting there :). I really appreciate the feedback you have been giving. Definitely don't hesitate to criticize anything that you think needs improved. Your build is beautiful Buda and definitely is one I refer to often along the way!
here is a side-by-side of the old vs new so far:
compare.JPG


Today I made progress on some small things. I made a posable mannequin hand using 3mm thick wire, duct tape and screws so that Boba can finally hold his blaster.

I started by twisting 2 lengths of wire together (did this twice for 4 fingers):
1.jpg

I then twisted the 2 pairs of wires together at their base to make a 4-finger base hand. During this I kept holding the wires up to my hand making sure that the "twist point" (where the wires connect) ends at my wrist. I then added the thumb wire by twisting that around the stem of the 4 twisted wires. This created the general shape of the hand which I then wrapped in duct tape up to the joints.
2.jpg
3.jpg

Once the shape was fine-tuned, I removed the connecting screw from the mannequin hand and attached it to the base of my wire hand which allowed me to connect it to the arm of the mannequin.
4.jpg
5.jpg


I was surprised how well the wire gripped the blaster once I bent the fingers and thumb around the handgrip. I still tied some floss around certain areas to reinforce it so that there is little risk of any more "accidents".

Here are some pictures of the results:
6.jpg
7.jpg

8.jpg

9.jpg

10.jpg

I'm really happy to finally have the EE-3 mounted onto the mannequin, it always felt like something was missing...

I have a few more things to work on before Steel City Con in a few weeks but I also have to get my finishing touches on my Jango build since Temuera Morrison is going to be at the con (I plan on wearing both costumes on different days).

My goal is to keep updating this build thread but also to finally update my Jango build thread soon. I have been working on both kind of simultaneously but have really neglected updating that post.
 
Last edited:
I love mannequin builds! Looks awesome congrats on the build!
Thanks Buda! Mannequins are great because after putting in all of this work you can display it instead of keeping it in a box.

It also motivates me to work on the costume more since he's always staring at me in my living room lol
 

Your message may be considered spam for the following reasons:

If you wish to reply despite these issues, check the box below before replying.
Be aware that malicious compliance may result in more severe penalties.
Back
Top