Fennec Shand Build

bigkidbiggertoys

Well-Known Hunter
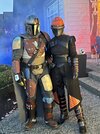
I managed to convince my wife to join me this Halloween and build her a Fennec costume. This was a quick build as she won't lug around a cosplay rifle all night so most of the costume consists of soft parts with very little armor. I purchased the Fennec costume from Cosplaysky but look around, I found it cheaper on Amazon.
il_1140xN.3268947643_aag6.jpg
 
The costume came in after a couple of weeks and was exactly as pictured and the fit was great, no alterations needed.
IMG_0145.JPG


The gloves that came with the costume will do but these are being replaced with some black leather ones we had from another costume. The boots are also a stand in and she will find something with a more aggressive sole.
 
I started off 3D printing the helmet from Nikko Industries. As I have now studied more pics of this character I realized this helmet has some shortcomings and the one from DO3D is way more accurate. Too late now but if she is going to wear this again I can always make the upgrade.
OTFL1639.JPG

I didn't take pics of the printing and finishing process but this is the way I go about it now and it works well for me and is pretty quick.
1) I glue the pieces together with CA glue, building up the seams and sanding flush after. Any bondo work needed is done at this point.
2) I sand down the whole helmet with 80 and 120, using 80 only where I need to get more aggressive to remove most of the print lines.
3) I coat the whole helmet with a THIN layer of epoxy and let cure overnight
4) I sand down again with 120, then 180 and finally 220. Any fine print lines should be filled at this point but if some are still present then I use the red glazing putty to fill these and sand again.
5) I spray with two coats of filler primer and sand between coats with 220. I don't go to heavy with the filler primer as I have found that if you try to fill print lines this way, the primer will cure over a couple of months and print lines come back on your finished prop. The last grit for sanding will depend on the final finish of the helmet. Since this has a flat finish 220 is fine. If I were doing a polished helmet then I would step up to 600.
UCTV3406.JPG


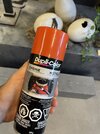
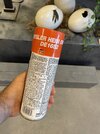
I used an orange engine enamel for the paint. The airbrushing was a thinned out brown/ black acrylic mixture. I misted with a slight sandy color and sealed with a matte finish. The dings were applied with a silver paint pen.
IMG_0150.JPG


I missed a couple of print lines but I can easily go back in and fix these later. They really are not noticeable in person but look really bad in the above pic.
IMG_0174.JPG
 
I used the same process for the arm band print. This is a simple piece so it could be made from Sintra quite easily and it would save the print time and sanding. I'll probably go back to this kind of thing in the future and not rely so heavily on the printer.
IMG_0173.JPG

The elastic was glued on with some E6000 and allowed to cure overnight.
IMG_0172.JPG
 
I worked on the helmet interior and glued on a dome topper with some scrap foam I had laying around for a finished look. I also gutted a hard hat for the liner, keeping the attachment point for the helmet which I added velcro to. This way I can easily remove the liner if I need to adjust the fit or work on the helmet. I also looks pretty good too.
IMG_0168.JPG
IMG_0169.JPG
IMG_0171.JPG
 
Finally I got to work on the chest greeblie. I originally printed one out but decided the time to finish this would be longer than scratch building. I didn't use any reference pics, just the 3d print and just winged it for something that was close enough.
IMG_0176.JPG


I broke out the styrene and an hour or so later I had this.
IMG_0177.JPG

After a bit of clean up and some primer and paint.
IMG_0179.JPG

The nice thing about doing it this way is I didn't have to modify the suit and remove the original greeblie that was made of pleather and sewn on. This slips tightly over top and is secured with a bit of two way tape. It is never coming off unless I want it to.
 
Lastly I worked on the belt box. Since this was a larger piece and I didn't have as much styrene, I modified a 3d print and hollowed out the back side so it could slip on the same way as the chest box. I didn't bother epoxying this print as it is a small piece. Just lots of sanding.
IMG_0182.JPG

And the finished product compared to the scratch build.
IMG_0184.JPG

And a quick pic to show how it is installed.
IMG_0185.JPG
IMG_0186.JPG
 
Finally, this is where we are at. I put it on a skinny mini mannequin that I had in storage so the fit isn't great but at least I can enjoy it for awhile. The shoes and gloves are still stand ins and the only part I need to make is the shoe armor. This was a quick build and was started Aug 7th and finished on the 15th, including the print time. A couple of good days were spent on the weekends and a few hours during the week nights.
IMG_0188.JPG


Hope this helps someone else out as I couldn't find any other Fennec Shand builds out there.
 
DUDE... Well done! Love that the costume base came as pictued, big plus not having to alter it other than the details.
 
So awesome! Do you happen to know the exact orange engine enamel paint color you used? Currently working on prepping my fennec helmet!
 
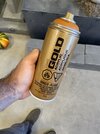
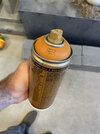
Base coat is the Chrysler Hemi Orange and I gave a very light dusting with Montana Gold Terra for some light weathering. You could use anything for this though.

And this is the second helmet I have done. The first was from Nikko Industries but as I studied more character references I realized there were some shortcomings that I couldn’t unsee.

This helmet is from Do3D. There are a couple of minor details that are off but it is about 95% of the way there and good enough for me.
9DB119D9-3B22-4CA8-9567-5F5D2B86D20E.jpeg
EEDC8762-90FD-47ED-B5D3-A774E32CA4D5.jpeg
 

Attachments

  • BE69B921-6638-456B-81B1-52D4BFF20A44.jpeg
    BE69B921-6638-456B-81B1-52D4BFF20A44.jpeg
    1.8 MB · Views: 234
  • 3DC8441D-5FC0-4CB3-A6FB-0146FE63C0F3.jpeg
    3DC8441D-5FC0-4CB3-A6FB-0146FE63C0F3.jpeg
    1.8 MB · Views: 254
  • A6E234D0-3C6A-47FB-83EB-3A83CE623923.jpeg
    A6E234D0-3C6A-47FB-83EB-3A83CE623923.jpeg
    1.7 MB · Views: 217
  • 2D604F8D-9E38-4EDA-AC90-F2CB41E7744B.jpeg
    2D604F8D-9E38-4EDA-AC90-F2CB41E7744B.jpeg
    1.7 MB · Views: 280
This turned out surprisingly well! I've heard of Cosplaysky but never really paid much mind to them. My wife has also been wanting to cosplay Fennec! I just showed her the outcome of your suit and she really wants to go down this route. Did you order directly from cossky? I'm getting a few different sites related to cosplaysky and not sure which is the proper one to order from. Even found one on ebay that looks similar (same photos and all but says the maker is "Laku". Would love to get this for her and start working on the obvious upgrades for it. Thanks for sharing, this is cool!
 
I ordered directly from cosplaysky.ca since I'm located in Canada, but I think cossky is the same company. I have ordered a few times from them and the quality is pretty good and the costumes a great base to start with. I did have one bad experience but it all worked out in the end. Just make sure that you pay with paypal so you have some protection and you should be fine. I won't let the one bad experience keep me from ordering again as it did work out in the end.
 
This thread is more than 2 months old.

Your message may be considered spam for the following reasons:

  1. This thread hasn't been active in some time. A new post in this thread might not contribute constructively to this discussion after so long.
If you wish to reply despite these issues, check the box below before replying.
Be aware that malicious compliance may result in more severe penalties.
Back
Top