BH4548 Back again - sold my kit long ago - want to rebuild... [Progress Post - Pic Heavy]

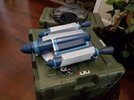
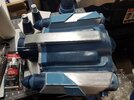
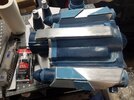
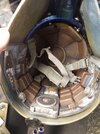
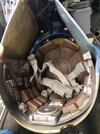
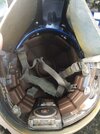
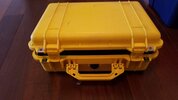
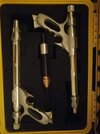
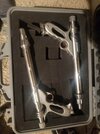
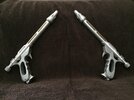
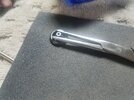
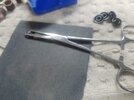
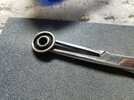
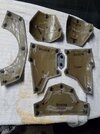
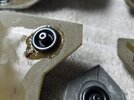
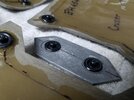
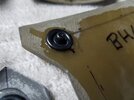
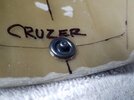
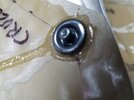
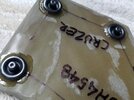
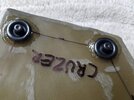
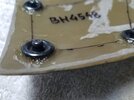
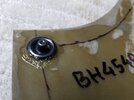
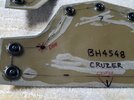
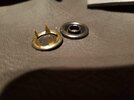
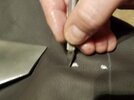
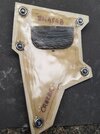
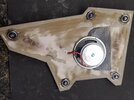
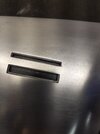
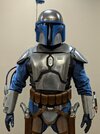
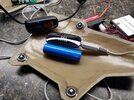
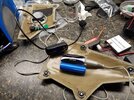
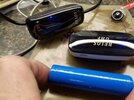
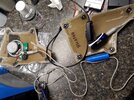
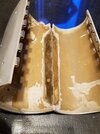
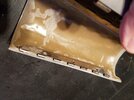
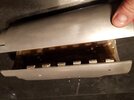
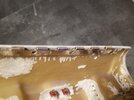
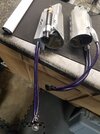
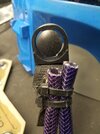
Assembled the gauntlets and polished them up and attached hoses. I used some tarp rivets for the sleeve attachment and secured the parachute clips. Then, on the hoses and wire tied them on with some elastic strips to 'give' a little. I added some foam from a yoga mat for gauntlet padding. I glued in the aluminum dart parts that I got from ThinkBoxMFG.
 

Attachments

  • 20210206_220607.jpg
    20210206_220607.jpg
    898.3 KB · Views: 188
  • 20210206_220614.jpg
    20210206_220614.jpg
    726.7 KB · Views: 195
  • 20210206_220626.jpg
    20210206_220626.jpg
    594.4 KB · Views: 199
  • 20210206_220652.jpg
    20210206_220652.jpg
    437.1 KB · Views: 191
  • 20210206_220816.jpg
    20210206_220816.jpg
    563.1 KB · Views: 179
  • 20210206_221414.jpg
    20210206_221414.jpg
    390.6 KB · Views: 193
  • 20210302_092955.jpg
    20210302_092955.jpg
    1,018.2 KB · Views: 201
  • 20210302_093014.jpg
    20210302_093014.jpg
    1 MB · Views: 208
  • 20210302_093023.jpg
    20210302_093023.jpg
    596.5 KB · Views: 204
  • 20210302_093043.jpg
    20210302_093043.jpg
    640.6 KB · Views: 197
  • 20210302_093058.jpg
    20210302_093058.jpg
    1.2 MB · Views: 185
  • 20210302_093112.jpg
    20210302_093112.jpg
    2.3 MB · Views: 197
I got a 'B'-grade jetpack from MoW and boy was it bad. I had a LOT of work to do on it and I'm still not happy with it. I painted it up because I wanted to make a 501st event, but ended up re-working it afterwards.
 

Attachments

  • 20210221_093752.jpg
    20210221_093752.jpg
    417.4 KB · Views: 183
  • 20210302_093203.jpg
    20210302_093203.jpg
    777.1 KB · Views: 180
  • 20210302_093205.jpg
    20210302_093205.jpg
    888.7 KB · Views: 195
Added the foam helmet inserts and the ACH (military) chin straps all secured in with chicago screws. I roughed them up with 150-180 grit sandpaper and CA glued them into the helmet. I still have to add some mild adhesive to get the foam to line up better/flush against the bottom.
 

Attachments

  • 20210302_100641.jpg
    20210302_100641.jpg
    763.3 KB · Views: 198
  • 20210302_100657.jpg
    20210302_100657.jpg
    1.2 MB · Views: 202
  • 20210302_100705.jpg
    20210302_100705.jpg
    1.1 MB · Views: 196
I used one of my old pelican cases for the Westar34's, but I like the gray case better.

I'll start on the DEC reproductions with LED lights when my wire and red LED's come in...
 

Attachments

  • 20191208_123334.jpg
    20191208_123334.jpg
    499.9 KB · Views: 157
  • 20191208_123348.jpg
    20191208_123348.jpg
    829.2 KB · Views: 155
  • 20191208_123356.jpg
    20191208_123356.jpg
    275.1 KB · Views: 146
  • 20201105_183249.jpg
    20201105_183249.jpg
    640.8 KB · Views: 154
  • 20210221_094242.jpg
    20210221_094242.jpg
    923.2 KB · Views: 148
  • Westars 1.jpg
    Westars 1.jpg
    1 MB · Views: 153
OK, for the chest armor, once again I followed Cruzer's build tutorial here on the TDH, but I used some different snaps that 'bite' into the leather. Once again, I used CA glue and roughed up the snaps and the back side of the armor before I glued the snaps in. To make the teeth of the snap sink in better, I created tiny slits in the leather with a small Exact blade.
 

Attachments

  • 20210215_111910.jpg
    20210215_111910.jpg
    1.8 MB · Views: 172
  • 20210215_111912.jpg
    20210215_111912.jpg
    424.8 KB · Views: 174
  • 20210215_111929.jpg
    20210215_111929.jpg
    1.8 MB · Views: 164
  • 20210215_111938.jpg
    20210215_111938.jpg
    560.4 KB · Views: 175
  • 20210215_113537.jpg
    20210215_113537.jpg
    1.3 MB · Views: 169
  • 20210215_113543.jpg
    20210215_113543.jpg
    435.2 KB · Views: 173
  • 20210215_113550.jpg
    20210215_113550.jpg
    860.7 KB · Views: 164
  • 20210215_113554.jpg
    20210215_113554.jpg
    448.6 KB · Views: 163
  • 20210215_113557.jpg
    20210215_113557.jpg
    365.9 KB · Views: 157
  • 20210215_113602.jpg
    20210215_113602.jpg
    318.9 KB · Views: 152
  • 20210215_113605.jpg
    20210215_113605.jpg
    696 KB · Views: 151
  • 20210215_113608.jpg
    20210215_113608.jpg
    501.8 KB · Views: 157
  • 20210215_113612.jpg
    20210215_113612.jpg
    320.1 KB · Views: 146
  • 20210215_113615.jpg
    20210215_113615.jpg
    405.5 KB · Views: 145
  • 20210215_113618.jpg
    20210215_113618.jpg
    364.6 KB · Views: 148
  • 20210215_113623.jpg
    20210215_113623.jpg
    965.6 KB · Views: 153
  • 20210215_165044.jpg
    20210215_165044.jpg
    355 KB · Views: 146
  • 20210215_165829.jpg
    20210215_165829.jpg
    492.2 KB · Views: 156
  • 20210215_165854.jpg
    20210215_165854.jpg
    385.6 KB · Views: 157
My favorite part...I am installing a voice amplifier to the back of my chest armor. I bought a Croove brand voice amp for $25 and took it apart. The circuit board, speaker, and battery holder should all fit in the back, but I may move the battery holder to back of the other chest piece. I cut out the slits in the front of the chest piece and added the screen mesh that come on the Croove amp case that I disassembled.

This Croove voice amp came with a WIRED mic. I hate extra wires to keep up with, so I ordered a blue tooth mic adapter instead to use in the helmet (waiting on it to arrive). I'll keep you posted...
 

Attachments

  • 20210301_182301.jpg
    20210301_182301.jpg
    1.2 MB · Views: 162
  • 20210301_182310.jpg
    20210301_182310.jpg
    1.8 MB · Views: 147
  • 20210301_182316.jpg
    20210301_182316.jpg
    958.9 KB · Views: 142
  • 20210301_182323.jpg
    20210301_182323.jpg
    1.4 MB · Views: 144
  • 20210301_182346.jpg
    20210301_182346.jpg
    950.5 KB · Views: 155
Update: my Bluetooth mic came in, it's a bit bulky though. I don't like the WIRED one that came with the Croove, so I got the Bluetooth one cheap. I added an audio cable so that I could connect it to the mainboard in the right side chest armor piece and mount the Bluetooth transmitter in the left chest or visa versa (point of view).

I will use sticky-back velcro to mount the transmitter. next to the battery. The concept is that the speaker and mainboard (connections) will be on the left chest and the battery (power) and transmitter will be on the right, so there will be a pos + neg wire and an audio extension cable running behind the armor and just behind the leather flak vest. The audio cable will have to be shortened.

Anyhow, all I need now is an 18650 battery holder - I will have to 3D print one since most of them out there are only $3 but usually ship for $6-9...pffft! More to come...
 

Attachments

  • 20210303_182704.jpg
    20210303_182704.jpg
    999 KB · Views: 147
  • 20210303_182708.jpg
    20210303_182708.jpg
    2.4 MB · Views: 151
  • 20210303_182731.jpg
    20210303_182731.jpg
    416.3 KB · Views: 153
  • 20210303_182806.jpg
    20210303_182806.jpg
    2 MB · Views: 154
This thread is more than 3 years old.

Your message may be considered spam for the following reasons:

  1. This thread hasn't been active in some time. A new post in this thread might not contribute constructively to this discussion after so long.
If you wish to reply despite these issues, check the box below before replying.
Be aware that malicious compliance may result in more severe penalties.
Back
Top