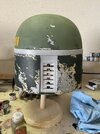
VutycFett FPH2 ESB Paint-up

VutycFett

Hunter
First time painting up a Boba helmet so if you guys see anything I need to improve on criticize me! I’m going to need it.

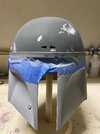
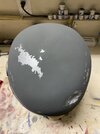
Well to start off this is a FPH2 ESB bucket from Wasted Fett. I started by priming and drilling holes to get the ears fitted. Also had to do a bit of bondo work due to finding some pin holes on the helmet. Plus filed out the keyslots sense they had a lot of problems, so if anyone knows someone who makes cast of the keyboard I’m looking!
2853-b57338981cbf7874801300ef26f5cb9b.jpg
2854-8a51e6c2ee0198b3e17572196fb716b5.jpg


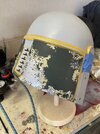
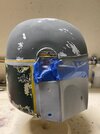
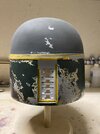
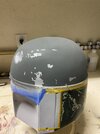
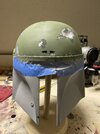
After the priming was all done I started by taping up the back panels. I’m using only humbrols and stencils from RafalFett. First color I did was a light grey 147.
2857-db49b5aa7775c336a620668de8575ef7.jpg
2855-bfb0a8d6984e2b0202a41349a440d222.jpg
2856-346395b89dd8d46cc1139185783a93db.jpg


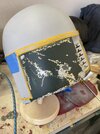
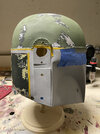
Next color on the list was silver 11. Applying the stencil onto it was more challenging for me I felt the first masking I did with 147 was better done where as the silver I believe I messed up the sizing and or placement. Will have to fix that later.
2858-d34048ac5fbfe747ce41aaf6987d506d.jpg
2859-5306aeb0d516b179ff9407cf16203a35.jpg
2861-aa92cfe6d6eed6732a3f5df333b4d63d.jpg


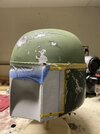
Today I put the next color onto the silver which was the “refer grey” 79.
2860-553d54e7903f335b79a4360648c77363.jpg
2863-29e2f4d23777348bf9571c1c0db4ef4e.jpg
2862-1eba439abf74c2aeecbdfd46a613b4ae.jpg


Once it dries I’ll be doing the concrete color!
 
Last edited:
First time painting up a Boba helmet so if you guys see anything I need to improve on criticize me! I’m going to need it.

Well to start off this is a FPH2 ESB bucket from Wasted Fett. I started by priming and drilling holes to get the ears fitted. Also had to do a bit of bondo work due to finding some pin holes on the helmet. Plus filed out the keyholes sense they had a lot of problems, so if anyone knows someone who makes cast of the keyboard I’m looking!
View attachment 203254View attachment 203255

After the priming was all done I started by taping up the back panels. I’m using only humbrols and stencils from RafalFett. First color I did was a light grey 147.
View attachment 203256View attachment 203257View attachment 203258

Next color on the list was silver 11. Applying the stencil onto it was more challenging for me I felt the first masking I did with 147 was better done where as the silver I believe I messed up the sizing and or placement. Will have to fix that later.
View attachment 203259View attachment 203260View attachment 203261

Today I put the next color onto the silver which was the “refer grey” 79.
View attachment 203262View attachment 203263View attachment 203264

Once it dries I’ll be doing the concrete color!
I make casts of the MQ-1 circuit board for the key slots, if that is what you need.
 
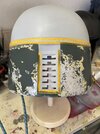
Just finished layering all the colors onto the back plates now onto detailing it with a brush. The fun part! Here is what I did for the rest of the layering though.
3104-4bd4dd93ccea63131539fd8342e38ce2.jpg
3105-1a229e4f1855572cbd939fd357a7b67c.jpg
3106-35c7651677a2acadc171041e4ad63cd6.jpg


Once I masked the grey put grey 28 and then beige 103 misted onto it.
3107-91fdddd98dceb16c2b477b3bba42e9f0.jpg
3108-406138b333d1a218749379054b72a5e5.jpg
3109-9b890eca267a630ce9ecb71a268a7a1e.jpg


Then I masked it
3110-bf37b1c7d7a3b384eb64042c2c8f9ecf.jpg
3111-efe636d222169fece3cb000b3615e0de.jpg
3112-90c9ab38460b351159bfc36917a014e5.jpg


Once it dried I mixed green 76 and blue 96 to try matching RLM73.
3113-2b678d9e3bc3fdcaa7be98c951e70e84.jpg
3114-03962d3b80501d5dd5dad3f08624237e.jpg
3115-fc2e2dae45d3ad96cdf09ea8fa7b98e5.jpg


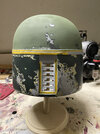
Now onto the detailing. I could have done better with the masking but that will be something I’ll have to do better on the next time around. I think the final green it good but not exact I’ll have to fix that somehow too.
 
Good work! I decided to tweak my final green colour after I was “done”, I just masked off the beige and silver and did a few light coats.
 
So gotten a bit more done sense the last time I posted so gonna dumb it all here.

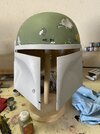
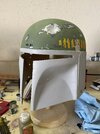
First off I changed the color of the back panels to a darker color with Vallejo RLM 73.
FC36BD06-65E8-419B-84CF-56C95D8652F2.jpegB480D90C-0105-4C87-B6BC-11EDA6FACB1B.jpegC0C1ABDC-CA7F-4DA1-B460-220EFD134156.jpeg

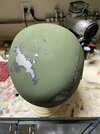
Once I did that I went about doing the dome. I masked the primer, then silver, grey and laid green on last. The only thing I regret doing is not doing the cheeks at the same time but can try that on the next helmet.
859FE6C7-A143-49CA-A61D-CC2125ED773F.jpeg14A4055E-4893-4DE8-B2A1-5059E112B586.jpeg70FF2B04-0263-421A-9020-AE6B44E1A83A.jpegCF4A8B3C-FED8-4CC3-8C5E-DF352BF7095D.jpegC3182759-CBF6-43B2-8A9E-53A2C19924E6.jpeg
281621A3-943D-491B-8D85-12FE06040759.jpegB03B85C1-A89B-4A2F-9182-039624D61A0C.jpeg2D59E3F5-6195-42B2-ADC5-BC613A4D82CD.jpegC96998B5-839D-4D6D-A64F-19D30E5F7970.jpegF59BDA7B-D647-4AE2-BDE4-AD84C5016CCA.jpeg

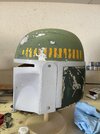
After that I went about putting the killstripes on. Now just have to add the details. Waiting on a dental file so I can do the fine scratches too. After that going to do the cheeks.
FD2FF15B-F9BC-449E-9023-8265AD4B1CF7.jpeg0997DE49-D092-47C1-89AC-18264DCFB781.jpeg3C4DE8DF-6254-4771-B7C4-F5A24447919C.jpeg5D113529-ECF3-423D-BB64-38F272A15C4A.jpeg
 
This thread is more than 2 years old.

Your message may be considered spam for the following reasons:

  1. This thread hasn't been active in some time. A new post in this thread might not contribute constructively to this discussion after so long.
If you wish to reply despite these issues, check the box below before replying.
Be aware that malicious compliance may result in more severe penalties.
Back
Top