XiAn0x
New Hunter
Hi all,
For years I had the dream of building my very own Boba Fett costume and after purchasing a 3D printer in November last year (2020), I decided to finally start. I first started by leeching on this forum which I already new for quite some years. It really is valuable pool of information which helped me a lot in getting started.
To start my first build, I decided to go with RafalFett's 3D files and stencils and wanted to use the Humbrol color guide from Jigglenomicon. After that I started purchasing all the good that I would need and bought an Airbrush kit I would want to use.
Now it was time to start and learn new things, 3D printing was pretty new to me and before this I had never toughed an Airbrush in my life. But the results I was able to get made me pretty happy.
I do see that there is tons of room to improve, especially on the airbrushing part. But I'm sure this won't be my last build.
I've atleast learned a lot during the process, especially how to airbrush and how to NOT airbrush.
Anyway, after leeching these forums for such a long time, it is time to give back a little. So here some progress pics.
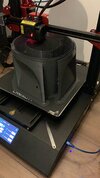
First I obviously started with the 3D print. It took about shy of 4 days and with some more printing experience, I would not print supports in the center again. This saves a lot of time and Filament.
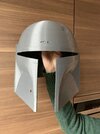
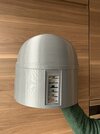
Then the tedious task of filling and sanding. I loved how easy it was to apply and sand the 3M Glazing putty. Was not sure if this was similar to the Bondo I see lot's of people use which I could not get here (read. Netherlands).
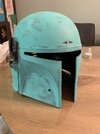
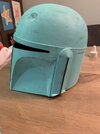
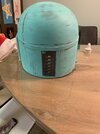
After all the work I applied Motip spray putty to even everything out. Pictures where not the final result as this was an intermediate sanding. The final result was realy smooth and waterproofed with P800 sandpaper.
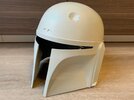
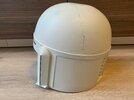
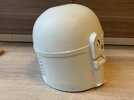
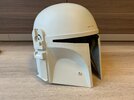
Then ready for the first coat. My god did I struggle with my first airbrush experience. But managed to get a nice coat of metallic silver after priming. And because I was curious I also created and mounted the visor. This was done with a shade 5 welding visor and the use of chicago screws.
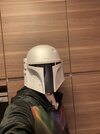
Now the cool stuff was going to happen, so started masking of the back parts and sprayed on the grey.
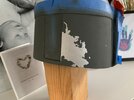
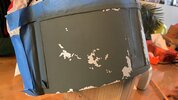
Then finished the back of with the other colors.
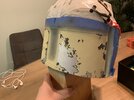
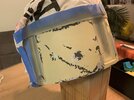
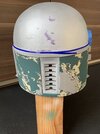
Now it was time to get the rest of the helmet in grey as well.
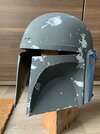
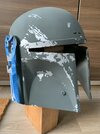
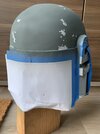
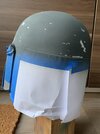
Then started adding some green and black.
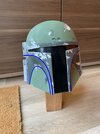
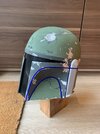
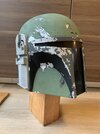
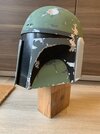
Now this really made the helmet come alive, the reds.
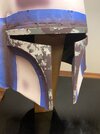
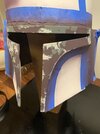
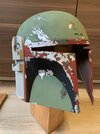
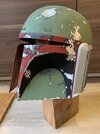
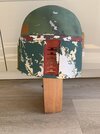
Now for the final base colors, the ears and rangefinder and killstripes.
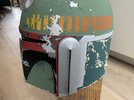
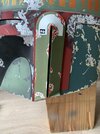
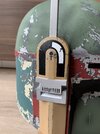
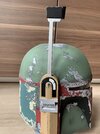
After that I painted and mounted the MQ-1 replica from that i purchased on Etsy from CStallardDesigns
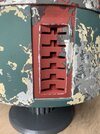
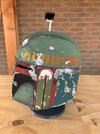
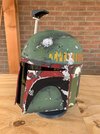
Now it was time to do some final detailing and finish of the paint work. Again, still lots to learn and improve but considering this was my first paint-job with 0 experience I'm really happy with the results. There are still some minor details i want to change but for now this is it. I hope you guys all like it and let me know if you have any suggestions or questions regarding my build.
I will now be starting on getting the electronics done for the rangefinder and will post some updates once I'm progressing (again something I have 0 experience with )
)
Here some pictures of the current result.
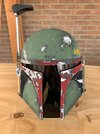
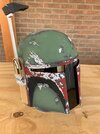
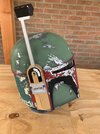
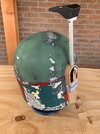
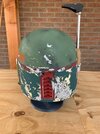
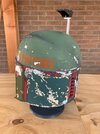
More to follow.
You can also follow me on Instagram if you like. https://www.instagram.com/eternal_fett/
For years I had the dream of building my very own Boba Fett costume and after purchasing a 3D printer in November last year (2020), I decided to finally start. I first started by leeching on this forum which I already new for quite some years. It really is valuable pool of information which helped me a lot in getting started.
To start my first build, I decided to go with RafalFett's 3D files and stencils and wanted to use the Humbrol color guide from Jigglenomicon. After that I started purchasing all the good that I would need and bought an Airbrush kit I would want to use.
Now it was time to start and learn new things, 3D printing was pretty new to me and before this I had never toughed an Airbrush in my life. But the results I was able to get made me pretty happy.
I do see that there is tons of room to improve, especially on the airbrushing part. But I'm sure this won't be my last build.
I've atleast learned a lot during the process, especially how to airbrush and how to NOT airbrush.
Anyway, after leeching these forums for such a long time, it is time to give back a little. So here some progress pics.
First I obviously started with the 3D print. It took about shy of 4 days and with some more printing experience, I would not print supports in the center again. This saves a lot of time and Filament.


Then the tedious task of filling and sanding. I loved how easy it was to apply and sand the 3M Glazing putty. Was not sure if this was similar to the Bondo I see lot's of people use which I could not get here (read. Netherlands).


After all the work I applied Motip spray putty to even everything out. Pictures where not the final result as this was an intermediate sanding. The final result was realy smooth and waterproofed with P800 sandpaper.


Then ready for the first coat. My god did I struggle with my first airbrush experience. But managed to get a nice coat of metallic silver after priming. And because I was curious I also created and mounted the visor. This was done with a shade 5 welding visor and the use of chicago screws.

Now the cool stuff was going to happen, so started masking of the back parts and sprayed on the grey.


Then finished the back of with the other colors.


Now it was time to get the rest of the helmet in grey as well.


Then started adding some green and black.


Now this really made the helmet come alive, the reds.


Now for the final base colors, the ears and rangefinder and killstripes.


After that I painted and mounted the MQ-1 replica from that i purchased on Etsy from CStallardDesigns

Now it was time to do some final detailing and finish of the paint work. Again, still lots to learn and improve but considering this was my first paint-job with 0 experience I'm really happy with the results. There are still some minor details i want to change but for now this is it. I hope you guys all like it and let me know if you have any suggestions or questions regarding my build.
I will now be starting on getting the electronics done for the rangefinder and will post some updates once I'm progressing (again something I have 0 experience with
Here some pictures of the current result.


More to follow.
You can also follow me on Instagram if you like. https://www.instagram.com/eternal_fett/
Attachments
Last edited:

