superjedi
Sr Hunter
Hi all!
So, you're one of the fortunate group who has gotten one of the amazing Generation 2 ESB helmet casts and a set of metal ears from Machinecraft Replicas. Congrats! It's certainly one of the most exciting offerings to hit the Fett community for a long time.
Now that you have your kit, what's the way forward to get those shiny metal ears ready for paint (or just display) and attach them to your helmet? Machinecraft was gracious enough to send a kit my way in order to work up a tutorial of sorts. So away we go!

HELMET PREP
I'll begin with getting the helmet ready for mounting the ears. These steps are fairly straightforward, but since not everyone has worked with kits like these, I'll include lots of pics.
The helmet cast has indications in the ear platforms where the holes for the fasteners should be. These holes were clayed over during casting, but you can see the depressions in the surface pretty easily.
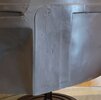
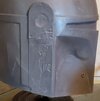
All the holes need to be opened up. Some helpful tools are small drill bits, a Dremel sanding drum, and maybe some fine grade sandpaper.
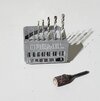
To begin with, use a small drill bit to open all the "normal" holes. There are two for the left ear, two for the lower RF ear, and four for the upper RF ear. Once they're drilled out, the ear platforms look like this.
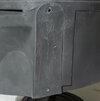
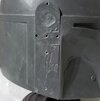
Next you'll need to open the center hole for the RF stalk, and the rectangular slot for the microswitch wiring. The method i use is to drill small holes close to each other, then sort of drag the drill bit sideways to connect the holes. Your rough cutouts will look something like this.
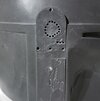
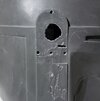
I use small jewelers files to square up the wiring slot.
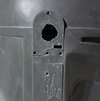
I use a Dremel sanding drum to clean up the large hole for the stalk. NOTE: the entire hole needs to be opened up to allow the stalk hex bolt to fit properly.
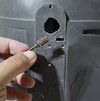
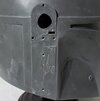
You can use some fine grit sandpaper to clean up the edges of the large hole if you like.
That's about it for helmet prep! Of course, you'll need to cut out the visor and keyslots if you're going to paint your helmet, but this thread is strictly about the ears.
EAR PREP
You can prep your ear set before doing the helmet prep. It doesn't matter at all. You do you!
As received, you'll notice that the ears have some marks from the finishing process used during machining. The marks appear as stripes or striations on the surface of the parts.
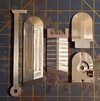
These are pretty easily cleaned up using a red Scotchbrite pad (included with the kit) and maybe some sandpaper if needed.
All it takes is a little elbow grease and some time! I spent about an hour and fifteen minutes working on them.
Use the Scotchbrite pad to rub each part down. Here's a pic of the lower RF ear as it came, and then halfway prepped. The finishing marks really have no depth to speak of, it's more of a difference in reflectivity.
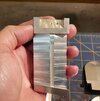
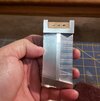
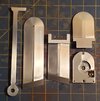
Once you've finished rubbing the part down, it attains a nice almost brushed appearance.
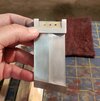
Use the same process on the remaining pieces. If you're planning to leave your ears unpainted, you may choose to take a little extra time with fine grit sandpaper, then the red Scotchbrite pad to get a more even appearance. If you're going to paint them, this probably won't be necessary.
When you're finished, your ears will look pretty snazzy!
CLEAN YOUR EARS!
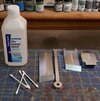
After sanding and using the red pad, do some clean up to make sure any loose particles are removed. I use rubbing alcohol and Q-tips to get into all the crevices and undercuts.
EAR MOUNTING
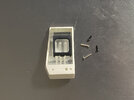
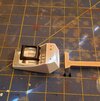
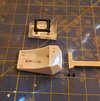
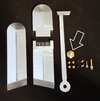
The ear kit is totally comprehensive and includes all the hardware needed to mount the ears, the stalk, and even an RF topper. Here's the complete kit with all the hardware to show where the various fasteners go.
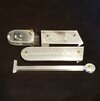
The left ear and the lower RF ear parts are attached to the helmet using the four brass "cheese head" type screws.
The upper RF ear base is attached using the two countersunk screws (one large and one small) and their mating washers and nuts.
The upper ear cap itself is attached using the two small screws that were holding the ear cap on when you unpacked the kit. They go from the inside of the helmet, through the two outer holes that you drilled in the ear platforms, as indicated here.
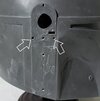
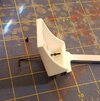
The stalk slips into the slot and is attached using the large brass hex bolt indicated below.
NOTE: It *may* be necessary to sand down the inner corner of the microswitch slightly to get the stalk to slip into place. Do a test fit before installing any fasteners.
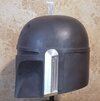
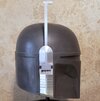
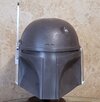
When you're finished, stand back and admire your work!
FINAL NOTES
Just a couple of things to keep in mind.
First, aluminum oxidizes very quickly. It won't be visible, but a microscopic layer of aluminum oxide can affect how paint will stick. So if you'll be painting your ears, you should mask and prime them as soon as you can after cleaning them up. Try to find a self-etching primer for metal. This will give it some "tooth" and help your color coats adhere better.
Second, if you're painting the ears, you don't want to get them super smooth. You can sand or Scotchbrite the parts that will remain bare metal to get them looking good, but on the areas that will be painted, it's better to give them a light scuffing. I generally use somewhere between 220 and 400 grit sandpaper to lightly scuff things up, clean with rubbing alcohol, then mask and prime as soon as I can.
I hope this info is helpful for you! Machinecraft Replicas has certainly produced a beautiful high quality kit, and whether you display it as is, or paint it up, it's sure to be a centerpiece in your Fett collection!
If anyone has any questions please feel free to ask. Happy Fetting!
So, you're one of the fortunate group who has gotten one of the amazing Generation 2 ESB helmet casts and a set of metal ears from Machinecraft Replicas. Congrats! It's certainly one of the most exciting offerings to hit the Fett community for a long time.
Now that you have your kit, what's the way forward to get those shiny metal ears ready for paint (or just display) and attach them to your helmet? Machinecraft was gracious enough to send a kit my way in order to work up a tutorial of sorts. So away we go!
HELMET PREP
I'll begin with getting the helmet ready for mounting the ears. These steps are fairly straightforward, but since not everyone has worked with kits like these, I'll include lots of pics.
The helmet cast has indications in the ear platforms where the holes for the fasteners should be. These holes were clayed over during casting, but you can see the depressions in the surface pretty easily.


All the holes need to be opened up. Some helpful tools are small drill bits, a Dremel sanding drum, and maybe some fine grade sandpaper.

To begin with, use a small drill bit to open all the "normal" holes. There are two for the left ear, two for the lower RF ear, and four for the upper RF ear. Once they're drilled out, the ear platforms look like this.


Next you'll need to open the center hole for the RF stalk, and the rectangular slot for the microswitch wiring. The method i use is to drill small holes close to each other, then sort of drag the drill bit sideways to connect the holes. Your rough cutouts will look something like this.


I use small jewelers files to square up the wiring slot.


I use a Dremel sanding drum to clean up the large hole for the stalk. NOTE: the entire hole needs to be opened up to allow the stalk hex bolt to fit properly.


You can use some fine grit sandpaper to clean up the edges of the large hole if you like.
That's about it for helmet prep! Of course, you'll need to cut out the visor and keyslots if you're going to paint your helmet, but this thread is strictly about the ears.
EAR PREP
You can prep your ear set before doing the helmet prep. It doesn't matter at all. You do you!
As received, you'll notice that the ears have some marks from the finishing process used during machining. The marks appear as stripes or striations on the surface of the parts.

These are pretty easily cleaned up using a red Scotchbrite pad (included with the kit) and maybe some sandpaper if needed.
All it takes is a little elbow grease and some time! I spent about an hour and fifteen minutes working on them.
Use the Scotchbrite pad to rub each part down. Here's a pic of the lower RF ear as it came, and then halfway prepped. The finishing marks really have no depth to speak of, it's more of a difference in reflectivity.


Once you've finished rubbing the part down, it attains a nice almost brushed appearance.

Use the same process on the remaining pieces. If you're planning to leave your ears unpainted, you may choose to take a little extra time with fine grit sandpaper, then the red Scotchbrite pad to get a more even appearance. If you're going to paint them, this probably won't be necessary.
When you're finished, your ears will look pretty snazzy!

CLEAN YOUR EARS!
After sanding and using the red pad, do some clean up to make sure any loose particles are removed. I use rubbing alcohol and Q-tips to get into all the crevices and undercuts.

EAR MOUNTING
The ear kit is totally comprehensive and includes all the hardware needed to mount the ears, the stalk, and even an RF topper. Here's the complete kit with all the hardware to show where the various fasteners go.

The left ear and the lower RF ear parts are attached to the helmet using the four brass "cheese head" type screws.
The upper RF ear base is attached using the two countersunk screws (one large and one small) and their mating washers and nuts.
The upper ear cap itself is attached using the two small screws that were holding the ear cap on when you unpacked the kit. They go from the inside of the helmet, through the two outer holes that you drilled in the ear platforms, as indicated here.

The stalk slips into the slot and is attached using the large brass hex bolt indicated below.
NOTE: It *may* be necessary to sand down the inner corner of the microswitch slightly to get the stalk to slip into place. Do a test fit before installing any fasteners.

When you're finished, stand back and admire your work!


FINAL NOTES
Just a couple of things to keep in mind.
First, aluminum oxidizes very quickly. It won't be visible, but a microscopic layer of aluminum oxide can affect how paint will stick. So if you'll be painting your ears, you should mask and prime them as soon as you can after cleaning them up. Try to find a self-etching primer for metal. This will give it some "tooth" and help your color coats adhere better.
Second, if you're painting the ears, you don't want to get them super smooth. You can sand or Scotchbrite the parts that will remain bare metal to get them looking good, but on the areas that will be painted, it's better to give them a light scuffing. I generally use somewhere between 220 and 400 grit sandpaper to lightly scuff things up, clean with rubbing alcohol, then mask and prime as soon as I can.
I hope this info is helpful for you! Machinecraft Replicas has certainly produced a beautiful high quality kit, and whether you display it as is, or paint it up, it's sure to be a centerpiece in your Fett collection!
If anyone has any questions please feel free to ask. Happy Fetting!

