Jango build for a member

Cruzer

Well-Known Hunter
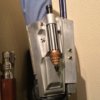
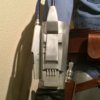
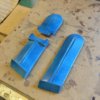
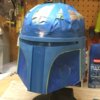
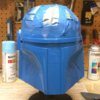
Hey guys. Just wanted to share the complete suit build I have the pleasure of currently working on for a fellow member. Luckily (because I love building these suits), I would have to say this is my 5th or 6th Jango build. So please let me know if there are any questions regarding the methods I have come to prefer on the assembly/attachment of any parts through these experiences. My two main concerns when building a suit are always as lightweight and as comfortable as possible.

I'm also excited to be working closely with someone locally in creating a very accurate and high quality leather vest, and whose attention to detail far surpasses mine. Just yesterday we were discussing recreating the slight folds seen in the leather of the shoulder/sleeve parts that appear to be created by the weight of the armor.

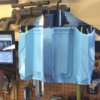
The boots are Prada, the gloves are just some old black U.S. Navy issues, and the flight suit is converted from two pairs of Red Kap coveralls. Everything else was made by me. Well on to a few pics for now...

ImageUploadedByTapatalk1425655824.990714.jpg ImageUploadedByTapatalk1425655862.710166.jpg ImageUploadedByTapatalk1428128780.721836.jpg ImageUploadedByTapatalk1428128793.007529.jpg

ImageUploadedByTapatalk1425655824.990714.jpg


ImageUploadedByTapatalk1425655862.710166.jpg


ImageUploadedByTapatalk1428128780.721836.jpg


ImageUploadedByTapatalk1428128793.007529.jpg
 
Last edited by a moderator:
Awesome work as usual if the local person on the vest works out find out if they will do a commision i need a leather vest please
 
If able could you share who built the helmet and soft parts? Luckily I already have a set of your armor in work via Sleepalot.
 
Thanks guys for the kudos, however this will hopefully be one of the many other amazing suits assembled by members here. I definitely don't have the gift for attention to fine detail like that of Seeker or Dark-Side or the numerous Boba experts on these forums.

But I do enjoy figuring out the most efficient and effective assembly processes. For example I like attaching the holster assembly to the cod armor with a single medium Chicago screw that is hidden in the middle of the d-ring holder housing and runs through the leather strap that holds the d-rings and through the cod. I've noticed this method allows the cod to comfortably shift slightly back and forth while walking. I'll try to post more pics as the build progresses.
 
If able could you share who built the helmet and soft parts? Luckily I already have a set of your armor in work via Sleepalot.
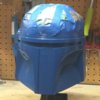
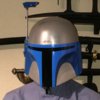
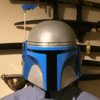
The helmet is one of my cc fiberglass casts of a BKBT Jango.

The flight suit is made from two pairs of Red Kap "postman blue" 100% cotton coveralls. The 100% cotton allows for subtle bleach lightening and/or dying, but the color on these have not been altered. The sleeves on the first pair of coveralls are made into the shorter sleeves with the bicep and tricep seam detailing added. The sleeves on the second pair of coveralls are carefully removed and added to the inside of the short sleeves for the full sleeve. If you want to be super accurate, then you'll want to add the matching seam lines to the full sleeves as well.

Other alterations would include taking off the back pockets, sewing closed the front pockets/undergarment access holes, and tapering the legs if necessary.

Hope that helps.

ImageUploadedByTapatalk1427753575.169142.jpg ImageUploadedByTapatalk1427753590.269074.jpg ImageUploadedByTapatalk1427753611.342640.jpg ImageUploadedByTapatalk1427753624.637943.jpg ImageUploadedByTapatalk1427753684.425900.jpg ImageUploadedByTapatalk1427753705.877895.jpg ImageUploadedByTapatalk1427753720.896665.jpg ImageUploadedByTapatalk1427777876.384638.jpg ImageUploadedByTapatalk1428126861.666534.jpg
 
Last edited by a moderator:
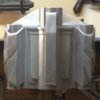
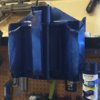
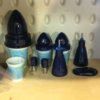
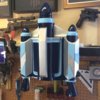
The jetpack I'm using is a FettSeven design. It's a quality jetpack for the price that allows the buyer to determine how they would like to attach all of the parts. The suggested thruster assembly seemed more fragile than I was comfortable with, so I came up with this solution. I cut the slip caps at a 10 degree angle using a table saw and securing them to the wood block seen in the pic with a screw to keep my fingers safe. The only step I forgot to document with a pic was the fact I used a 1-1/16" forstner bit to create a recessed hole at the top of the thrusters to glue the pvc plugs into place after grinding down their flared bases. The only glue used was Satellite City's yellow label CA glue.

I also filled the small nose cones with some lightweight resin in order to give the hanger bolts something to grab on to and help give them a solid feel. This added a few ounces to the total weight of the pack, but I didn't mind because whoever made this jetpack did a great job of keeping it light but sturdy.

Update:
I had to switch the machine screws on the thrusters to 3", and the hanger bolts in the side knobs to 2"

ImageUploadedByTapatalk1425911287.254555.jpgImageUploadedByTapatalk1425911464.664662.jpg ImageUploadedByTapatalk1425911489.633577.jpg ImageUploadedByTapatalk1425911518.289115.jpg ImageUploadedByTapatalk1425911561.340394.jpg ImageUploadedByTapatalk1425911597.109726.jpg ImageUploadedByTapatalk1425911656.381669.jpg ImageUploadedByTapatalk1425911674.853820.jpg ImageUploadedByTapatalk1425911688.417124.jpg ImageUploadedByTapatalk1425911701.936647.jpg ImageUploadedByTapatalk1425911718.236315.jpg ImageUploadedByTapatalk1425911744.239001.jpg ImageUploadedByTapatalk1425911757.007027.jpg ImageUploadedByTapatalk1425963061.367128.jpg ImageUploadedByTapatalk1425963361.939315.jpg ImageUploadedByTapatalk1425963120.235625.jpg ImageUploadedByTapatalk1425963133.704637.jpg ImageUploadedByTapatalk1427752368.245975.jpg ImageUploadedByTapatalk1427752380.809922.jpg ImageUploadedByTapatalk1427752395.911282.jpg ImageUploadedByTapatalk1428088753.542346.jpg ImageUploadedByTapatalk1428089288.512279.jpg ImageUploadedByTapatalk1428089484.642365.jpg

ImageUploadedByTapatalk1425911287.254555.jpg


ImageUploadedByTapatalk1425911464.664662.jpg


ImageUploadedByTapatalk1425911489.633577.jpg


ImageUploadedByTapatalk1425911518.289115.jpg


ImageUploadedByTapatalk1425911561.340394.jpg


ImageUploadedByTapatalk1425911597.109726.jpg


ImageUploadedByTapatalk1425911656.381669.jpg


ImageUploadedByTapatalk1425911674.853820.jpg


ImageUploadedByTapatalk1425911688.417124.jpg


ImageUploadedByTapatalk1425911701.936647.jpg


ImageUploadedByTapatalk1425911718.236315.jpg


ImageUploadedByTapatalk1425911744.239001.jpg


ImageUploadedByTapatalk1425911757.007027.jpg


ImageUploadedByTapatalk1425963061.367128.jpg


ImageUploadedByTapatalk1425963120.235625.jpg


ImageUploadedByTapatalk1425963133.704637.jpg


ImageUploadedByTapatalk1425963361.939315.jpg


ImageUploadedByTapatalk1427752368.245975.jpg


ImageUploadedByTapatalk1427752380.809922.jpg


ImageUploadedByTapatalk1427752395.911282.jpg


ImageUploadedByTapatalk1428088753.542346.jpg


ImageUploadedByTapatalk1428089288.512279.jpg


ImageUploadedByTapatalk1428089484.642365.jpg
 
Last edited by a moderator:
Don't let him kid you folks! His attention to detail is top notch.

Very nice work on this! I can vouch your method of attaching all the cod, ammo, holsters, and thighs. It makes it so easy to put on and troop.
 
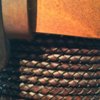
Tried something I've always wanted to attempt, but had to wait until I was working on my own girth belt in case it was a fail. Sprayed an initial base of EcoFlo Dk Mahogany to try and capture some of the burgundy hue seen in the C2 reference pics. Followed it up with a generous sprayed coat of 1/1 parts of Bison Brown & Range Tan. Then brushed a generous layer of 1/1 parts Java Brown & Fudge Brown All-in-one to get deep in the nooks and crannies. Then took a cloth with some solvent and wiped the surface to take off some of the "dark" tone; followed by brushing it with a soft wire brush to further bring out the color, highlight the high spots from the lows, clean out the grime between the braids, and scratch it up a little. I think I'm happy with the results.

ImageUploadedByTapatalk1428373055.565982.jpg ImageUploadedByTapatalk1428373070.028629.jpg ImageUploadedByTapatalk1428373081.796675.jpg ImageUploadedByTapatalk1428450769.641556.jpg ImageUploadedByTapatalk1428450844.496158.jpg ImageUploadedByTapatalk1428450874.332860.jpg ImageUploadedByTapatalk1428450888.299943.jpg ImageUploadedByTapatalk1428450902.851032.jpg

ImageUploadedByTapatalk1428373055.565982.jpg


ImageUploadedByTapatalk1428373070.028629.jpg


ImageUploadedByTapatalk1428373081.796675.jpg


ImageUploadedByTapatalk1428450769.641556.jpg


ImageUploadedByTapatalk1428450844.496158.jpg


ImageUploadedByTapatalk1428450874.332860.jpg


ImageUploadedByTapatalk1428450888.299943.jpg


ImageUploadedByTapatalk1428450902.851032.jpg
 
Last edited by a moderator:
This thread is more than 3 years old.

Your message may be considered spam for the following reasons:

  1. This thread hasn't been active in some time. A new post in this thread might not contribute constructively to this discussion after so long.
If you wish to reply despite these issues, check the box below before replying.
Be aware that malicious compliance may result in more severe penalties.
Back
Top