Crabbyginger Jango Fett build WIP

crabbyginger10

New Hunter
I met up with my local 501st at an event which sparked my interest in creating the Jango Fett build who was my childhood hero. I will be posting my progress. Please let me know if there are better ways and techniques i can improve on. Going to be 3D printing the armor on my bambu lab P1S with ABS.

Part sourcing list:
-Jango Fett Armor Files: Minutefett
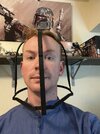
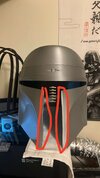
-Jango Fett Helmet Files: Mysterymakers
-Jetpack: Minutefett
-Flightsuit: Arkady designs (ordered)
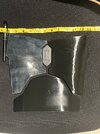
-Boots: Crowprops Jango Short Boots
-Gloves:
-Flak Vest: Delta Leatherworks
-Girth Belt: Delta Leatherworks
-Westar 34 Holsters: Delta Leatherworks
-Ammo belt: Delta Leatherworks
 
Goodluck, you got a solid list so far. I love my Arkady suit and the boots are AMAZING. Iast thing im held up on is a jetpack right now. 3D printing the armor will be difficult. I first did that then I switched to cold cast from boba maker. Reason being when I went trooping the difference was astonishing. The finish of the cold cast looks killler. The rub and buff works decent but nothing like boba makers quality. So I would start out with the helmet first and see if you like it.
 
-Flightsuit by Arkady Designs was delivered on the 14th and looks like a pretty good fit!
-Gauntlet sizing i am running into a scaling problem of it looking too long. Printed minutefetts right gauntlet at 105% scale. Was advised to have wiggle room inside the gauntlet for the flightsuit as well as padding. The gauntlet takes up almost the entire forearm instead of 3/4s from looking at others so i will need to figure out how to scale it down about an inch on one axis.
-Printed Mystermakers helmet frame to get a size reference prior to printing the helmet. Printed at 100% and it was slightly too small so i went with 105% and it looked much better, with plenty of room for padding and other internals i want to add down the road.
-Helmet itself: first time printing with ABS so had a bunch of lessons learned about warping and bed adhesion. The front of the helmet was the first piece and i am going to reprint it. I broke the file down into three parts being the top, back and front. I used bambu studios as the slicing software and when i cut the helmet into pieces, i installed pins for when i go to attach them to help with alignment. My plan is to make an abs slurry after i reprint the front to adhere the three pieces together and i am going to use a 3d print pen to help weld the seams. I thought about attempting vapor smoothing but i want to try to use UV resin to smooth asides along with sanding.
-I got a roll of PETG to experiment with from a friend and printed the chest and ab pieces. 90% scaled is what i went through and after dialing down PETG and borrowing their print profile it came out pretty good. One of the 501st members at the armor party showed me how to use UV resin to smooth so i ordered some UV resin off amazon along with a UV flashlight.
 

Attachments

  • IMG_5853.jpeg
    IMG_5853.jpeg
    1.2 MB · Views: 21
  • IMG_5870.jpeg
    IMG_5870.jpeg
    1.2 MB · Views: 18
  • IMG_5872.jpeg
    IMG_5872.jpeg
    1.3 MB · Views: 16
  • IMG_5874.jpeg
    IMG_5874.jpeg
    1.1 MB · Views: 19
  • IMG_5873.jpeg
    IMG_5873.jpeg
    1.2 MB · Views: 15
  • IMG_5897.jpeg
    IMG_5897.jpeg
    299.1 KB · Views: 15
  • IMG_5898.jpeg
    IMG_5898.jpeg
    2.1 MB · Views: 19
Love my Arkady flight suit. I was surprised to find out she’s less than 20 minutes away from me.

I want to dye mine. But too scared to touch it. Have a lot of time tied up in mine.
 

Your message may be considered spam for the following reasons:

If you wish to reply despite these issues, check the box below before replying.
Be aware that malicious compliance may result in more severe penalties.
Back
Top