Iron's ROTJ WIP

**UPDATE**
I received word back from Boba Maker that my damaged "ROTJ Helmet V4" has made it's way across international waters and is held up with Customs. Customs got a hold of Boba Maker and had questions about my package to him (Not sure why... :unsure:
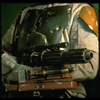
) However, when I asked for the re-cast, which again he kindly agreed to do. Daz, came back this week and he said he released his newer "ROTJ Helmet VX" (I had the "ROTJ Helmet V4" variant) and gave me the option to upgrade to that one instead of the V4 version. It's currently on his website but here is what his VX helmet looks like.....
Boba Maker ROTJ Helmet VX.jpg


I replied to him saying that I would most definitely prefer that version instead. (y) The additional damage alone would be worth it, not to mention the visor update also saves me the hassle of sourcing out a way to secure it.

Lazerjock - Now I have that Dremel "Flex-Shaft(y)" attachment and associated bits that I will not be using.....at least for this project. Now that I think about it, I'll be able to still use it for that '95 Don Post Helmet that I wanted to finish. So, maybe it's NOT a waste after all.

But all in all - quite the upgrade in helmet I'll be getting! What do you guys think about his new version?

-Iron
 
Just doing another update, this time I've been working on my Gauntlets......specifically my Left Gauntlet. I've completed it.....let me know your thoughts. My goal is to have my Right Gauntlet completed by this weekend. I have to blame work and family life for the delay. But I'm in total "Boba Mode" this weekend.
View attachment 197187
View attachment 197188
View attachment 197189
View attachment 197190
View attachment 197191

Using my Airbrush I sprayed on some Tamiya X-11 (Silver) as my base, then liquid mask'd it all and then sprayed on some Vallejo "Game Color" paint called "Gory Red". I did zero mixing of this paint (except for some Vallejo Airbrush Flow Improver) as I felt the color looked great right out of the bottle. (y)

The Metal Gauntlet Darts were supplied by QuestDesignCanada and were installed using my new favorite tool - Gorilla Hot Glue Sticks!

-Iron
Looking good! Especially the extra weathering in black. Very subtle. Very nice touch!
 
Hey guys,
Finally got the Left Gauntlet done this weekend. I gotta say there's a lot more involved I thought than the Right Gauntlet. But here it is!
Left Gauntlet 1.jpg

Left Gauntlet 2.jpg

Left Gauntlet 3.jpg

Left Gauntlet 4.jpg


....And both together! (y)
Left Gauntlet 5.jpg


And for those that wonder about the LED on this Gauntlet. I hot glued the LED in place and then used a few drops of super glue for wire management and to mount the on/off switch. The 9V Duracell is mounted via velcro in the Flamethrower housing. (y)
Left Gauntlet 6.jpg


Let me know whatcha guys think! Next on the chopping block is the AprilStormProps EE-3 and using that Smooth-On "XTC-3D" product. (y)

....more to come!

-Iron
 
Hey guys,
Finally got the Left Gauntlet done this weekend. I gotta say there's a lot more involved I thought than the Right Gauntlet. But here it is!
View attachment 197410
View attachment 197411
View attachment 197412
View attachment 197413

....And both together! (y)
View attachment 197414

And for those that wonder about the LED on this Gauntlet. I hot glued the LED in place and then used a few drops of super glue for wire management and to mount the on/off switch. The 9V Duracell is mounted via velcro in the Flamethrower housing. (y)
View attachment 197415

Let me know whatcha guys think! Next on the chopping block is the AprilStormProps EE-3 and using that Smooth-On "XTC-3D" product. (y)

....more to come!

-Iron

Are you aiming for 501st approval still? If yes, the ROTJ Hero gauntlets have a different damage pattern.
 

Attachments

  • B8D2B019-06C6-4FBF-AF03-8D1CDFA2D38C.png
    B8D2B019-06C6-4FBF-AF03-8D1CDFA2D38C.png
    5.4 MB · Views: 145
  • FE6389B8-C0B5-415E-8BD8-42A0BAE3B22D.png
    FE6389B8-C0B5-415E-8BD8-42A0BAE3B22D.png
    5.9 MB · Views: 133
roger12RAMJET
Right now, I am not looking for 501st approval. But the damage was eyeballed using their photo. Thanks for your opinion. (y)

-Iron
I hate to harp on this point, and I am fully aware you're not seeking 501st approval, hence rendering my next comment as inconsequential. However, I must clarify the photos in the CRL for both gauntlets reflect the correct Hero weathering as roger12RAMJET shared.
 
I hate to harp on this point, and I am fully aware you're not seeking 501st approval, hence rendering my next comment as inconsequential. However, I must clarify the photos in the CRL for both gauntlets reflect the correct Hero weathering as roger12RAMJET shared.

tennantlim
Understood, and I appreciate the feedback. Just so everyone's aware I based the paint damage on these two older CRL photos (Which are I know are NOT current and out of date now)
Right Gauntlet.jpg

Left Gauntlet.jpg


Again I know Fett's costume is and probably will never be 100% accurate as they keep finding new things on his costume daily. But as a first pass on these.....I'd have to say they are not a bad first start. I may look into it a bit later in stripping these back down and re-doing them. But for now, I'm happy with em'
1598973783244.png


-Iron

......and just as a curiosity, does anyone have any 501st CRL photos that pre-date the ones from above?
 
Last edited:
I love the wire management for the LED!! Details like that really impress me being the AR person I am. LOL

Lazerjock
As a former "Low-Voltage Cable Installer" of CAT3, CAT5e & CAT6 networks (10 years experience - 1995 to 2005) I also appreciate good cabling skills. Very often when I walk into buildings that have open ceilings, I'll look up and check out folks cabling work.
(y)

-Iron
 
Hey folks,
Just an update.....

The EE-3 is still ongoing, the wife had me out all day today running errands. However, I was able to get around to my Girth Belt. I know a few of you had interest in how the elastic would hold up on it. I'm pleased to say that after a 3.5 mile walk with my dog, it survived well! The Girth Belt hugged me the whole way and didn't slip an inch. (y) And strangely no one even looked at me funny for wearing it out. :unsure:

In addition, I also installed grommets on it to prevent any further unwanted tearage on the band. I know this is NOT a 501st thing you should do, if you are looking for acceptance. But for me I was fine with it. I may go over it carefully with a brush of black paint. If you're looking to do it and argue with them over it.....well, it doesn't say you can't have a grommet on there either. Hehehe! ;) But as we all know it is up to your local Garrison as to what is acceptable and what is not.

Here is what it looks like buckled up, I know I'd probably get dinged from the five-oh-one on the whole 3-4 inch gap from buckle to buckle - but so be it. I'm in the process of getting there. ;) I'm doing P90x and running a couple miles every other day is kicking my butt too.
Girth Belt Buckled Up.jpg


Here is a better view of that grommet...
Girth Belt Grommet.jpg


Again, I thought it'd be very hard to tell the difference between the Elastic Band and Nylon Strap from afar, not to mention the fact that the ammo belt will most likely cover it up anyways, Below is a comparison of the two...
Elastic Band vs Nylon Strap.jpg


And here is the grommet kit I used to install the grommets.....
Grommet Install Kit.jpg

I got the kit from Lowe's for $8.00 and it came with the Copper, Brass and Chrome Grommets. The darker grommet on the far right I found at Michael's and liked the fact that it was darker. It also crimped nicely with the kit. Again I may hit it with some black paint later but for now it's acceptable to me. And, later if I decide to go 501st....this solution is not permanent as I can simply cut it off and go Nylon Straps.
(y)

-Iron
 
Last edited:
I can't believe you went out walking your dog with the girth belt and no one batted an eye!
They probably thought it was some new fashion fad. LOL You may have started something. Next everyone will be doing it.
 
Hey Folks,
Just an update, As you may be aware I'm starting the process of getting my EE-3 smoothed out via a product called XTC-3D by Smooth-On. So far, I'm really liking how this product is taking. I completely messed up the mixing ratios as it is 2 part system (Part A & Part B), it is a 2:1 mixing ratio. I got them bottles to mix, reversed. But thankfully it wasn't that bad, it is just gonna take a while for this stuff to harden. The Barrel is what I started with last night and it is still a bit tacky 24 hours later. But I did the pistol grip, and rifle butt today with correct ratios and it is solid! And while it dried on a glossy and clear, it is hard to tell just from a picture if the PLA lines are gone, BUT I can tell from handling it, that when I paint it, we shouldn't see any indication of PLA/ABS Print Lines. (y) More to come on that.

I did however make a few boxes out of cardboard for my Arkady Hip Pouches and Thigh Pockets on the Flightsuit. I had a Lowe's Medium Heavy Duty Box and decided to cut it up for the pieces. The dimensions of the boxes I made are:
Hip Pouches: 6 Inches Long by 6 Inches Wide by 1.5 Inches Deep.
Thigh Pockets: 6.5 Inches Long by 5.5 Inches Wide by 1.5 Inches Deep.

Here's that box I used, I just wanted something that would hold up well.....
Lowe's Medium Box.jpg


Here is the Boxes I created. (I made two of each ;))
Boxes.jpg


Here they are fitted in the Hip Pouches....
Hip Pouches.jpg


And here they are on my Flight Suit.....
Flight Suit Thigh Pockets.jpg


I'm not sure if this is what everyone's doing, but is what I decided on. (y)

-Iron
 
Iron I'm not criticizing just wanted to give my opinion. I think your pockets look too perfect.

I used soft foam like you would find in a camera case. I cut the pieces so the pockets didn't look full or empty but like there was stuff in them. I cut the edges of the foam with a bevel to avoid hard corners. The right thigh pocket actually does hold the speaker for my helmet mic as well as a small piece of foam.

I want to see the EE-3 work in progress.
 
I used foam in mine as well. I used 1” foam and folded them in half creating a pocket. I keep the battery pack for my chest lights in my left hip pocket, my phone in my right. For the thigh pockets, I put in some jingle bells to simulate the spurs sound even though I know you can’t hear any in ROTJ like you can in ESB.
 
Iron I'm not criticizing just wanted to give my opinion. I think your pockets look too perfect.
I used soft foam like you would find in a camera case. I cut the pieces so the pockets didn't look full or empty but like there was stuff in them. I cut the edges of the foam with a bevel to avoid hard corners. The right thigh pocket actually does hold the speaker for my helmet mic as well as a small piece of foam.
I want to see the EE-3 work in progress.

Lazerjock
Nope......constructive criticism is always welcome. We all strive to be that better Boba I should think. (y) I love the idea of foam... You can cut it in ways that would seem to be "Not-So-Perfect". I fully intend to have my Hip Pouch be where I stash my Voice Amp. Got a pic of what your look like?

I used foam in mine as well. I used 1” foam and folded them in half creating a pocket. I keep the battery pack for my chest lights in my left hip pocket, my phone in my right. For the thigh pockets, I put in some jingle bells to simulate the spurs sound even though I know you can’t hear any in ROTJ like you can in ESB.

ShortFuse
Just so happens I have a sheet of 1" thick foam too, that I was meaning to get fixed to my gauntlets so they stay put! Nice idea on the jingle bells for that spur noise too.(y) That does it, I'm totally ditching that idea of using them boxes now.

Thanks guys!

-Iron
 
This thread is more than 3 months old.

Your message may be considered spam for the following reasons:

  1. This thread hasn't been active in some time. A new post in this thread might not contribute constructively to this discussion after so long.
If you wish to reply despite these issues, check the box below before replying.
Be aware that malicious compliance may result in more severe penalties.
Back
Top