Jetpackfett
Hunter
So last night I ordered the last major piece for my build and with that I think it’s finally time to start up a WIP. I initially started fett over a year ago trying to scratch build, but as I became more obsessed I quickly realized that wouldn’t cut it in the accuracy department for me. I have since been ordering and beginning to piece everything together so here’s my parts list.
Helmet-EFX
Armor-minutefett anniversary edition(still on the way but should be here sometime in the next month or so)
Flight suit-Carole-(also still on the way, probably won’t be here till the summer)
Braids-woodman
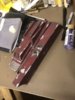
Cape-woodman
Flak Jacket & neck seal- one of the few pieces still scratch built, made by my grandmother who used to be a seamstress
Gauntlets-MOW
Gloves-Boba Maker
Jetpack harness-Big Dane
Jetpack-Froflo
Girth belt-MOW
Ammo Belt-Handmade Horror Shop
Shin tools-real Patterson squeegee
Boots-Imperial Boots
Helmet-EFX
Armor-minutefett anniversary edition(still on the way but should be here sometime in the next month or so)
Flight suit-Carole-(also still on the way, probably won’t be here till the summer)
Braids-woodman
Cape-woodman
Flak Jacket & neck seal- one of the few pieces still scratch built, made by my grandmother who used to be a seamstress
Gauntlets-MOW
Gloves-Boba Maker
Jetpack harness-Big Dane
Jetpack-Froflo
Girth belt-MOW
Ammo Belt-Handmade Horror Shop
Shin tools-real Patterson squeegee
Boots-Imperial Boots
Last edited:
")
