Tom Walker
New Hunter
Today I attempted to tackle Jango's heat issues... Quite successfully if I do say so myself!
I drew up and 3D printed some parts to fit the Blower fan I have.

These parts attached to each end of some spare Boba Fett gauntlet hose I had.

One of the 3D printed parts was glued onto the blower fan and sealed round with silicone.

I mounted the fan onto a piece of Foamex and stuck on some Velcro. I wanted all the mechanical parts to be easily removable just in case they ever need maintenance.

The fan was Velcroed (Is that a word?) behind the vent in the back of the helmet and covered in foam for a bit of sound insulation. The hose, luckily, fit nicely between the head harness and the helmet and was Velcroed into place. The 3D printed part on the other end of the hose was to spread the flow of air across my face a little better. The fan was then connected up to a switch and then to a powerbank. These were also attached with Velcro.

The end result was pretty successful, I now have a nice cool breeze blowing around my face!
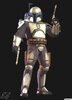
Also here's a quick Photoshop I did... (Which is now also my desktop background). If anyone can do a better one, that'd be great!

I drew up and 3D printed some parts to fit the Blower fan I have.
These parts attached to each end of some spare Boba Fett gauntlet hose I had.
One of the 3D printed parts was glued onto the blower fan and sealed round with silicone.
I mounted the fan onto a piece of Foamex and stuck on some Velcro. I wanted all the mechanical parts to be easily removable just in case they ever need maintenance.
The fan was Velcroed (Is that a word?) behind the vent in the back of the helmet and covered in foam for a bit of sound insulation. The hose, luckily, fit nicely between the head harness and the helmet and was Velcroed into place. The 3D printed part on the other end of the hose was to spread the flow of air across my face a little better. The fan was then connected up to a switch and then to a powerbank. These were also attached with Velcro.
The end result was pretty successful, I now have a nice cool breeze blowing around my face!
Also here's a quick Photoshop I did... (Which is now also my desktop background). If anyone can do a better one, that'd be great!


")
 Reminds me of the Game "Star Wars Bounty Hunter".
")