So, I've searched high and low and couldn't for the life of me find a Diagram or "How To" video on how to properly thread the webbing into the US Divers Belt. OK, let me rephrase, I couldn't find a Diagram or "How To" video on how to properly thread webbing into a 2-Slot US Divers Belt Buckle. Which is what I have...

There seems to be plenty for 3-Slot versions, just none of the 2-Slot variants. I've seen some that have all 3 slots up front and others that have 2 slots up front and 1 slot in the back. Mine just has the 2-Slots up front, and that's it! So I've taken the liberty of developing my own method and wanted to get your guys' thoughts.
The other concern I have is that the seatbelt material if you route just 2 instances of webbing through the clasp and clamp it down, it holds, but not very good. I can use about 15% of strength and easily pull them both out. However, if I route 3 instances of webbing through the clasp and clamp it down. I can use my full force of strength and it doesn't come apart at all. (Hell, I may even be willing to trust my life to it - ok, maybe NOT!) And even when you clamp it down, it has that feel to it, like it is just right. Now, I'm not saying that I need that level of strength from this buckle but I certainly don't want this coming loose on me and jangling by my side during a troop either - which is probably semi-embarrassing I would think. I'm just wanting a way to do this where there is none of that nonsense.
But here is my idea for my 2-Slot Buckle, and it'd require a little sewing...
(Steps 1 thru 4 are for the buckle that the strap will be sewn onto)
(Steps 5 thru 9 are for connecting the other strap to the buckle)
Step 1: For reference, I'm calling out the slots as such "Slot 1" and "Slot 2".
Step 2: From underneath insert your left-hand strap into slot 2.
Step 3: Insert your strap so that it goes out the back of the buckle.
Step 4: Go back underneath the buckle and where you see my thumb and index finger, sew the strap together with reinforced sewing techniques.
Step 5: Insert your right-hand side strap into the buckle from the back.
Step 6: Take the strap and go into Slot 1 and out the front.
Step 7: Pull and tighten your strap to your comfort level and fold it back over the front of the buckle.
Step 8: Push it through the back and pull the excess tight.
Step 9: Close the buckle clasp.

Once Steps 1 thru 4 are complete, you'll never have to worry about it again. Then it is just doing Steps 5 thru 9 every time you get suited up. And with 3 instances of webbing material routed through the buckle, believe you me, for this particular US Divers buckle, it shan’t come undone. I realize Scuba Divers probably do NOT do it this way. In fact, many of the Scuba Divers articles and blogs I've briefly researched, claimed that Divers should have another one ready to go in your backup bag/kit in the event they’d ever need to change it out. Suggesting that they don't sew theirs on. Sewing it on at least you don't have that worry about losing it, should it come loose and fall off during a troop. And secondly, I don't plan on taking my Boba Fett costume deep sea diving - Hahaha. The more and more I try to research this, the more and more it sounds like there is no wrong way to eat this Reese's....

....kinda cool that back in 1980 Reese's Peanut Butter Cups had Star Wars collector cutout pictures on the back of their packages. I betcha even Stephen Sansweet doesn't have this at Rancho Obi-Wan! (or maybe he does)

Best,
-Iron
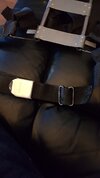
P.S. I'm aware that the webbing material shown in the photographs is not the correct seatbelt style webbing, which I do have, and is coincidentally the same thickness as my roll of vintage seatbelt webbing material. The material shown in the pictures above is from the seller who sold me the Big Dane Jetpack Harness. I’ve since cut it all off and removed it from the frame.
There seems to be plenty for 3-Slot versions, just none of the 2-Slot variants. I've seen some that have all 3 slots up front and others that have 2 slots up front and 1 slot in the back. Mine just has the 2-Slots up front, and that's it! So I've taken the liberty of developing my own method and wanted to get your guys' thoughts.
The other concern I have is that the seatbelt material if you route just 2 instances of webbing through the clasp and clamp it down, it holds, but not very good. I can use about 15% of strength and easily pull them both out. However, if I route 3 instances of webbing through the clasp and clamp it down. I can use my full force of strength and it doesn't come apart at all. (Hell, I may even be willing to trust my life to it - ok, maybe NOT!) And even when you clamp it down, it has that feel to it, like it is just right. Now, I'm not saying that I need that level of strength from this buckle but I certainly don't want this coming loose on me and jangling by my side during a troop either - which is probably semi-embarrassing I would think. I'm just wanting a way to do this where there is none of that nonsense.
But here is my idea for my 2-Slot Buckle, and it'd require a little sewing...
(Steps 1 thru 4 are for the buckle that the strap will be sewn onto)
(Steps 5 thru 9 are for connecting the other strap to the buckle)
Step 1: For reference, I'm calling out the slots as such "Slot 1" and "Slot 2".
Step 2: From underneath insert your left-hand strap into slot 2.
Step 3: Insert your strap so that it goes out the back of the buckle.
Step 4: Go back underneath the buckle and where you see my thumb and index finger, sew the strap together with reinforced sewing techniques.
Step 5: Insert your right-hand side strap into the buckle from the back.
Step 6: Take the strap and go into Slot 1 and out the front.
Step 7: Pull and tighten your strap to your comfort level and fold it back over the front of the buckle.
Step 8: Push it through the back and pull the excess tight.
Step 9: Close the buckle clasp.
Once Steps 1 thru 4 are complete, you'll never have to worry about it again. Then it is just doing Steps 5 thru 9 every time you get suited up. And with 3 instances of webbing material routed through the buckle, believe you me, for this particular US Divers buckle, it shan’t come undone. I realize Scuba Divers probably do NOT do it this way. In fact, many of the Scuba Divers articles and blogs I've briefly researched, claimed that Divers should have another one ready to go in your backup bag/kit in the event they’d ever need to change it out. Suggesting that they don't sew theirs on. Sewing it on at least you don't have that worry about losing it, should it come loose and fall off during a troop. And secondly, I don't plan on taking my Boba Fett costume deep sea diving - Hahaha. The more and more I try to research this, the more and more it sounds like there is no wrong way to eat this Reese's....
....kinda cool that back in 1980 Reese's Peanut Butter Cups had Star Wars collector cutout pictures on the back of their packages. I betcha even Stephen Sansweet doesn't have this at Rancho Obi-Wan! (or maybe he does)
Best,
-Iron
P.S. I'm aware that the webbing material shown in the photographs is not the correct seatbelt style webbing, which I do have, and is coincidentally the same thickness as my roll of vintage seatbelt webbing material. The material shown in the pictures above is from the seller who sold me the Big Dane Jetpack Harness. I’ve since cut it all off and removed it from the frame.
Last edited:
")