Hi everyone,
I figured it was time for me to start keeping track of my ESB Boba Fett build in a thread.
Thanks for looking!
-Steven
Components in Orange are still needed:
Helmet - FPH2 by WastedFett (June 2018)
Helmet Paint Job - superjedi (February 2020)
Helmet T Visor - Deluxe FP Visor (June 2018)
Helmet MQ-1 Circuit Board - Found part from EmperorFett (January 2020)
Helmet Honeywell Micro Switch - Amazon (January 2020)
Helmet Rangefinder - Terminal Fettler Resin (January 2020)
Helmet Rangefinder Light with Micro Switch Kit - Jc27 Fettinator Industries (March 2020)
Helmet Rangefinder Servo Kit $175- Fettinator Industries (March 2020)
Helmet Hollow Rangefinder Stalk for Metal Ears (Included with Metal Ears) - Machine Craft Replicas (January 2020)
Helmet Metal Ears - Machine Craft Replicas (January 2020)
Helmet Metal Borden - Machine Craft Replicas (April 2019)
Helmet Fans - Henry's Helmet Fans (February 2020)
Helmet Suspension Straps US Military PASGT - eBay (April 2019)
Helmet Chin Cup - Vintage Made in England (May 2020)
Balaclava - Etsy Crochet And More By Gigi (February 2020)
Hero Armor - WastedFett
Chest Armor- WastedFett (May 2019)
Cod Piece- WastedFett (May 2019)
Kidney Armor- WastedFett (May 2019)
Back Armor- WastedFett (May 2019)
Shoulder Armor Lineage- MinuteFett (Estimated March 2020)
Knee Armor- WastedFett (May 2019)
Knee Darts - Machine Craft Replicas (October 2019)
Armor Collar Studs - Machine Craft Replicas (October 2019)
Chest Armor Light Display - Fettronics (October 2019)
Jetpack - Darth Vorhees V3 (July 2019)
Jetpack Harness V2 - Big Dane (June 2019)
Jetpack Harness US Divers Vintage Belt Buckle - eBay (July 2019)
Jetpack Harness Belt Polyester Webbing 2" - Strapworks (July 2019)
Jetpack Beacon - Machine Craft Replicas (January 2020)
Jetpack Beacon Lighting Kit - Fettinator Industries (February 2020)
Jetpack Stabilzier - Machine Craft Replicas (January 2020)
Jetpack Vent (Round) - Machine Craft Replicas (January 2020)
Jetpack Thruster Side Greeblies - Machine Craft Replicas (January 2020)
Jetpack Thruster Front Greeblies - Machine Craft Replicas (January 2020)
Jetpack Thruster Discs - Machine Craft Replicas (January 2020)
Jetpack Micro Mega Dental File- 01Hawk (February 2020)
Jetpack Hooks and Clips - Full Metal Fett (Received July 2019)
Gauntlet Kit - MinuteFett (March 2020)
Left Gauntlet- MinuteFett (March 2020)
Left Gauntlet Glenross Dental Expander Screw Replica Polished Gold Steel - CSB Props on Shapeways (Ordered February 2020)
Left Gauntlet Keypad- MQ-1 (February 2020)
Left Gauntlet Rocket Copper Tip - Machine Craft Replicas (March 2020)
Right Gauntlet- MinuteFett (March 2020)
Right Gauntlet Whipcord Housing Knobs- MinuteFett (March 2020)
Gauntlet Micro Mega Dental Files 1 Fat Silver and 1 Fat Red- 01Hawk (February 2020)
Right Gauntlet Darts- June 2020
Right Gauntlet Ever Ready Light - June 2020
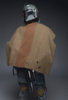
Cape - Boba87Fett
Wookie Braids - Woodman
Flak Vest - Arkady
Neck Seal (Attached to Flight Suit) - Arkady
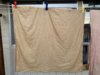
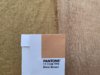
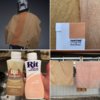
Flight Suit (One Piece) - Arkady
Girth Belt - Woodman
Leather Ammo Belt - Woodman
Vinyl Ammo Belt - HandmadeHorrorShop on Etsy
Hip Pouches - Arkady
Gloves - Mike M
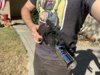
Sidearm Holster - BobaMaker
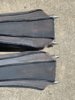
Shin Tool Sonic Beam Weapon - Paterson Squeegee from B&H
Shin Tool Anti-Security Blade- Paterson Squeegee from B&H
Shin Tool Survival Knife - Paterson Stirrer
Shin Tool Jetpack Adjustment Tool - MachineCraft Replicas
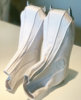
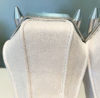
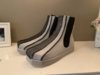
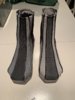
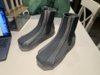
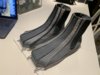
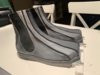
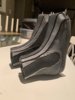
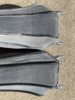
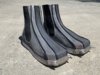
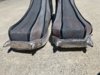
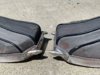
Boots - WastedFett Size 11.5
Boot Spikes - Machine Craft Replicas
Optional Accessories
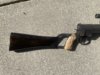
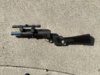
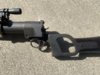
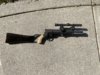
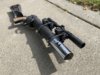
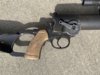
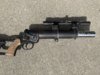
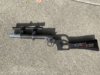
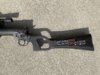
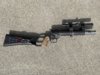
ESB EE3 Blaster - Sidewinder
Vintage Heiland Syncronar 2 Cell - eBay
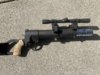
ESB Sidearm Pulce - BobaMaker (March 2019)
I figured it was time for me to start keeping track of my ESB Boba Fett build in a thread.
Thanks for looking!
-Steven
Components in Orange are still needed:
Helmet - FPH2 by WastedFett (June 2018)
Helmet Paint Job - superjedi (February 2020)
Helmet T Visor - Deluxe FP Visor (June 2018)
Helmet MQ-1 Circuit Board - Found part from EmperorFett (January 2020)
Helmet Honeywell Micro Switch - Amazon (January 2020)
Helmet Rangefinder - Terminal Fettler Resin (January 2020)
Helmet Rangefinder Light with Micro Switch Kit - Jc27 Fettinator Industries (March 2020)
Helmet Rangefinder Servo Kit $175- Fettinator Industries (March 2020)
Helmet Hollow Rangefinder Stalk for Metal Ears (Included with Metal Ears) - Machine Craft Replicas (January 2020)
Helmet Metal Ears - Machine Craft Replicas (January 2020)
Helmet Metal Borden - Machine Craft Replicas (April 2019)
Helmet Fans - Henry's Helmet Fans (February 2020)
Helmet Suspension Straps US Military PASGT - eBay (April 2019)
Helmet Chin Cup - Vintage Made in England (May 2020)
Balaclava - Etsy Crochet And More By Gigi (February 2020)
Hero Armor - WastedFett
Chest Armor- WastedFett (May 2019)
Cod Piece- WastedFett (May 2019)
Kidney Armor- WastedFett (May 2019)
Back Armor- WastedFett (May 2019)
Shoulder Armor Lineage- MinuteFett (Estimated March 2020)
Knee Armor- WastedFett (May 2019)
Knee Darts - Machine Craft Replicas (October 2019)
Armor Collar Studs - Machine Craft Replicas (October 2019)
Chest Armor Light Display - Fettronics (October 2019)
Jetpack - Darth Vorhees V3 (July 2019)
Jetpack Harness V2 - Big Dane (June 2019)
Jetpack Harness US Divers Vintage Belt Buckle - eBay (July 2019)
Jetpack Harness Belt Polyester Webbing 2" - Strapworks (July 2019)
Jetpack Beacon - Machine Craft Replicas (January 2020)
Jetpack Beacon Lighting Kit - Fettinator Industries (February 2020)
Jetpack Stabilzier - Machine Craft Replicas (January 2020)
Jetpack Vent (Round) - Machine Craft Replicas (January 2020)
Jetpack Thruster Side Greeblies - Machine Craft Replicas (January 2020)
Jetpack Thruster Front Greeblies - Machine Craft Replicas (January 2020)
Jetpack Thruster Discs - Machine Craft Replicas (January 2020)
Jetpack Micro Mega Dental File- 01Hawk (February 2020)
Jetpack Hooks and Clips - Full Metal Fett (Received July 2019)
Gauntlet Kit - MinuteFett (March 2020)
Left Gauntlet- MinuteFett (March 2020)
Left Gauntlet Glenross Dental Expander Screw Replica Polished Gold Steel - CSB Props on Shapeways (Ordered February 2020)
Left Gauntlet Keypad- MQ-1 (February 2020)
Left Gauntlet Rocket Copper Tip - Machine Craft Replicas (March 2020)
Right Gauntlet- MinuteFett (March 2020)
Right Gauntlet Whipcord Housing Knobs- MinuteFett (March 2020)
Gauntlet Micro Mega Dental Files 1 Fat Silver and 1 Fat Red- 01Hawk (February 2020)
Right Gauntlet Darts- June 2020
Right Gauntlet Ever Ready Light - June 2020
Cape - Boba87Fett
Wookie Braids - Woodman
Flak Vest - Arkady
Neck Seal (Attached to Flight Suit) - Arkady
Flight Suit (One Piece) - Arkady
Girth Belt - Woodman
Leather Ammo Belt - Woodman
Vinyl Ammo Belt - HandmadeHorrorShop on Etsy
Hip Pouches - Arkady
Gloves - Mike M
Sidearm Holster - BobaMaker
Shin Tool Sonic Beam Weapon - Paterson Squeegee from B&H
Shin Tool Anti-Security Blade- Paterson Squeegee from B&H
Shin Tool Survival Knife - Paterson Stirrer
Shin Tool Jetpack Adjustment Tool - MachineCraft Replicas
Boots - WastedFett Size 11.5
Boot Spikes - Machine Craft Replicas
Optional Accessories
ESB EE3 Blaster - Sidewinder
Vintage Heiland Syncronar 2 Cell - eBay
ESB Sidearm Pulce - BobaMaker (March 2019)
Last edited: