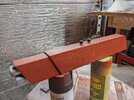
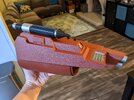
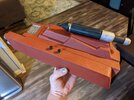
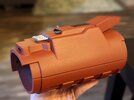
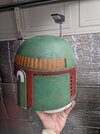
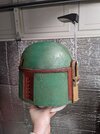
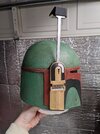
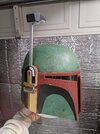
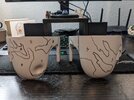
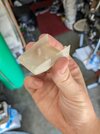
Boba Re-Armored 3d printed

Nice! Yeah yours look very similar to the pair I have, very comfy and are nearly there with the look. I look forward to seeing how yours turn out!
 
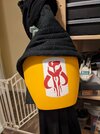
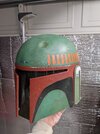
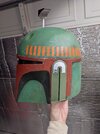
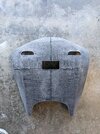
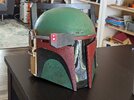
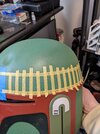
Took me a long time to get to it but I finally had time to finish the bucket. Looked high and low for an orange I liked but no hardware stores in 100 sq miles of me had anything so I just broke down and got a couple of cans of Montana Black. I went with Pure Orange for the stripes and I got a can of the Melon Yellow to redo the shoulders and knees with. I eyeballed the start and finish of the killstripes then attempted to do some math. I managed to mark off 19 stripes on the bottom and intended to mark off 19 on the top but I couldn't get them to line up (damn you compound curves!), so I just eyeballed it. I used the width of my masking tape as spacing and I think it worked out just about perfectly. Peeling the masking off was super satisfying.
PXL_20211231_093248331.jpg


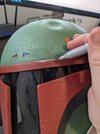
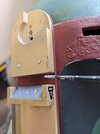
After that I went to work with acrylics. I did an overall black wash, followed by some brownish-yellowish in random spots. I used a silver sharpie for the peeled paint details and white acrylic for the wear on the right ear (the sharpie wasn't contrasting enough with the gold.) I tried to stay as accurate as possible with the silver. After that I decided to go back with some nuln oil in the crevices. I'm very pleased with the helmet overall.
PXL_20220103_191730744.jpgPXL_20220103_222844285.jpg
PXL_20220104_002127317.jpgPXL_20220104_002137249.jpgPXL_20220104_002139516.jpgPXL_20220104_002149715.jpgPXL_20220104_002151906.jpgPXL_20220104_002154968.jpg

Up next, I'm going to teach myself leatherworking :lol:
PXL_20220104_004015464.jpg
 
yeah man, looking good. hopefully soon i'll get some time to create my own thread of my build. i have a ton of pics but cant seem to fin the time at home to put them on the site. coming soon. the left ear is bothering me now. i cant seem to find a color i like. ive repainted it 3 times now. lol. what color did you use.?
 
For the left ear I used the color that I dusted over the armor, Krylon Satin Italian Olive. Looking forward to seeing your build!
 
Hey man! Thanks so much for the files - I’m curious, how did you attach the two halves of the gauntlets?
Hi! For the right I left it connected and just slide it over my arm. For the left I'm in the middle of a redesign, I'm thinking magnets probably. As designed I planned to slide that over my arm as well but it's a little large so I'm adjusting the proportions.
 
Felt like I'd drop in and give a quick update. Not much progress has been made in the past month unfortunately, mostly due to the weather but also because I've had an influx of commissions that I've been taking care of. (not a bad problem to have!)

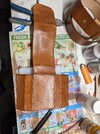
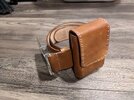
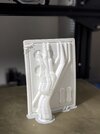
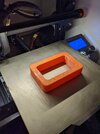
Anyway, I printed a form for my belt pouches and finally got around to staining the belt blank. Will be adding the finish to it today and then sewing the belt buckle, trimming, and adding the holes.

PXL_20220118_221047661.jpgPXL_20220306_230014316.jpg

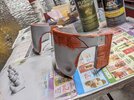
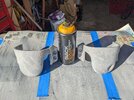
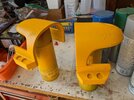
I also finally started working on the knees I printed months and months ago. (Although now I believe I will be printing these again to make them even more accurate...) Lots and lots and lots of sanding and Bondo. Then the classic mustard masking, texture paint, Bondo stippling. Sprayed them with the Montana Black Melon Yellow and the color looks great. The paint got all over everything in my shop though. Still need to finish the darts then I'll weather it all down.

PXL_20220126_211956019.jpgPXL_20220201_003352655.jpgPXL_20220201_171528091.jpgPXL_20220202_220627381.jpgPXL_20220203_213813757.jpg

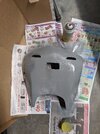
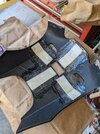
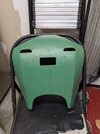
And I finally got around to working on the back plate. Interesting that one of the first things I printed ends up being one of the last to be worked on! I found that the back plate had a bit too much curve to it, leaving a larger gap at my shoulders than I would have liked. I considered reprinting it, but decided to try shortening the two tabs that "connect" to the neck to see if that would do the trick. I took about 3/4" off each side and it fits much better now! Bondo'd the ends and glued the whole back together. I figure since it's a large plate in 4 pieces and it'll be on my back, and eventually probably supporting a jetpack, I wanted to extra-reinforce it. So I used E6000 to glue the top and bottom halves together, then used the same glue to glue some styrene strips across the seams (holding them down with the tried and true method of setting whatever heavy crap I could find on them). After that dried I went back with fiberglass and applied that over the seams for good measure. I'll be doing Bondo on the seams on the other side as well. Also took some time to sand it all down. Look at that happy guy!

PXL_20220301_233233123.jpgPXL_20220306_232407518.jpgPXL_20220308_011332022.jpg

Was going to try and make it out to a Con this month but I'm going to set a more realistic goal of next month. We'll see how that goes!
 
Last edited:
Well quite a lot has happened in the last month! Well more realistically a lot has happened just in the past week. I'm very much a procrastinator but I do feel myself kind of get "in the zone" when a deadline is fast approaching. I set the deadline for myself for today so I could attend SacAnime for the first time. Needless to say I felt good enough about the completion of my costume to make it out there and had a blast!

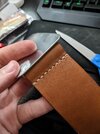
We'll pick things back up where we left off with the belt. After adding a finish coat and burnishing the edges, I glued the belt around the buckle and stitched it for good measure. My first time stitching leather and I found it very enjoyable. I think this will be a lasting hobby. I also added a belt loop which I didn't stain enough but it's hardly noticeable.
PXL_20220411_234340893.jpg

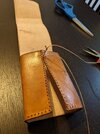
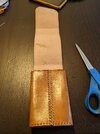
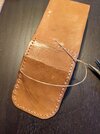
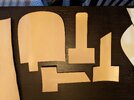
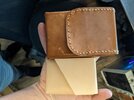
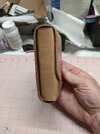
I then created a pattern for the pouch and cut one out as a test run. Using my previously printed form, I wet the leather and formed the pouch. Worked perfectly! Took about a day to dry and then I unfolded the pouch, stained it, burnished the edges, and punched holes for stitching. I decided to stitch the back together and I can see why others prefer glue here. Still a thoroughly enjoyable process though. I stitched the flap to the back to create the belt loop and continued that around the front of the flap. All in all the pouch came out great! I think for the next ones though I'll reduce the size slightly and form it a little looser so it's not quite as boxy. I went with the measurements listed on the Bounty Hunters Guild CRLs but I think since I used a 2" belt I'll have to reduce the size of the pouches so it looks proportionate.

PXL_20220412_062738481.jpgPXL_20220412_230506641.jpgPXL_20220414_041400609.jpgPXL_20220414_044527000.jpgPXL_20220414_051522152.jpgPXL_20220414_055226701.jpgPXL_20220414_062300339.jpg

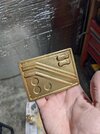
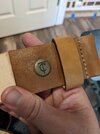
To finish off the belt I modeled and printed a Loxx connector and employed my wife's help to mix up a nice bronze color for it. I also included my maker's mark on the inside as a nice little bit of personalization. Then came the ongoing saga of the belt buckle. It's been quite the journey with this piece. I modeled and printed it in resin, but there weren't enough supports so it got a little droopy in the middle. I went back and tweaked the model and reprinted it a total of 4 times. Despite my best efforts, none of the buckles came out unwarped and I resorted to printing it on my FDM machine. I didn't want to do this in the first place so I could cut down on post-processing but it was really getting ridiculous. I tried resin smoothing for the first time on this and I'm not sure if it saved me time or not since the weather wasn't cooperative and the resin took a full 24hrs to cure. Anyway I managed to sand it to "good enough" standards then lathered on a few heavy layers of gold. I'm relatively happy with it but still plan to redo it, so I used hot glue to temporarily attach it to the buckle.

PXL_20220414_181003580.jpgPXL_20220414_180952620.jpgPXL_20220323_235336252.jpgPXL_20220406_165625745.PORTRAIT.jpgPXL_20220406_194215196.jpgPXL_20220415_050922470.jpg

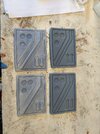
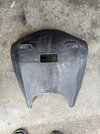
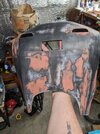
Next, I finally finished the backplate. It took multiple coats of filler primer, regular primer, and spot fill putty but I'm happy with it. There's not much reference for the texturing so I did some educated guessing with Bondo stippling and then painted it in the usual way.
PXL_20220413_221905982.jpgPXL_20220414_031527289.jpgPXL_20220414_032040478.jpgPXL_20220415_041044118.jpg

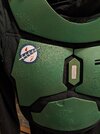
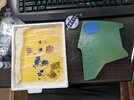
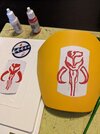
Wanting to be extra (and having purchased the wrong kind of blue vinyl), I hand painted the chest and shoulder emblem. I had my previously-used vinyl stickers as reference. This took a while but was really worth it in my opinion. Very happy with how these look.
PXL_20220414_213458128.jpgPXL_20220416_070340889.jpgPXL_20220416_150617357.jpgPXL_20220416_150624670.jpg

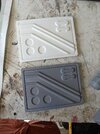
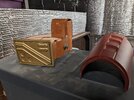
To finish off the knees I also resin-smoothed the knee darts, sprayed them black, then used Rub-n-buff for a nice metallic finish. I used E6000 to glue them to the knees. Very happy with these but they will soon be replaced by much more screen-accurate ones I've modeled. You can see one here next to one of the originals. Much better shape and much better yellow.
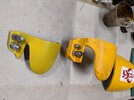
PXL_20220416_170113867.jpg

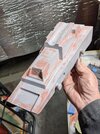
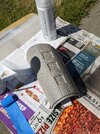
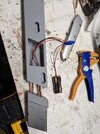
Then the final remaining task was to finish off the vambraces. The right had been pretty much finished for months but the left was still in a raw 3d printed state. I got to work sanding, spraying, sanding, filling, etc. until I finally had something I was happy to coat in paint. I also installed LEDs which I will wire to one of the switches at a later date. The rocket isn't fully painted, still need to paint the end a bronze/gold. The right vambrace needed a few details and pieces glued on which went pretty quickly.
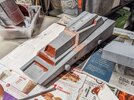
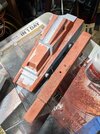
PXL_20220415_060429408.jpgPXL_20220416_033506610.jpgPXL_20220416_052902551.jpgPXL_20220415_170123805.jpgPXL_20220416_041046019.jpg

PXL_20220413_052518399.jpgPXL_20220416_054906982.jpgPXL_20220416_081740927.jpgPXL_20220416_081751941.jpgPXL_20220416_075420075.PORTRAIT.jpg

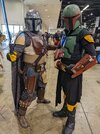
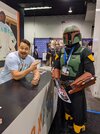
And really cutting it to the wire, I weathered everything this morning, a few hours before heading out to the con. Met some truly awesome people, especially this guy in the BoBF costume.
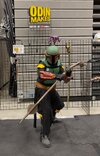
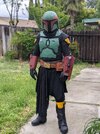
IMG_20220416_170451.jpgPXL_20220416_183822441.PORTRAIT.jpgPXL_20220416_201902856.jpg


All in all I'm very pleased with where the costume is at. I'm at a point now where I look at a picture of myself and see less "that's me in a costume" and more "that's Boba Fett." Still to do is finish the belt, add the hoses from the right vambrace, get the LEDs hooked up, and finish my blaster pistol. Down the road I'm planning to model and print an EE-3 and make a wooden stock for it, should be fun.
 
Last edited:
Couldn't help doing this comparison from the last time I wore my costume in October. It may not look like much has changed but I think the little bits have really started to add up. Also my backplate forces me to stand a bit straighter, lol.

compare.jpg
 
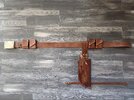
The belt is finally done! Home stretch for this costume now, and good thing too because I just found out I'm going to Celebration! Not sure yet if I'll have time to cosplay Boba but I plan to bring it just in case. (I'll be working a booth)

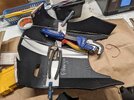
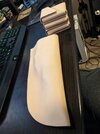
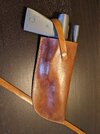
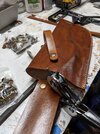
I made a new smaller template and form for the pouches. They are quite a bit smaller than my first pouch but I think they work well with the size of my belt and girth belt. I templated out the holster and after cutting it out I wet formed it directly over my blaster.

PXL_20220423_070140888.jpgPXL_20220421_162607052.jpgPXL_20220424_234810042.jpg

Stained and stitched everything together. The pouches were fun, the holster even moreso. I had to run to Tandy to get some snaps and rivets. I really like how the holster turned out. The belt overall might be slightly too light in color so I may be re-staining it a bit darker.

PXL_20220509_054722652.jpgPXL_20220511_002602748.jpgPXL_20220513_231350521.jpgPXL_20220513_231343311.jpg

I also wired up the lights in the left vambrace. Works great!
PXL_20220420_044419111.jpg

I've got hoses and mesh cover to finish off the right vambrace and after that I just need to find a way to keep the two halves of the left together, probably magnets.
 
Last edited:
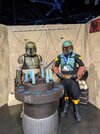
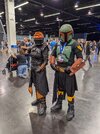
Well Celebration was a blast! Met lots of cool people, including a few other Bobas. I was able to walk the floor on Friday in costume and it was an awesome experience. I even ended up meeting Daniel Logan! (one of the people working the booth grabbed me as I was passing by)

PXL_20220527_231313834.jpgPXL_20220527_232632374.jpgPXL_20220527_233102980.jpgPXL_20220527_233528308.jpg

I do have some kinks to work out still, mainly with my gloves (I had to take one off to operate my phone but I had a hell of a time trying to get it back on) but first I'll detail the finishing touches I put together before Celebration.
The two halves of the left vambrace were easier to take care of than I thought. I took 4 magnets in a square (this was originally 2 but during gluing they slid together, sure we'll do 4) and super glued them over the seam. I let that set then went back with hot glue to really set them in place. After waiting 10-15 minutes I pulled the halves apart and the magnets thankfully stayed in place! Once the magnets get lined up and the two halves slot together, it's pretty difficult to pull apart. Works perfectly.

PXL_20220525_235946645.jpg

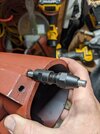
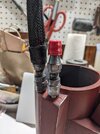
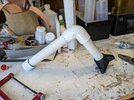
The final step was the hoses for the right vambrace. I picked up vinyl tubing from Home Depot and ordered mesh covering from eBay. I left the mesh a little long on each hose and sewed them all together at the top, sandwiched between two pieces of velcro. This allowed me to place them between my vest and shoulder piece, with the shoulder piece essentially sitting on top of the hose velcro. Works great. Then I designed and 3d printed a plug that threads onto some 1/4 x 20 threaded rod I picked up. The metal pieces go onto the rod and the plug locks them into place. Then the tube slides over the plug and is trapped, no glue required. I then used some heavy duty shrink tube to finish it off. It's a bit too thick but I'm planning to completely redo these hoses anyway as they're not as flexible as I'd like. I went ahead and glued the metal detail pieces to the hoses and I just insert the threaded rod into my vambrace after I put it on. The hoses stay in place just fine.

PXL_20220520_045223771.jpgPXL_20220520_211550210.jpg

And for now that's it! It's pretty much in its completed state now, save for weapons and possibly a jetpack. The next thing I want to do is a custom phone pouch and some touch-sensitive stickers I can put on my gloves.
 
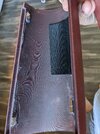
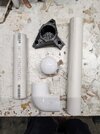
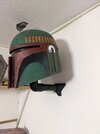
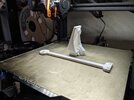
Not a strictly costume-related update but I did whip up a nice and simple wall mount for my helmet finally! As far as I can tell there are no cheap 1" PVC flanges available so I modeled something simple. I left one side flat in case I wanted to print it on its side but I figured printing it laying down would actually be more structural.

PXL_20220724_163457573.jpgPXL_20220724_164508341.jpgPXL_20220724_221311263.jpg
 
I got some goodies in the mail! Knees from Redman Studio Workshop that we collaborated on, and rubber handplates. Local con coming up next month so trying to get these on the costume plus new pants. I've already made a new shirt but not sure I'm happy with it. Updates to come!

PXL_20230214_225705818.jpg
 
It's been quite a while since I made an update here. I'm gearing up to finally get to a place I'm happy with on this costume.

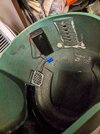
After instantly fogging up my helmet at Celebration I decided to add a small fan to my helmet. I printed a shroud to direct the airflow across the visor. A 9v is a little under powered for it but it does great keeping the fog off.

PXL_20221019_045349569.jpg


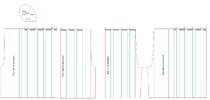
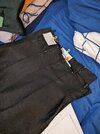
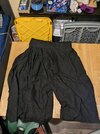
Also I made new pants! I've been putting this off for far too long because I just didn't know how I was going to do it, but I decided to just dive into it. I figured out how I wanted to pleats spaced out and used that combined with my waist measurement to create a pattern. In my case I had the pleats fold over 1.25" and space 3" between them. It looks like a hot mess but it made sense to me.

hakama.JPG

Once the fabric was cut I ironed and pinned the pleats, then sewed the top 3" or so of each one to keep them in place. I assembled the legs front to back, then the crotch seam. I stopped the crotch seam a few inches short in the back and hemmed that over to create a "v" in the back so I could have an adjustable fit. I then took an 8" tall piece of fabric, folded it over and sewed everything together to create the waistband. This was by far the most challenging part. It looks ok from the outside though, and that's what matters! I ripped the two extra hanging pieces of cloth off of my old pants and reused them here.

PXL_20230807_043432226.jpgPXL_20230825_040100196.jpg

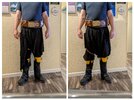
I made the waistband extend about 8" long off the end of the "v" seam and added velcro to it as a closure. I kept the legs straight and it's quite a bit of extra fabric but they tuck nicely into my gaiters and I think the pants look 10x better than what I had. I'll get better pictures soon but here's a good before/after pic. You can see the pants I had before just didn't look quite right, too skinny and they hung kinda weird. These new ones puff out like they should and the pleats are reasonably accurate. Oh, I almost forgot to mention, I added a hidden pocket in the right side seam! Shhh, don't tell anyone.

20230808_152342-COLLAGE.jpg
 
Last edited:
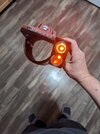
I finished putting the electronics in my rangefinder!
PXL_20230831_204617583.jpgPXL_20230831_204637303.jpg

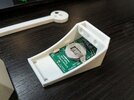
I modified the rangefinder model to make the stalk removable and to have holes to hold the acrylic piece in place with magnets. I wanted to keep everything accessible. I also modified the "acrylic" piece to be hollow and to have standoffs to hold the circuit board down. Printed everything out, put in threaded inserts, realized the acrylic piece is fine as a press fit so skipped the magnets, then painted and assembled everything. Works great!
PXL_20230829_013444847.jpgPXL_20230829_153838497.jpgPXL_20230831_201750476.jpg
 

Your message may be considered spam for the following reasons:

If you wish to reply despite these issues, check the box below before replying.
Be aware that malicious compliance may result in more severe penalties.
Back
Top