BKBT Rubies Blaster Mod

bigkidbiggertoys

Well-Known Hunter
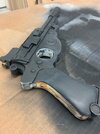
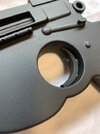
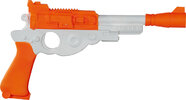
I picked up one of these about a week ago thinking it would be a great holster stuffer. It is a great base and originally I was just going to do a repaint but I couldn't leave well enough alone.
201270.jpg
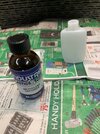
I started by gluing all of the seams closed with methylene chloride. It welds the plastic together so I was able to file down the seams clean and had to only use body filler in the handle grip area.
IMG_1668.jpgIMG_1656.jpg
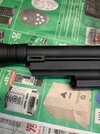
Everything was painted with a black primer so I could check my progress.
 
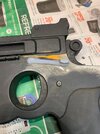
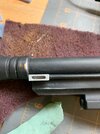
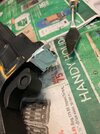
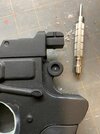
I wanted to accurize this a bit more so I started with a few details that were bugging me. The safety is molded in backwards so I ground off the detail and printed a new one. Same thing with the tip of the cleaning rod, it was only half formed.
IMG_1660.jpg IMG_1661.jpgIMG_1662.jpg
IMG_1665.jpgIMG_1666.jpgIMG_1674.jpg
 
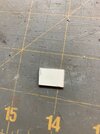
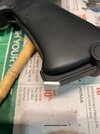
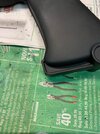
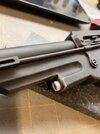
Next, I moved on to the grip. It is missing a small angle at the bottom and it is an easy enough fix. So I filed it down, glued on a small square of styrene and filed to shape.
IMG_1667.jpgIMG_1669.jpgIMG_1671.jpgIMG_1672.jpgIMG_1675.jpg

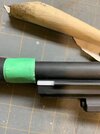
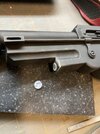
There is also a small detail at the front of the gun, some kind of screw head under the barrel. The toy just had a lifeless lump molded in so it had to go and a new resin bit glued on.
IMG_1679.jpgIMG_1681.jpg
 
Last edited:
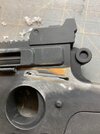
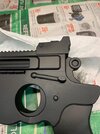
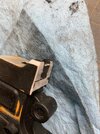
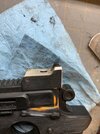
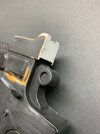
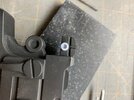
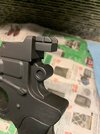
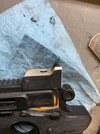
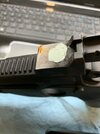
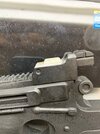
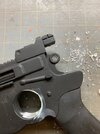
Next I moved on to the rear sight. There is a whole piece missing there so I printed off a new one but in order to mount it, the toy has to be sanded flat as there is some detail there that is not on the screen gun. At the same time I ground off the sight as it is just a big square of plastic, not accurate at all. I also took this opportunity to shape the area a little more accurately.

IMG_1663.jpgIMG_1664.jpg

After grinding down the back of the blaster a little filling has to be done and flattened out to allow the rear sight to be attached.

IMG_1670.jpgIMG_1673.jpg

A small resin screw is added to the assembly and the whole thing glued on with cyanoacrylate adhesive.
IMG_1680.jpgIMG_1676.jpg
 
After grinding down the sight there ends up being a hole in the plastic. I used this as a way of adding weight and realism to the blaster. I went through my odd screw assortment and purged a bunch of crappy screws I was never going to use, added some casting resin, taped up the hole and slush casted everything inside to distribute the weight across the blaster so it wasn't all in the handle. It worked out pretty good and didn't cost me anything other than the resin I already had. Epoxy would work equally as well.
IMG_1664.jpg
After I was able to fill the hole with body filler and attach a small styrene sight I fashioned.
IMG_1677.jpgIMG_1678.jpg
 
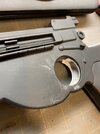
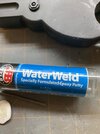
Next I moved onto the trigger. The molded in one is way too fat and toy like, so it had to go. I sanded it off with my dremmel, added some epoxy putty to fill the hole and then finished with body filler and sanding. I modelled and printed a new trigger to be glued on after painting.

IMG_1682.jpgIMG_1683.jpgIMG_1686.jpg

The toy blaster also has a solid hammer where the screen used blaster has a hole in it. I used a center punch and stepped up drill bit sizes until I had the hole cleaned out. This was an area I knew to be hollow so when I added the resin in the earlier step, I made sure that it flowed back into this area to make it solid for drilling.
IMG_1684.jpgIMG_1685.jpg
 
Last edited:
Lastly was the paint. I sprayed a semi gloss black, rubbed with graphite powder, hit wear edges with rub n buff or a silver paint pen. The grips are painted with acrylics with a dry brush to get the grained effect and a satin top coat. They may be a little too dark but I can always go back and fix this after. A little mist of blue on the blaster muzzle to simulate heat distortion and I'm calling this done.
IMG_1697.jpg
 
Last edited:
I didn't post any pics of the paint process but will include them here. I am by no means an excellent painter but I am muddling my way through.
As I stated above, I used a black filler primer as I went to check my progress followed by a light coat of satin black.
IMG_1687.jpg


Then I added the brass details. These are a brass colored wax that I quickly rubbed on and buffed. I didn't try for even coverage as I wanted it to look like dirt and grime in the corners. Same thing with the graphite rub, I just worked in the main areas where I thought the blaster would be handled.
IMG_1691.jpg


Then I taped off and sprayed the muzzle silver, with a touch of anodized blue to simulate heat. I may end up going back to this as I am not totally happy with it. The grips were dry brushed with 2 colors of cheap craft acrylic paint with a satin top coat. I misted with some flat black overspray at the top and bottom of the grips and buffed them simulating handling wear. A silver paint pen and some rub n buff silver leaf on some wear edges and that was it. I touched up a couple of areas with some flat black.
IMG_1696.jpg


Overall I am happy with it. I think for me, one of the best changes I made was adding the weight to it. I think psychologically it adds realism as you EXPECT it to have some weight.
 
This thread is more than 3 years old.

Your message may be considered spam for the following reasons:

  1. This thread hasn't been active in some time. A new post in this thread might not contribute constructively to this discussion after so long.
If you wish to reply despite these issues, check the box below before replying.
Be aware that malicious compliance may result in more severe penalties.
Back
Top