atrophical
New Hunter
Wow, I will def be following this. Everything looks great!
No speculation...it's a FPH2 recast. Chris (Fettpride) pointed this out months ago when corbanth (Randy) first started selling these.
Sent from my iPhone
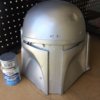
Silver Layer-Testors Metallic Silver
View attachment 146790
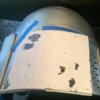
I used Tracedown waxfree tracing down paper to apply the stencils
View attachment 146792
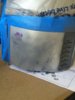
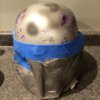
Using Maskol, I masked the silver parts and weathered the fading silver
View attachment 146794
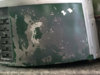
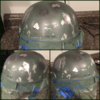
For the backpanel green, I used Rustoleum Hunter Green
View attachment 146797
Without getting into crazy detail, I end up misting with dark grey using an airbrush and topcially applied the silver damage to the back panels.
View attachment 146799
125-150PSI/6 gallon should be more then enough. You can likely get away with a 3 gallon 100PSI from harbor freight, which cost around $60Tfett40 thank you so much! I cancel the airbrush and ordered the one you suggested tomorrow I will go get a compressor. One last question about how many psi do you think I need I notice they are selling a lot of small pancake air compressor’s so I don’t really know how much power I need
Thank you picking it up today. That video helped tremendously.125-150PSI/6 gallon should be more then enough. You can likely get away with a 3 gallon 100PSI from harbor freight, which cost around $60