You are using an out of date browser. It may not display this or other websites correctly.
You should upgrade or use an alternative browser.
You should upgrade or use an alternative browser.
Ord Mantell's ESB build
- Thread starter Ord Mantell
- Start date
TheBobaFett
Active Hunter
Good observation Ord. I see no yellow either in those shots pointed out however I do see it appear on the rocket in the BTS stills where Fett is escorting Han in Carbonite with the 2 Cloud City guards. This one in particular, I adjusted the brightness and increased the saturation so it can be seen a bit better.

Ord Mantell
Well-Known Hunter
Good observation Ord. I see no yellow either in those shots pointed out however I do see it appear on the rocket in the BTS stills where Fett is escorting Han in Carbonite with the 2 Cloud City guards. This one in particular, I adjusted the brightness and increased the saturation so it can be seen a bit better.
Most excellent. This would seem to support RafalFett's intuition that resolution and lighting create conditions leading to an illusion that the yellow has vanished. Do we know the date on that photo? I believe this was the first Fett scene shot for the film. In the film, Fett is only seen far from the camera and pretty much in silhouette for the corridor escort... so no good shot of the jp until he returns to shoot at Luke, where we do get a good look at the jp. That all took several days to shoot. Seems plausible that the yellow might still have been painted over after this still was taken, a change that would effect all on-screen shots of the jp. We need dates and production stills from later in the production to settle the question. I've looked but haven;t come across them yet. Surely they are out there.
Last edited:
Ord Mantell
Well-Known Hunter
Waiting for a replacement topper for the left gauntlet, but finishing up with the right gauntlet in the meantime...
There was a small problem with the whipcord housing being inaccurate. I'm not sure if its with the mold or casting. But the inner part was missing.

Not acceptable, but seemed an easy fix with some polystyrene. I settled on 1.5 x 1.5mm polystyrene strips to build out the missing section.
Of course as I proceeded I noticed more inaccuracies and I think I'll have to make more modifications later.


for now, only one gauntlet dart is from a real Michell. I know Kurtyboy back in the day managed to get them all from sweep arms. I'm not sure if I'm that committed. Maybe. I am looking for more if anybody wants to sell.
There was a small problem with the whipcord housing being inaccurate. I'm not sure if its with the mold or casting. But the inner part was missing.
Not acceptable, but seemed an easy fix with some polystyrene. I settled on 1.5 x 1.5mm polystyrene strips to build out the missing section.
Of course as I proceeded I noticed more inaccuracies and I think I'll have to make more modifications later.
for now, only one gauntlet dart is from a real Michell. I know Kurtyboy back in the day managed to get them all from sweep arms. I'm not sure if I'm that committed. Maybe. I am looking for more if anybody wants to sell.
Ord Mantell
Well-Known Hunter
still waiting on left gauntlet parts so started the fixes on the EE3.
Sidewinder's EE3 is a superb replica. I can't see how it could get any better without actually adding real parts to it. I can sing its praises all day, but as awesome as it was when it arrived in the mail, as far as accuracy of the paint job on it, I feel there is some slight room for improvement. Anybody who has a sidewinder EE3 built and painted by him might consider these tweaks:

first lets take care of the stock color:
With a stock that's too dark, there's not a lot of options. You either need to strip the color out or paint on top. I didn't want to potentially damage the fine wood grain detail of the cast, so I opted to do thin layers of paint on top. I chose to use artists acrylics because they have a nice viscosity for the technique I wanted to do, which is paint and and rub off leaving super thin streaky layers. I then just kept building layers and mixing different browns, generally going lighter and lighter with each layer. I'd never painted simulated wood before, so I had no idea if this was going to work. I just went with gut instinct. Along the way I did some very very light sanding between layers, just for added organic color variations.

After everything was dry I went over it with some washes of ash and activated charcoal and ended up with this:

It's not going to fool anybody on close inspection but does well enough from more than a foot away. Also, the greeblies there have been repainted with added silver and pinkish orange.
now, to do some fixing on the scope and mount assembly, taking a look at a lot of reference, it's clear to me there is a thin layer of weathered black paint on the entire assembly:

The scope was not primered and you can see the original finish of the scope in places where the weathered black has been scratched off.
So the sidewinder scope came painted flat black with some inaccurate weathering:

This will not do, so we have to restore it to the look of a real scope with some lacquer or varnish to approximate the shine of the real deal. I picked out something I had on hand which is a spray varnish meant for wood but works just fine on this. It forms a pretty tough layer that shines almost just right:

It doesn't have to be perfect because I'm painting over this and will only be able to see little bits of this finish come through in spots. This is about 3 layers. Dries super fast. It is important to use a medium that won't bind very well with whatever you use over top. You want to be able to easily scratch the top layer off. I would stay away from acrylics for this. Too rubbery for scratching off. If you have a real scope, it's easy peasy. Just about anything will work as long as you do not use a primer.
So from here I put the scope back on and hand-brushed a sloppy paint job on the scope assembly with archive-x weathered black, similar to what I see in the reference. Then went back over and scraped bits off after everything was nice and dry, trying to match references. The result:

I feel like this was pretty successful. Note: as the production progressed, more and more of the top paint layer got scraped off.
At the same time I removed the black off of the flash tube going by reference photos, especially scene 371.

Keeping in mind there is STILL weathering on the tube, but under harsh light it appears to not be very dense.
Then of course, I added the sling, thanks to this super helpful and brilliant tutorial by KenChan. the only thing I'd add is go with a leather strap about 3/4" wide and no thicker than 1/16" of an inch. This is what I used: Leather Strip Brown ¾ Inch Wide 1/16 inch Thick and 72 Inches Long
(I got double the needed length because I need two).
Final result:


At some point later I will take the plunge and shave off a chunk from the top of the butt like the screen-used weapon.
Sidewinder's EE3 is a superb replica. I can't see how it could get any better without actually adding real parts to it. I can sing its praises all day, but as awesome as it was when it arrived in the mail, as far as accuracy of the paint job on it, I feel there is some slight room for improvement. Anybody who has a sidewinder EE3 built and painted by him might consider these tweaks:
first lets take care of the stock color:
With a stock that's too dark, there's not a lot of options. You either need to strip the color out or paint on top. I didn't want to potentially damage the fine wood grain detail of the cast, so I opted to do thin layers of paint on top. I chose to use artists acrylics because they have a nice viscosity for the technique I wanted to do, which is paint and and rub off leaving super thin streaky layers. I then just kept building layers and mixing different browns, generally going lighter and lighter with each layer. I'd never painted simulated wood before, so I had no idea if this was going to work. I just went with gut instinct. Along the way I did some very very light sanding between layers, just for added organic color variations.
After everything was dry I went over it with some washes of ash and activated charcoal and ended up with this:
It's not going to fool anybody on close inspection but does well enough from more than a foot away. Also, the greeblies there have been repainted with added silver and pinkish orange.
now, to do some fixing on the scope and mount assembly, taking a look at a lot of reference, it's clear to me there is a thin layer of weathered black paint on the entire assembly:
The scope was not primered and you can see the original finish of the scope in places where the weathered black has been scratched off.
So the sidewinder scope came painted flat black with some inaccurate weathering:
This will not do, so we have to restore it to the look of a real scope with some lacquer or varnish to approximate the shine of the real deal. I picked out something I had on hand which is a spray varnish meant for wood but works just fine on this. It forms a pretty tough layer that shines almost just right:
It doesn't have to be perfect because I'm painting over this and will only be able to see little bits of this finish come through in spots. This is about 3 layers. Dries super fast. It is important to use a medium that won't bind very well with whatever you use over top. You want to be able to easily scratch the top layer off. I would stay away from acrylics for this. Too rubbery for scratching off. If you have a real scope, it's easy peasy. Just about anything will work as long as you do not use a primer.
So from here I put the scope back on and hand-brushed a sloppy paint job on the scope assembly with archive-x weathered black, similar to what I see in the reference. Then went back over and scraped bits off after everything was nice and dry, trying to match references. The result:
I feel like this was pretty successful. Note: as the production progressed, more and more of the top paint layer got scraped off.
At the same time I removed the black off of the flash tube going by reference photos, especially scene 371.
Keeping in mind there is STILL weathering on the tube, but under harsh light it appears to not be very dense.
Then of course, I added the sling, thanks to this super helpful and brilliant tutorial by KenChan. the only thing I'd add is go with a leather strap about 3/4" wide and no thicker than 1/16" of an inch. This is what I used: Leather Strip Brown ¾ Inch Wide 1/16 inch Thick and 72 Inches Long
(I got double the needed length because I need two).
Final result:
At some point later I will take the plunge and shave off a chunk from the top of the butt like the screen-used weapon.
Last edited:
AlphaCloneFett
Active Hunter
thanks for the info! I have a rifle coming from sidewinder as well, shipped it out a month ago, i hope its not lost while making its journey to the states! : /
sutt_hero_rotj
Active Hunter
Looks a lot better !
Ord Mantell
Well-Known Hunter
Jango Fett Jr
Well-Known Hunter
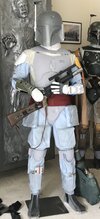
Your attention to detail is incredible. Also I just love that mannequin, you managed such a specific ESB pose that’s hard to pull off. Can’t wait to see this progress.
sutt_hero_rotj
Active Hunter
Looking good man !
Ord Mantell
Well-Known Hunter
Thank you, kind sir. My resume says "I'm detail oriented." lol.Your attention to detail is incredible. Also I just love that mannequin, you managed such a specific ESB pose that’s hard to pull off. Can’t wait to see this progress.
Ord Mantell
Well-Known Hunter
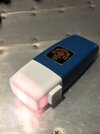
Finally got my shovel packed and went out to the Midlands for a short vacation to complete my quest for an Ever Ready minilight. The theory being, the only ones left on the planet not installed in a Fett gauntlet are buried in the Earth's crust as human refuse from the 70's/80's. So trekked until I found a good sized landfill that was sealed up in the 80's and started digging...
pro tip: if you see these things sticking out of the ground, you are on a landfill. Those are methane vents, releasing the pressure built up from the decay of everything in the garbage pile...

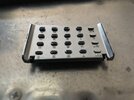
After 3 days of going through a tv-bearing vein of old tech devices, about 14 meters down I found this in a squashed shoebox:

Paydirt! Totally worth the burning streaks of sciatica going down my left leg after 3 days of non-stop hunched-over digging. But, unbelievably... it got better. I turned it over and stuck to the back, via an ancient candy wrapper, was this:

Unreal. What a crazy trip. I dug through for another couple of days trying to find a glenross dental expander but alas, I did not find a single vein of cast-aside dental tech down there. I will have to go back and try another time. Right now I need to recuperate... and get these installed in the gauntlets pronto.
(Joking, of course. Bought these off the same TDH member. Many thanks to him for kindly letting them go for a king's ransom -- not an unfair price by any stretch)
pro tip: if you see these things sticking out of the ground, you are on a landfill. Those are methane vents, releasing the pressure built up from the decay of everything in the garbage pile...
After 3 days of going through a tv-bearing vein of old tech devices, about 14 meters down I found this in a squashed shoebox:
Paydirt! Totally worth the burning streaks of sciatica going down my left leg after 3 days of non-stop hunched-over digging. But, unbelievably... it got better. I turned it over and stuck to the back, via an ancient candy wrapper, was this:
Unreal. What a crazy trip. I dug through for another couple of days trying to find a glenross dental expander but alas, I did not find a single vein of cast-aside dental tech down there. I will have to go back and try another time. Right now I need to recuperate... and get these installed in the gauntlets pronto.
(Joking, of course. Bought these off the same TDH member. Many thanks to him for kindly letting them go for a king's ransom -- not an unfair price by any stretch)
Last edited:
Ord Mantell
Well-Known Hunter
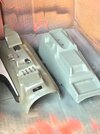
kit bashing to swap out some resin parts on the flamethrower...
Last edited:
Ord Mantell
Well-Known Hunter
replaced the replica minilight with the real deal. Right gauntlet complete. Or actually... no. I have to make another fix to the whipcord housing. Later.
Attachments
Last edited:
Ord Mantell
Well-Known Hunter
Ord Mantell
Well-Known Hunter
I originally got a LED light kit for the jetpack beacon but was underwhelmed by the weak light output. When I photographed the jp under studio lighting, you couldn't even see that it was on, as in this photo:

Believe it or not, the beacon light is on in that photo. The brightness here is well short of the real jp light. And here's the thing about that light... you don't need a fancy board to do different modes of blinking, or pulsing if you want it to be accurate. In the movie, the beacon light is simply always on. There is NO blinking. No pulsating. I think that was a misread from the early days of scrutinizing the film on VHS. Somehow it stuck. All you have to do is watch the film in 1080p to realize it does not flicker or blink or pulsate. It's just on. If anyone can prove otherwise, I'll eat my hat... er, or my MCR-ESB.
All you need is the right bulb, the right power source and a switch. You don't need a fancy lighting kit if you want to be screen accurate. All the different modes might be cool if your trooping and such, but that's not me. I want the screen costume as close as I can get it.
The real light was on a 12 volt system. I have plenty of 12 volt bulbs laying around for my landscaping lights. I have halogen and LED equivalents. I started farting around with them. Here is a 12 volt 10 watt halogen running straight off a 9 volt next to the beacon light kit LED:

Obviously better color, and a little brighter. The next thing was to hook it up to a true 12 volt source. Since I don't need to be mobile, I got this from Amazon to just plug straight into the wall:


Lovely. Plenty bright in the jetpack, too:

Now, how does it fair under modest studio lighting with my DSLR?
Here is the original ESB jetpack beacon light:

The Fettinator light kit installed in my beacon:

Yes, again, that's ON.
Here's the 1.5 watt 12 volt LED:

A lot closer. Could probably go up to 2 watts to get the correct brightness. I might look into experimenting with other types of bulbs, too. The problem I see with this 12 volt LED is that the surface area of the light source is so broad it doesn't throw exactly the same kind of shadows from the beacon slits as the original. Either way, this light is far more satisfying and looks a lot more like the real deal to me. I do hope to improve upon it more after I get some other bigger stuff done on the build.
Believe it or not, the beacon light is on in that photo. The brightness here is well short of the real jp light. And here's the thing about that light... you don't need a fancy board to do different modes of blinking, or pulsing if you want it to be accurate. In the movie, the beacon light is simply always on. There is NO blinking. No pulsating. I think that was a misread from the early days of scrutinizing the film on VHS. Somehow it stuck. All you have to do is watch the film in 1080p to realize it does not flicker or blink or pulsate. It's just on. If anyone can prove otherwise, I'll eat my hat... er, or my MCR-ESB.
All you need is the right bulb, the right power source and a switch. You don't need a fancy lighting kit if you want to be screen accurate. All the different modes might be cool if your trooping and such, but that's not me. I want the screen costume as close as I can get it.
The real light was on a 12 volt system. I have plenty of 12 volt bulbs laying around for my landscaping lights. I have halogen and LED equivalents. I started farting around with them. Here is a 12 volt 10 watt halogen running straight off a 9 volt next to the beacon light kit LED:
Obviously better color, and a little brighter. The next thing was to hook it up to a true 12 volt source. Since I don't need to be mobile, I got this from Amazon to just plug straight into the wall:
12V LED Strip Power Supply
I tried the 10watt halogen and it was super bright and lovely but as one might expect, much too hot. And the heat transferred straight into the beacon. After a minute you could use it to BBQ. So I wired up a 1.5 watt, 10 watt equivalent, 2700K LED.Lovely. Plenty bright in the jetpack, too:
Now, how does it fair under modest studio lighting with my DSLR?
Here is the original ESB jetpack beacon light:
The Fettinator light kit installed in my beacon:
Yes, again, that's ON.
Here's the 1.5 watt 12 volt LED:
A lot closer. Could probably go up to 2 watts to get the correct brightness. I might look into experimenting with other types of bulbs, too. The problem I see with this 12 volt LED is that the surface area of the light source is so broad it doesn't throw exactly the same kind of shadows from the beacon slits as the original. Either way, this light is far more satisfying and looks a lot more like the real deal to me. I do hope to improve upon it more after I get some other bigger stuff done on the build.
Last edited:
Ord Mantell
Well-Known Hunter
updated comparison to the original jetpack

I think I want to try this again with a more accurate jetpack. So sad the Anovos jetpack doesn't appear to be happening.
I think I want to try this again with a more accurate jetpack. So sad the Anovos jetpack doesn't appear to be happening.
sutt_hero_rotj
Active Hunter
I think you captured a great look with comparison to the original. Kudos dude!
Shane
Shane
Ord Mantell
Well-Known Hunter
Last edited:
Similar threads
- Replies
- 67
- Views
- 3,728

