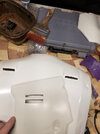
Look how they massacred my boy

zemzero

Hunter
Got this helmet from Asok back in...oh I have no idea. Years ago. 2015 maybe. FP budget cold cast, slush resin.

There was no other choice, my stupid big nose just needed an extra 1/4 of an inch...it was a long haul to get to this point. It's funny how I treated this helmet like a baby when I first got it and now... it looks like its been through the grinder.


1.jpg
2.jpg


Not quite how it started but this is where I jumped the gun and started sanding and polishing before doing any work on it

7.jpg
 
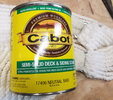
Ovation Centuar 40' mohair belt from amazon. I couldn't find the exact shade of red dye everyone was talking about and finally threw in the towel when I was at Menards back in April, settling for what they call "Tile Red". Looks close enough to me.

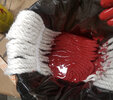
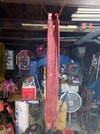
I wrapped the buckles in masking tape and drowned the entire belt in the dye with a garbage bag in a bucket. Kneaded it all together, wrung out the excess and hung it up to dry. I came back about two hours later and it was stiff like a baseball bat so I roughed it up in my hands until it was flexible and soft. Fits me just right around the waste, but maybe that isn't a good thing, I can't tell you how many gummy bears I ate when I was laid off during the lock down.

I'll add the black extensions when I feel like doing all the small things. Do they have to be nylon webbing or can they even be leather?


girth1.jpg

girth2.jpggirth3.jpggirth4.jpggirth5.jpg
 
wheewwwww boy, yeah, some here would say that helmet mod is blasphemy. But if you're not a full on accuracy stickler, then WARP SPEED MR SULU!

I'm excited to see how it turns out. And honestly if its not the proper shade on the girth belt, you'd have me fooled. If it should be darker or what not, weathering will make it just right anyway, so good looking belt!
 
I figured the helmet wouldn't be too popular but I am determined to make it fit my stupid fat head, it's useless if I can't wear it. I can't bring myself to strive for 100% accuracy, I think I would drive myself insane.

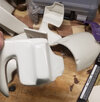
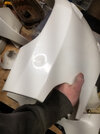
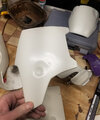
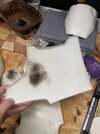
The armor pieces, I believe, are RS Propmaster. To add the RoTJ specific dents, I put a lighter to the armor and used a piece of clay to add an indent. I also added the notch to the left knee armor and cut out the slots for the chest display and jetpack harness straps.

Gotta love Ohio weather, it's winter temperatures one week and the next it's summer.
armor_1.jpg


armor_2.jpgarmor_3.jpgarmor_4.jpgarmor_5.jpgarmor_6.jpg
 
I figured the helmet wouldn't be too popular but I am determined to make it fit my stupid fat head, it's useless if I can't wear it. I can't bring myself to strive for 100% accuracy, I think I would drive myself insane.

The armor pieces, I believe, are RS Propmaster. To add the RoTJ specific dents, I put a lighter to the armor and used a piece of clay to add an indent. I also added the notch to the left knee armor and cut out the slots for the chest display and jetpack harness straps.

Gotta love Ohio weather, it's winter temperatures one week and the next it's summer.
View attachment 200943


View attachment 200944View attachment 200945View attachment 200946View attachment 200947View attachment 200948
It looks as though you have two right shoulders. An ESB and ROTJ. The left shoulder has no dents.
 
The armor came with three shoulders, I didn't pay attention to which one I threw into the picture.

shoulders.jpg


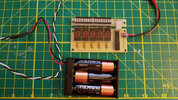
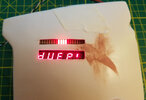
I played around with the chest display that I got from fettronics and noticed how big of a gap there is between the board and the armor. I'll have to look at more references. In an attempt to further sand the openings a bit wider, I got a case of the jimmy arms and put a gouge in the plastic.

dhest_display3.jpg


dhest_display1.jpgdhest_display2.jpg
 
Imperial Boots aluminum fittings and size 48 boots. They're too small sadly, I need an extra 1/2 inch at least. I can probably manage a couple hours in them but...my toes might curl up like my grandmas. Also opened my Man Of War gauntlet box, lets get the party started.

IB.jpg


gaunts.jpg


So I have a bunch of these huge pins in different sizes, not sure what they're for, some kind of keyway I'm assuming but they are the perfect shape for the spikes on the boots. After printing RafalFetts drawings, I measured the pins and then busted out the ole' grinder, put the pins in the drill and let her go.

metal_1.jpg
metal_2.jpg
metal_3.jpg


After a little failure, sanding and polishing, this is what we come to.

metal_4.jpg


Here is my attempt at the jet pack harness rings and jet pack rail. I was running out of time but next time I'll start the frame and finish the middle strips of sheet metal. Ignore my garbage welding, I was trying not to burn through the rod.

metal_6.jpg
metal_7.jpg
metal_8.jpg


The spikes aren't perfect, I know, but they will get the job done.
 
Here is the journey of this poor helmet....

Started off with eagerness, sanding with larger grits of sandpaper until I got to fine steel wool and a semi polished look, I understand this should have been the last thing I did but the shininess gave me motivation, I'm a simple man . I cut out the T section and made a paper template for the visor, taped it to my face shield and cut it out.

Use a face mask, please. An N95 preferably, resin is no joke when it gets into your lungs. For added precaution I had my shop vac clamped near by and a fan blowing across me, directing the dust into the vac hose. Not perfect, but better than nothing.

1.jpg
2.jpg


Look at this handsome boy

3.jpg
4.jpg
5.jpg


7.jpg


Now this, this right here is where everything went down hill. Everything was fine, I came to terms that I wouldn't be able to wear the helmet, it's cool, I'll paint it and sit it on a shelf. But the visor...the damn visor wouldn't sit flush against the inside of the helmet no matter where I sanded, no matter how much I sanded, no matter how much I bent the visor, no matter where I tried to set the visor. Seeing these gaps, it's an itch that can't be scratched. I could add a thin strip of bondo for the visor to sit flat against but then I started to notice how thick the mandible edges already were and there was an indent from the top to the bottom, as if a visor was supposed to sit inside this indent but it wasn't uniform. I chalked it up to a weird defect in the casting or some internal structure that held the molds t visor in place. Either way, I couldn't paint over it, it would stand out like a stripper in a church. It had to go.

I sanded some more and noticed the inside of the helmet really wasn't as uniform as I thought. So I sanded the entire inside, more and more every day. Seeing Every millimetre being scrapped away, I started to gain hope my face would actually fit inside. Until I got too close to the sun, the helmet couldn't support it's own weight anymore.

6.jpg


This was harder than I thought, picking away all the small resin blobs and trying to sand what was left. I had to add jb weld to some of the chipped corners.

8.jpg
9.jpg


Added studs to keep the ear piece straight, the ones molded into the helmet were too shallow. I'll add a magnet when I set the stalk.

10.jpg


The initial sanding technique, to find the thickest parts and only dremel those away.

11.jpg


Added Return of The Jedi damage to the helmet, not every scrape and cut is added, just enough for some extra depth to satisfy me. You can also see how thin the helmet became, pinholes and cracks started appearing, especially around the left ear. The left mandible became warped because of the thinness.

12.jpg
13.jpg
14.jpg
15.jpg


I dug myself deep, the only choice was to add fiberglass and resin. I'm not a professional and my patience became thinner than the helmet.

16.jpg


Some parts bubbled up and wouldn't stick, so I cut them off and hosed everything out. I put the helmet on and realized all that dremeling and sanding did almost nothing, I gained maybe 2mm extra tolerance after the fiberglass was laid. I'm too deep in it now, the only way is forward. I will wear this thing even if I have to be buried in it.

17.jpg


Like some back alley surgeon hired by a rogue agent to remove a lodged bullet, I drew some surgery lines and picked up my tools of destruction. My breath was heavy and my hand was shaky but it had to be done. My tools screamed and whirred as they dug into the resin, kicking smoke and dust into the air, catching the light from the dim bulb swinging above me. The rain from outside fell onto my garage roof like war drums, or perhaps, it was the heavy beating of my heart.

18.jpg
19.jpg


tumblr_mztukbtFVl1sa11jco1_500.gif
 
Thinking back to my stormtrooper helmet and all the fans, batteries and microphone electronics I needed, I figured I would need an extra inch of space. I cut small rectangles of wood an inch long and used them as spacers between the two halves. I taped them in place and used clamps to make sure the helmet didn't shift. Added a thin layer of resin and fiberglass to the inside.

20.jpg
21.jpg
22.jpg
23.jpg


Well guess what, the helmet shifted. I cut the new fiberglass only down the right side and put a small shim until the strip behind the ear lined up.

24.jpg


Sanded the resin and put a chamfer on the helmet edges, hopefully to help with the bondo covering the edges.

25.jpg


And the first of what I suspect to many layers of body filler.

26.jpg


An early christmas miracle, my pack from Darth Voorhees arrived and also bought a helmet from him. I've been working 75+ hours lately at my job but I'll get it started soon when I have time off. Plus we had a huge winter storm last weekend and a pine tree crashed in front of my garage that I'll need to take care of.


jetpack1.jpg
helmet1.jpg


tree.jpg


Stay safe, happy holidays.
 
This thread is more than 3 years old.

Your message may be considered spam for the following reasons:

  1. This thread hasn't been active in some time. A new post in this thread might not contribute constructively to this discussion after so long.
If you wish to reply despite these issues, check the box below before replying.
Be aware that malicious compliance may result in more severe penalties.
Back
Top