Fettology
Hunter
I thought it would be fun to document my EE-3 build and share what I’ve done so far. I got an Aluminum EE-3 kit from Airmarshal for Christmas and I have to say it’s nothing but spectacular!!!! A lot of hard work went into these kits and it truly shows. You can find the info here:
FIELDMARSHAL EE3 ALUMINUM CNC PROJECT
I started off by taking a quick photo of the kit before I quickly assembled it. I couldn’t wait any longer.


I had printed an MPP flash tube from Rafalfett’s models to do a test fit. And boy did this thing fit like a glove. I plan on smoothing out the print and painting it up as it’s the closest thing I’ll have to a flash tube for now. My first order of business was to sand the stock a little bit and give it some dings and what not to give it character. I used rocks in my flower bed to achieve organic “dings” and dents but made sure to not go overboard. I then used some walnut wood stain to stain the wood and I love the color it came out to be. After the wood dried I sealed it with a layer of wood sealant. I then distressed it a bit with a few washes of black to get into all the dents and dings I put into the stock.


I then prepped all the aluminum pieces and painted them using a satin black epoxy paint used in the automotive world. I had done some tests using blueing liquid but didn’t have the results I wanted to try on this project so I went with paint. I didn’t get any shots of the painting process but I made lots of jigs to hold my pieces in the air without touching any areas so I could get full coverage while painting. Once painted I waited a full 24 hrs to let it cure before putting it back together. I used a combination of gun oil and gel WD-40 to lubricate the moving parts as to not scratch the paint over and over.


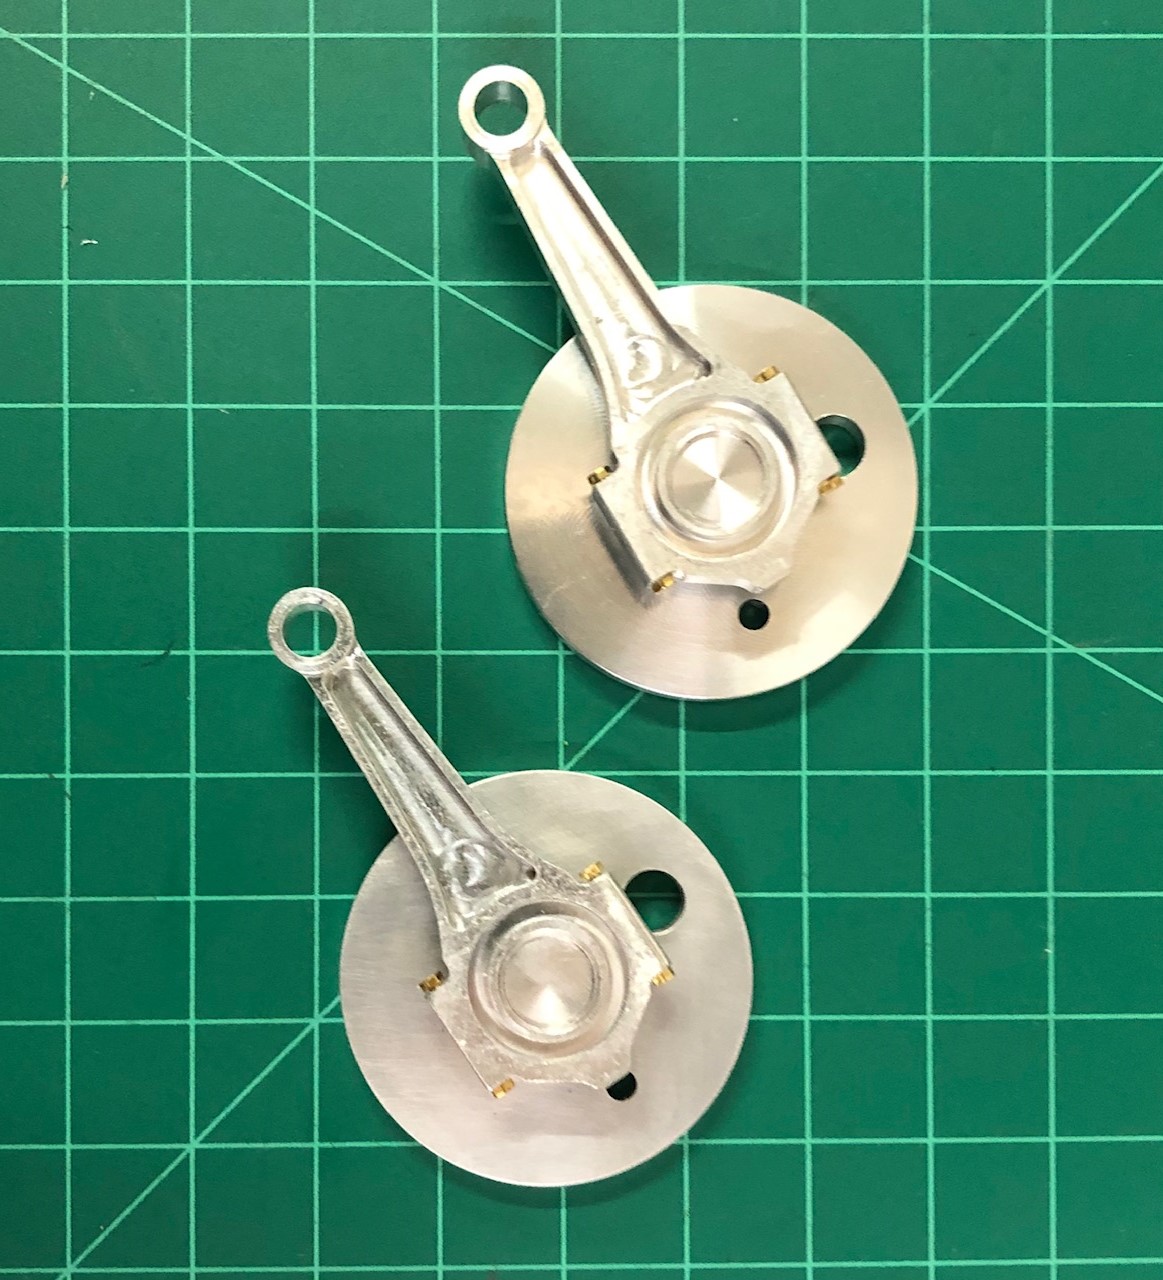
I then gathered all my resin parts I’ve made over the past few days and painted them as well. I’m very happy with them and especially the scope as it looks pretty nice in my opinion.

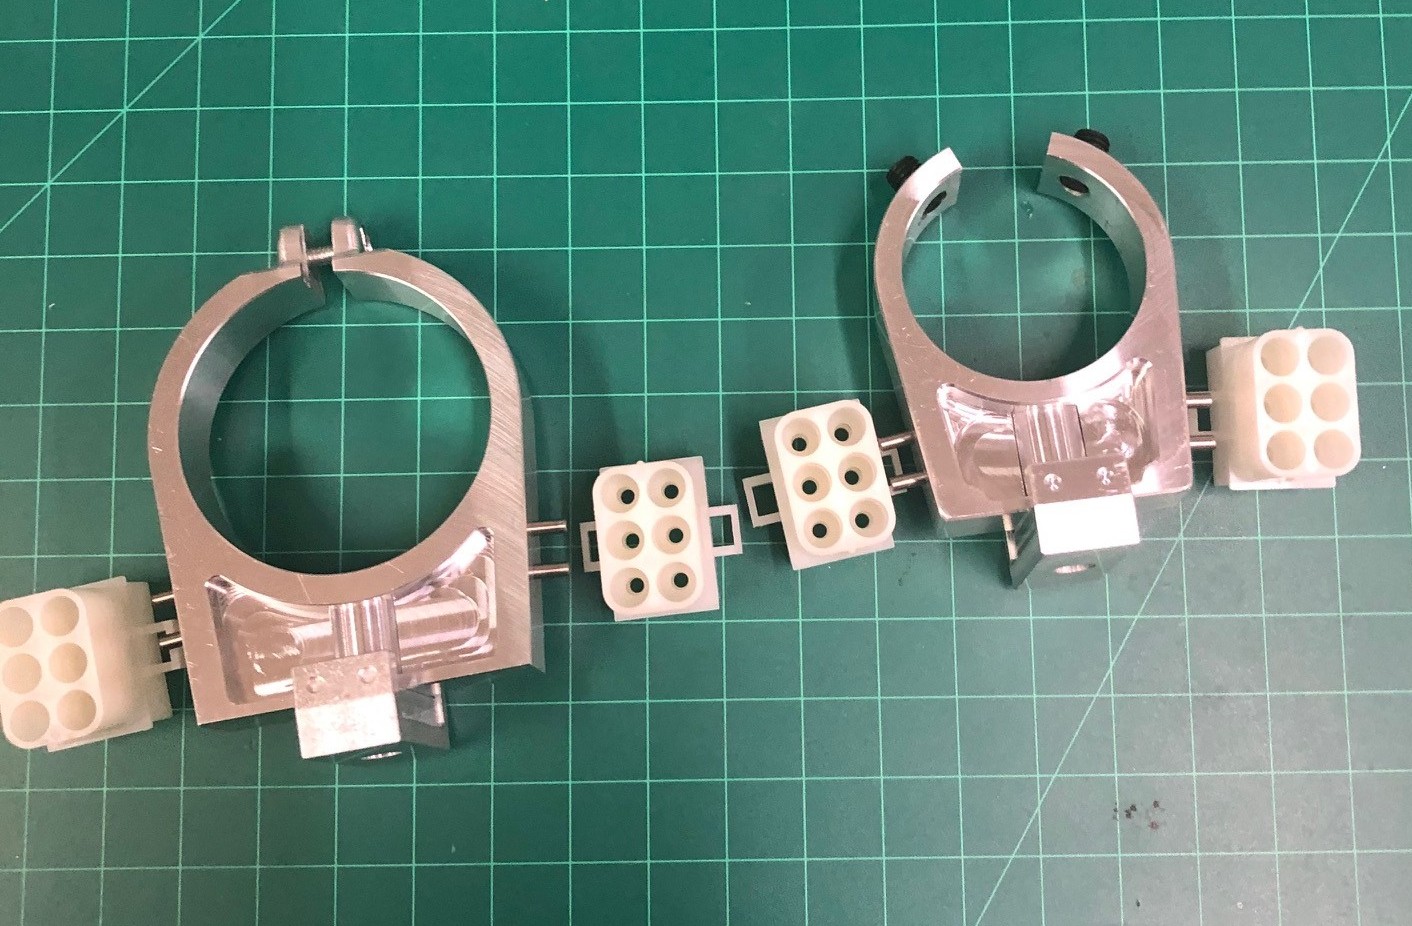
I then got to work on the barrel clamps and molex connectors. I dyed the molex connectors black and they turned out very nice. I drilled 2 small holes in each side of the barrel clamps and inserted small pins to support the molex connectors. I drilled corresponding holes in the connectors and glued in the pins to both sides. I’m re-making the clamp top adapter parts as I’m not 100% happy with those. I’ll post photos of the 2.0 versions when they are ready.

I then moved along to mounting the greeblies onto the stock and the body. I decided to use 3M mounting tape so that I didn’t have to drill holes into my beautiful new blaster.


I lastly added my “O” rings to my rifle and my leather strap. I still have to do some work but I’m super excited to finish this project.
I still need to get screws for my scope, make new mounting blocks, finish my MPP tube, weathering it and putting it all together. All and all I’m so excited to have a nice heavy and sturdy EE-3. It’s way better feeling than my resin copy. Just feels right.
FIELDMARSHAL EE3 ALUMINUM CNC PROJECT
I started off by taking a quick photo of the kit before I quickly assembled it. I couldn’t wait any longer.
I had printed an MPP flash tube from Rafalfett’s models to do a test fit. And boy did this thing fit like a glove. I plan on smoothing out the print and painting it up as it’s the closest thing I’ll have to a flash tube for now. My first order of business was to sand the stock a little bit and give it some dings and what not to give it character. I used rocks in my flower bed to achieve organic “dings” and dents but made sure to not go overboard. I then used some walnut wood stain to stain the wood and I love the color it came out to be. After the wood dried I sealed it with a layer of wood sealant. I then distressed it a bit with a few washes of black to get into all the dents and dings I put into the stock.
I then prepped all the aluminum pieces and painted them using a satin black epoxy paint used in the automotive world. I had done some tests using blueing liquid but didn’t have the results I wanted to try on this project so I went with paint. I didn’t get any shots of the painting process but I made lots of jigs to hold my pieces in the air without touching any areas so I could get full coverage while painting. Once painted I waited a full 24 hrs to let it cure before putting it back together. I used a combination of gun oil and gel WD-40 to lubricate the moving parts as to not scratch the paint over and over.
I then gathered all my resin parts I’ve made over the past few days and painted them as well. I’m very happy with them and especially the scope as it looks pretty nice in my opinion.
I then got to work on the barrel clamps and molex connectors. I dyed the molex connectors black and they turned out very nice. I drilled 2 small holes in each side of the barrel clamps and inserted small pins to support the molex connectors. I drilled corresponding holes in the connectors and glued in the pins to both sides. I’m re-making the clamp top adapter parts as I’m not 100% happy with those. I’ll post photos of the 2.0 versions when they are ready.
I then moved along to mounting the greeblies onto the stock and the body. I decided to use 3M mounting tape so that I didn’t have to drill holes into my beautiful new blaster.
I lastly added my “O” rings to my rifle and my leather strap. I still have to do some work but I’m super excited to finish this project.
I still need to get screws for my scope, make new mounting blocks, finish my MPP tube, weathering it and putting it all together. All and all I’m so excited to have a nice heavy and sturdy EE-3. It’s way better feeling than my resin copy. Just feels right.