bigkidbiggertoys
Well-Known Hunter
I thought I would migrate this info here so it isn't buried in my Din Djarin build thread.
I have had a couple of mannequin pieces in storage for years and finally got around to using them. These were purchased second hand fairly inexpensively, but the proportions did not match mine and the pose was not to my liking. I also had the problem of grafting two different mannequins and two different materials together and try and get a cohesive look.
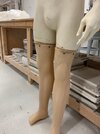
After taking my measurements, I planned where I was going to make my cuts and the angles of the new pose. The legs were not too bad as I just had to add some plywood and screw the plastic legs to the fiberglass body. I don't have a pic but I further reinforced the joint after and smoothed out the transition with duct tape.
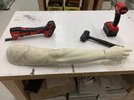
I had to chop about 3" from the arms on the fiberglass body. A multi tool made quick work of this and I added some wood pieces inside so I could pose and secure the joint with wood screws. I then used 3 layers of fiberglass cloth to smooth out the transition and make the joint rock solid again. I wanted to flare out one arm to make it look like he is ready to go for his blaster, so I took out a wedge, heated up and bent the arm out, again securing with screws and fiberglass.
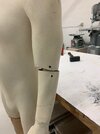
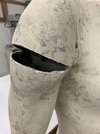
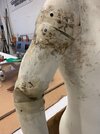
Last step was to check my progress by stepping back and looking at the pose and standing next to it and mimicking it to see if it felt natural and balanced. This was hard to tell as it looks really rough but I know once it get clothed that the sins will be hidden. I took it home right away and set it up. I had to chop most of the front of the foot off in order to get the boots to fit and I added a padded stem on the neck to support the helmet. Other than that, this is all of the pieces I made and chronicled in this thread. The last thing I am going to do to this is add a custom themed base.
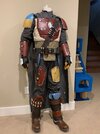

I have had a couple of mannequin pieces in storage for years and finally got around to using them. These were purchased second hand fairly inexpensively, but the proportions did not match mine and the pose was not to my liking. I also had the problem of grafting two different mannequins and two different materials together and try and get a cohesive look.
After taking my measurements, I planned where I was going to make my cuts and the angles of the new pose. The legs were not too bad as I just had to add some plywood and screw the plastic legs to the fiberglass body. I don't have a pic but I further reinforced the joint after and smoothed out the transition with duct tape.


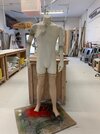
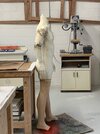
I had to chop about 3" from the arms on the fiberglass body. A multi tool made quick work of this and I added some wood pieces inside so I could pose and secure the joint with wood screws. I then used 3 layers of fiberglass cloth to smooth out the transition and make the joint rock solid again. I wanted to flare out one arm to make it look like he is ready to go for his blaster, so I took out a wedge, heated up and bent the arm out, again securing with screws and fiberglass.


Last step was to check my progress by stepping back and looking at the pose and standing next to it and mimicking it to see if it felt natural and balanced. This was hard to tell as it looks really rough but I know once it get clothed that the sins will be hidden. I took it home right away and set it up. I had to chop most of the front of the foot off in order to get the boots to fit and I added a padded stem on the neck to support the helmet. Other than that, this is all of the pieces I made and chronicled in this thread. The last thing I am going to do to this is add a custom themed base.


