Boba Re-Armored 3d printed

TerranCmdr

Active Hunter
Hi,
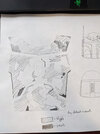
Decided I wanted to be Boba for Halloween (and beyond, definitely plan to take this to some cons) and his most recent Re-armored costume seemed more approachable than his previous iterations. Right off the bat I want to say I'm not trying to get this certified, however I am doing my best to be as screen accurate as possible in the time I have allotted myself.

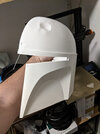
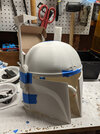
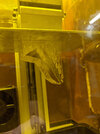
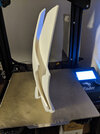
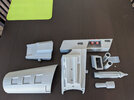
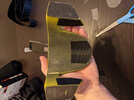
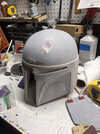
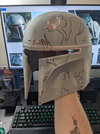
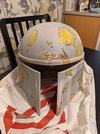
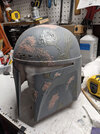
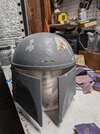
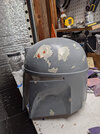
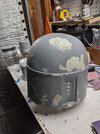
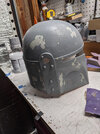
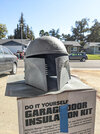
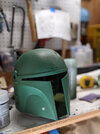
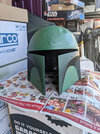
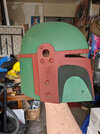
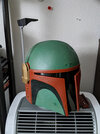
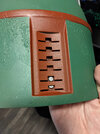
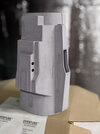
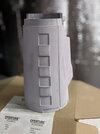
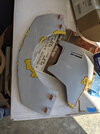
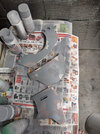
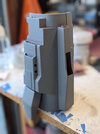
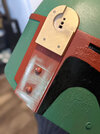
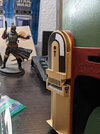
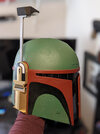
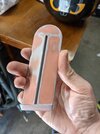
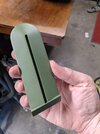
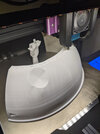
I started in May by getting files on my 3d printer. The first piece I printed was the helmet and I used a free file I got here. I realize there are differences between this and the Mandalorian Boba but I liked this file so that's what I used. I had to slice the helmet up myself to get it to fit on the printer. I had a few issues with banding and under-extrusion which ended up causing more finishing work for me later. I hollowed out the RF stalk so I can run wires through it, to power the LEDs. Also printed the rangefinder clear piece on my Anycubic photon in clear resin.
PXL_20210526_045836599.jpgPXL_20210527_134009758.jpgPXL_20210601_061757366.jpgPXL_20210715_031450150.jpg

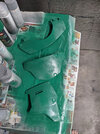
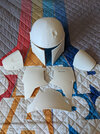
For the rest of the armor (minus the vambraces/gauntlets, but I'll get to that later), I used Galactic Armory's files. They are great for the most part, haven't looked too close at them as far as accuracy goes but they are nicely sculpted. The knees I will be redoing as the dart pieces aren't accurate and I should have printed them with the dart pieces separate. One thing that annoyed me about the files was that some of them were not very print-friendly.
PXL_20210603_221556755.jpgPXL_20210603_220440695.jpgPXL_20210626_162827151.jpg
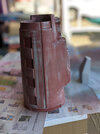
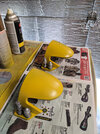
Since I knew I'd be re-doing the knees I didn't obsess over getting them perfectly sanded but they'll do for now. I sprayed the darts black and hit them with some rub-n-buff, then masked those and painted the rest of the knee.
PXL_20210915_224635232.jpg
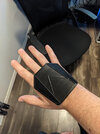
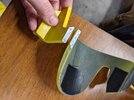
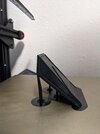
The hand plates I grabbed from here. Haven't verified the sizing but once I get them on the gloves I'll be able to re-print if necessary.
PXL_20210629_163016792.jpgPXL_20210629_133423715.jpg
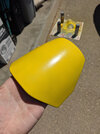
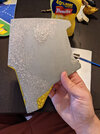
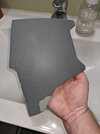
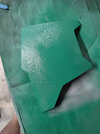
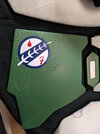
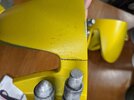
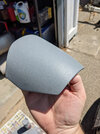
I tested my paint process on the shoulders first as they're the easiest to sand. I used a lot of sanding and filler primer, then sprayed on some textured paint followed by about 10 passes of yellow. Pretty happy with the result. The logo I plan to do with my Silhouette vinyl cutter.
PXL_20210702_180443661.jpgPXL_20210702_181050807.jpg
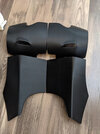
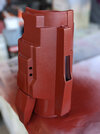
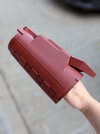
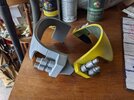
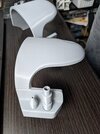
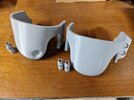
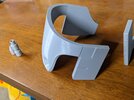
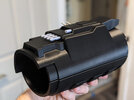
So the vambraces. I was happy with all of the files from Galactic Armory except these. They were not broken up to be printable at all and would not even fit on my printer, much less print nicely. So I decided I might as well remodel them myself. In that process I got a little obsessed and discovered just how inaccurate the GA files are (no disrespect, they're not sold as being screen accurate). Anyway it took me a while but I'm happy with the result. Still not perfect but much better than what I initially was going to print. And I put them up on Thingiverse as a way of paying it forward.
PXL_20210811_214557173.PORTRAIT.jpgPXL_20210822_190916242.jpgPXL_20210822_191314358.jpg
I got a little carried away with the left one so it has spaces for LEDs for the guns as well as the holographic projector.

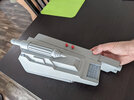
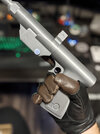
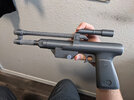
I also decided to model his blaster pistol. I was initially going to omit it but decided if I'm going to be commissioning the belt, why not include the holster? And why have a holster with nothing to put in it? This file is also up on Thingiverse.
PXL_20210907_233721217.jpg
 
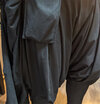
Ok, soft parts! Right off the bat I decided I didn't have enough time to figure out the pants so I went ahead and grabbed these from Amazon. I think they're just fine as a starting point. They are nice and comfy too! I also got this turtleneck as the undershirt.

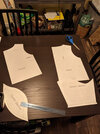
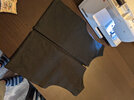
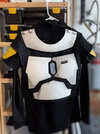
The vest I drafted myself. Found a generic template online and scaled to my measurements. The CRL discussion thread on BHG.net was extremely helpful in figuring out the details. I used sort of a duck cloth for the material, but if I redo it (and I might) I'll try and find the more accurate tackle twill. It's not perfect but I'm very happy with it for a first go. The armor is all attached with outdoor sticky velcro on the armor and sewn in velcro on the vest.
PXL_20210905_051524769.jpgPXL_20210908_061908711.jpgPXL_20210916_163249323.jpgPXL_20210916_192126039.PORTRAIT.jpg

I picked up some cotton(?) material from a local store to use for the extra pieces hanging from the pants. It's not quite as textured as the screen-used stuff but it hangs and moves very nicely. I pleated and sewed those to the inside of the pants before attacking them with scissors and an Xacto for weathering. I also added an extra belt over the top to tie it all together. I also used some of this material to sew a quick infinity scarf.

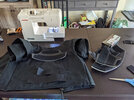
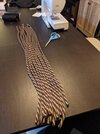
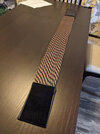
For the girth belt I got the pet hardware stuff that's screen accurate. It was very reasonably priced. Cut them all to length and sewed them into some pleather pouches at the ends. Getting the machine through the ropes was tough but I'm pleased with the outcome.
PXL_20210920_054438841.jpgPXL_20210922_065033992.jpg

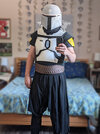
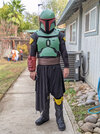
So here's the current state of the costume! I have the Nortiv8 boots on the way, as well as gloves. Looking forward to making the gaiters and then I've got a lot of sanding in store before I can get the rest of the armor painted. I will also be building the leather belt with a buddy of mine in the next couple of weeks.
PXL_20210922_193449902.jpg
 
On to the boot gaiters. Got the boots in my size from eBay for about $30 used, only problem is they're the grey kind. I plan to use some plastidip to get rid of the grey rim at the sole, will update on that later.

I thought the gaiters would be pretty simple to draft and assemble. Boy was I wrong!

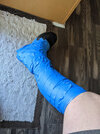
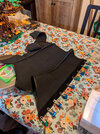
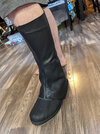
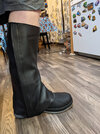
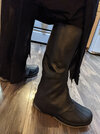
Saran wrapped and taped my leg and traced and cut the pattern from there. Transferred those to paper so I could add a seam allowance and clean them up a bit. I had some faux leather laying around which seemed like the perfect material for this. The first fitting was not looking great and it took a lot of pinning and re-sewing to get them fitting a bit better. I also trimmed one of the panels too far and had to sew it back on. Added velcro in the right places and the end result isn't terrible but I'm not happy with it. Unfortunately I only have exactly enough material for two gaiters and I can't seem to find the same material in store, so I'll go with the same pattern for the right leg. Will probably end up re-doing these at some point to try and make them a bit better. I also have to figure out placement of the knee armor but these feel a little low to me.
PXL_20210924_195147821.jpgPXL_20210929_055642510.jpgPXL_20210929_071239309.jpgPXL_20210929_071243881.jpg

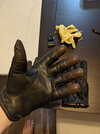
Also did the gloves. I didn't want to spend $50/pair on gloves so I went to eBay and found a couple of pairs for a total of $30.

The brown ones are super nice, love them as just gloves. Both pairs are "kevlar" lined though so I did go in and rip that out of the black pair. Was relatively simple to cut the fingers off, I used my last knuckle as a guide. Turned out pretty good in my opinion. Just need to sew the velcro for the handplates on now.
PXL_20210925_071334694.jpgPXL_20210926_211903846.PORTRAIT.jpg
 
Second gaiter is done. Turned out so much better than the first as I started with an adjusted pattern. I really wish I had more of this fake leather material as I'd love to redo the left but for some reason I can't find it anywhere. Attached velcro to the back of the knees and sewed on a couple of patches to the gaiters to hold them on. Works pretty well.
PXL_20211004_055857508.jpgPXL_20211004_060850076.jpg

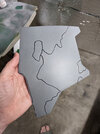
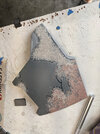
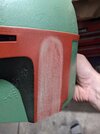
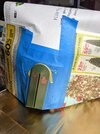
I also started painting the armor. I started by sanding smooth, adding a few very heavy coats of filler primer, and sanding again. Then I laid out the pattern for the underlying damage. I'm going with 3 levels - smooth, textured, and heavily textured/stippled. I got a little overzealous with this one and sprayed the texture before I decided to do masking, so I had to sand it back a bit. I use mustard to mask. I saw it in a helmet tutorial a long time ago and it just kinda stuck with me. Works great. After masking and re-spraying, I went with what some have suggested - stippling Bondo with a chip brush. It works well but I think next time I need to get the consistency a little smoother. I ended up sanding back over the stippling before re-spraying with the texture yet again. All in all I'm actually very happy with it.
PXL_20211002_211202095.jpgPXL_20211002_211609921.jpgPXL_20211002_233021684.jpgPXL_20211003_015759590.jpgPXL_20211003_030252901.jpg

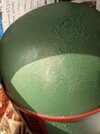
For green I used a basecoat of Krylon Satin Spring Grass with a dusting of Krylon Satin Italian Olive. Having no "actual" Boba Fett around to compare it to I'm happy with the look. Compared to the screengrabs I think it needs a bit more blue but there's so much color grading done to the show that it's probably not the best color reference anyway. The important thing is that it looks close and the armor will match itself.

PXL_20211003_030629746.jpgPXL_20211003_172315304.jpg

For the decal I cut 3 passes on my Silhouette and stacked them all up.

Now that I have this process figured out I feel more confident about painting the helmet... just need it to be smooth first!
 
Finally got my helmet smooth enough so I could go about un-smoothing it. :unsure:

First I mapped out the wear pattern. This may be not perfectly screen-accurate but the way I'm doing it is the most worn parts will be nearly smooth, then a layer of texture spray, then the raised parts with stippled Bondo. I used my template to paint in mustard for masking the smooth parts.

PXL_20211014_040120354.jpgPXL_20211014_042215521.jpgPXL_20211014_044934309.jpg

After masking I sprayed everything with texture paint. Then I sketched out the raised areas and stippled with Bondo. After that cured I hit it with another coat of the texture and washed everything off in the sink, using an old toothbrush to get all the masking off. Finally I hit the smooth parts with a high pass from a standard grey just to get a tiny bit of texture.

PXL_20211014_052335071.jpgPXL_20211014_202049698.jpgPXL_20211014_202053367.jpgPXL_20211014_202056896.jpgPXL_20211014_202101620.jpgPXL_20211014_212549673.jpg

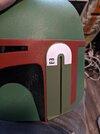
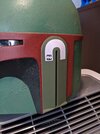
I hit the helmet with the ol' one-two of Spring Grass and Italian Olive, then began masking the cheekbones. Sprayed flat black on those in an attempt to make dark green but I think I went a little far. Then masked off the red and hit everything with a few coats of clear. Now it's really looking like a proper Boba bucket! Still need to do washes and weathering but here's how it stands. I'm really happy with how the texturing turned out. I also added an MQ-1 circuit board I modeled to the back. So much work for something that's barely visible!

For the ear pieces I painted the right side with a gold and hit it with a matte clear. The left side is straight Italian Olive. The rf stalk is Rub N' Buff. I'll be hand-painting the details.

PXL_20211015_171638894.PORTRAIT.jpgPXL_20211015_233323740.jpgPXL_20211017_205113873.jpgPXL_20211017_210332000.jpgPXL_20211017_210333469.jpgPXL_20211017_210335547.jpgPXL_20211018_065121256.NIGHT.jpgPXL_20211018_160114892.jpg

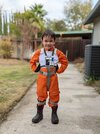
Up next are the vambraces. Was hoping to have this done for Halloween but I've gotta shift focus and get my son's Rebel pilot costume done!

PXL_20211011_045709466.PORTRAIT.jpgPXL_20211011_045715588.PORTRAIT.jpg
 
really like your take on the texture with the 3 layers, smooth, light texture and heavy stippling. probly gonna replicate this on my own. keep em coming , love it. for the paints I'm leaning towards the Montana series. the black series 'storm' seems a good fit for the base armor.
 
Thanks! Yeah I may end up re-painting if I don't end up liking the look after the weathering. Pretty sure I'll be redoing the shoulders at the very least because I didn't do the 3-step texturing on those. Yeah I'm pretty happy with the texturing, after seeing a hires promo image of Boba I think I actually got it pretty close.
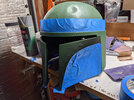
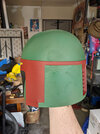
 
Quick Halloween update:

Managed to find some time to get the basecoat down on the rest of my chest armor so I could at least wear that to the festivities. I used the same masking stippling process.
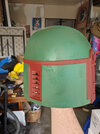
PXL_20211028_220750505.jpgPXL_20211029_062001694.jpgPXL_20211029_062415738.jpg

I also hadn't planned on it but I realized my right arm vambrace was actually in a place where I could paint it, so I got a quick coat of texture and paint on that as well. I will go back and add the stippling damage. I also think I need to figure out a better way to secure it to my costume. Sliding it over the velcro on my arm is very challenging to remove or attach it.

PXL_20211029_230511113.PORTRAIT.jpgPXL_20211030_001406354.PORTRAIT.jpgPXL_20211030_001615628.PORTRAIT.jpgPXL_20211030_002513045.PORTRAIT.jpg

I also had time to add a quick cell phone pouch to my bakama pants, inspired by Sandra1976 . It is completely concealed behind one of the hanging drapes and attaches with velcro.
PXL_20211101_032558334 copy.jpg

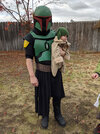
So now I have the left vambrace and back armor remaining. Still unsure whether I want to do the jetpack or not. Anyway I managed to finish both my boys' costumes before the big day and my firstborn was especially in love with his. :)

PXL_20211030_222031032.PORTRAIT.jpgPXL_20211030_233419245.jpgPXL_20211030_215107267.PORTRAIT.jpg
 
Quick Halloween update:
Nice! coming along nicely. Love the pilot suit and Grogu too! My youngest and I went as Mando and Grogu ourselves. Chk out SpicyFetts Happy Halloween post for pic.

Side note - see the new Book of Boba trailer yet? looks like his outfit (as expected) is changing slightly. could swear i saw what looked like pants and short half skirt just on the backside. Maybe it was the drapes blowing behind him but looked like solid piece behind both legs. My excitement level is like 10/10 for that show right now.
 
The FreshMaker Thanks! Your Din costume is amazing! Would love to do that one myself sometime.

Yup I saw the BoB trailer first thing in the morning, what a nice surprise to wake up to! I have to separate the Mando version of Boba and BoB version in my head so I don't go down the rabbit hole of redoing my entire costume, lol. As far as I can tell almost everything is different. His helmet looks taller/narrower, the armor spacing is much tighter, full Mando style undersuit with a back skirt as you pointed out. Different girth belt, different ammo belt, different buckle, etc. And don't even get me started on the extra slightly raised details on the armor! (look at the shoulders, the middle of the chest, and the vambraces)
Anyway it looks great but I prefer the Mando S2 look for now, could be because I've been working on it for a while though haha.
Loved the trailer aswell. Quite a few differences indeed. First up; completly hyped for BoB... like... wow!

Now on to costume nerding: I was a bit startled when I saw the sunlight through his shoulder armor. Beskar isn't translucent right? Then a few scenes he is walking around without the hoses, but.... maybe that is becauseche was instructed to go there unarmed.
Then the translucent armor made sense, because as he swings the vibro axe thingy down... the armor bends all kinds of manners. It's rubber.

Anyways, I think that only helps the actors but for costume nerds it can be weird. I also thought the inside of the black series helmet looked better then the one seen where thr coins drop out of, but perhaps there is more detail there going further into the bucket. Personally I dont care much about the inside of a helmet.. untill you start showing it in a scene, like Vader reveal's helmet or in this case the coins coming out of the bucket.

Enough nagging... again... hypedcand psyched for this!!! Bring it :)
Yeah i dont get hung up on the rubber/see through armor biz. necessary evils when making good tv. after wearing my Din armor around for a few hours i get it. my mobility is half of unarmored lol. fight scenes would be crap that way. the scene inconsistencies bother me hoses/no hoses, and in the axe shot it looks like the camera is reversed. chk his belt and armor - its flipped. its like they filmed it on an iphone in selfie mode. lol.
 
Found some time to do the decals on the helmet last night. I was originally planning to hand paint these but I don't know what I was thinking since I have a vinyl cutter. It was relatively easy to find decal sets online to trace. Just looked at reference and measured the helmet with calipers to make sure I had it sized right. Haven't applied the left ear yet since I had to reprint that one, I left it in the sun a bit too long and it melted slightly. :(

Had to sand the helmet slightly to get a good bond for the lower ear part. When I printed the helmet I modified the file slightly to include ball/socket connections for easy alignment, worked out perfectly. After I redo the left ear I'll do the kill stripes and then it's finally time for some much needed weathering!

PXL_20211103_051922125.jpgPXL_20211103_053119089.jpgPXL_20211103_053507685.PORTRAIT.jpgPXL_20211103_053956975.jpgPXL_20211103_054440481.PORTRAIT.jpg
 
Thanks for the comments!
Quick little update - I finished the stickers on the left side of the helmet, but it was just short of a total fiasco. I finished sanding, filling, and painting the left ear and got it into place. Then I applied the sticker I designed for it, based on other templates I found, and I was not happy with the size or fitment of it.
PXL_20211104_220719377.jpgPXL_20211104_234446271.jpgPXL_20211104_234945827.jpgPXL_20211106_162714935.jpg

No biggie, I'll just pull the sticker back off and cut a new one. I was able to reposition the stickers several times on the right side so this should be no different. Except... in my excitement, I didn't give the paint and clear coat a full 24h to cure and it's been colder here. So when I went to take the sticker back off, well, part of the paint came with it. Since the ear was already glued on, I didn't want to mess anything up by trying to remove it, so I ended up having to mask it off on the helmet to refinish it again. Unfortunately in the process I also managed to get some filler on the helmet itself so I had to sand that down a bit and repaint that part of the dome. After letting the ear cure for 24h this time I re-applied the new sticker and I'm much happier with it now. Whew!
PXL_20211105_200729117.jpgPXL_20211105_200740729.jpgPXL_20211110_214441594.jpg

Now I just need to get some red-orange spraypaint so I can do the killstripes, and then we can finally get to the fun weathering part!

I also decided to whip up some new knees. While I was still finishing the old ones, I dropped one of them and it cracked. I was able to get it back together but it was definitely a little flimsy. Then, while I was wearing my costume on Halloween, I bent down to help my son and the other knee cracked in the same place! Seems like they're a bit small and are flimsy because of the orientation I decided to print them in. So, I modeled some new ones, more accurate this time, and printed those out. These ones have the correct dart launchers, the inverted "F", and the dent in the left right. I also printed them orientated upside down and they are much stronger and more flexible where they need to be. Looking forward to getting these finished up.
PXL_20211107_062018778.jpgPXL_20211107_062030725.jpgPXL_20211106_180307554.jpgPXL_20211107_051717219.jpgPXL_20211108_190015698.jpgPXL_20211108_190105734.jpg
 
Last edited:
ninja pants.jpg


Looking good Terran. Are these the type of pants you guys are using? Bakama with the ability to tie up the leg below the knee?
 
JayRoo Thanks! I believe the ones you're picturing should work, as long as there's no opening on the side of the leg. In fact the ones you're picturing look more accurate than mine, at least to me. I linked the ones I used up above, and I think they look OK, but I plan to pattern out my own that are a little baggier and out of the correct material.

1636653607171.png
 
TerranCmdr i picked this $30 harem pant on Amazon.

harem.jpg


I will need to take-in the sides which stick out a bit (actually a pocket) and raise the middle from between my knees a bit but its the cleanest I could find for cheap just to get started for sizing things like the boot gaiters. I'll probably use some athletic tape to bunch the material up near my knees.

Those pants I posted above are $50 on Etsy but they are from Russia so it would be $70 with shipping and I don't know if its worth it yet if I can make mine look right with tape/armor/gaiters.
 

Your message may be considered spam for the following reasons:

If you wish to reply despite these issues, check the box below before replying.
Be aware that malicious compliance may result in more severe penalties.
Back
Top