TerranCmdr
Active Hunter
Thanks BrandNewMando !
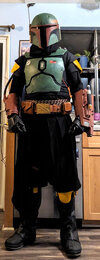
I got the rest of my con crunch done last week before attending SacAnime Summer 2023:
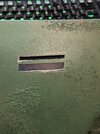
The windows on my chest piece were not large enough for my display so I had to do some dremel and file work to open them up a bit. Then had to Bondo, repaint and re-weather that entire panel. I ended up using rub-n-buff for the silver highlights instead of the silver Sharpie and I like it a lot more - will probably have to go back and update the rest of my armor with that.
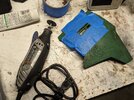
Installed the Westaby chest display on a custom 3d printed mount - the nice thing about having the 3d model of the chest pieces is that I can use that geometry to cut my model for a perfect curved fit. I used m3 threaded inserts and 3d printed bars to secure the display in a removable fashion. I then used the buttonhole setting on my sewing machine to punch a hole in my vest to run the wire down to my belt. The display looks awesome and really adds a more "finished" feeling to my costume. Thanks again to Dustin, I totally screwed up and soldered the bar graph upside down the first time and he was able to sell me a complete bar graph board to rectify my mistake!
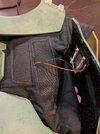
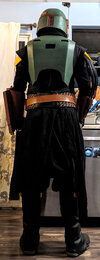
Finally I redid the scarf - I currently have mine detached from the undershirt because of how my comms setup works and it works fine for me. It differs from my old scarf in that it's a bit longer and the material is doubled over and finished. Looks much more accurate now to me.
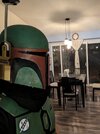
One little thing I noticed is that since my scarf is now larger, my neck was showing slightly so I went to Target and grabbed a black neck gaiter. This worked well to hide the top of my neck but unfortunately you can see the bottom of my neck poking out in this photo. I think I may actually attach the gaiter to the undershirt.
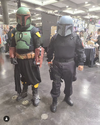
Anyway I attended SacAnime and it was fun talking to people and being stopped for photos. I met some cool people from the Mando Mercs and I may be making joining them a short-term goal of mine. Really glad for my tiny helmet fan as my visor didn't fog up despite me just pouring sweat the entire time. As it stands I'm very happy with the look of this costume and will be progressing towards submitting for approval. I have my sidearm to sand and paint, the EE-3 to make and the jetpack as well. More updates to come soon!
I got the rest of my con crunch done last week before attending SacAnime Summer 2023:
The windows on my chest piece were not large enough for my display so I had to do some dremel and file work to open them up a bit. Then had to Bondo, repaint and re-weather that entire panel. I ended up using rub-n-buff for the silver highlights instead of the silver Sharpie and I like it a lot more - will probably have to go back and update the rest of my armor with that.


Installed the Westaby chest display on a custom 3d printed mount - the nice thing about having the 3d model of the chest pieces is that I can use that geometry to cut my model for a perfect curved fit. I used m3 threaded inserts and 3d printed bars to secure the display in a removable fashion. I then used the buttonhole setting on my sewing machine to punch a hole in my vest to run the wire down to my belt. The display looks awesome and really adds a more "finished" feeling to my costume. Thanks again to Dustin, I totally screwed up and soldered the bar graph upside down the first time and he was able to sell me a complete bar graph board to rectify my mistake!

Finally I redid the scarf - I currently have mine detached from the undershirt because of how my comms setup works and it works fine for me. It differs from my old scarf in that it's a bit longer and the material is doubled over and finished. Looks much more accurate now to me.

One little thing I noticed is that since my scarf is now larger, my neck was showing slightly so I went to Target and grabbed a black neck gaiter. This worked well to hide the top of my neck but unfortunately you can see the bottom of my neck poking out in this photo. I think I may actually attach the gaiter to the undershirt.

Anyway I attended SacAnime and it was fun talking to people and being stopped for photos. I met some cool people from the Mando Mercs and I may be making joining them a short-term goal of mine. Really glad for my tiny helmet fan as my visor didn't fog up despite me just pouring sweat the entire time. As it stands I'm very happy with the look of this costume and will be progressing towards submitting for approval. I have my sidearm to sand and paint, the EE-3 to make and the jetpack as well. More updates to come soon!

