Donavon
New Hunter
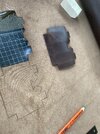
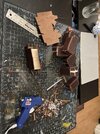
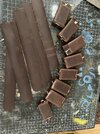
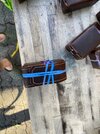
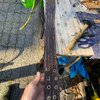
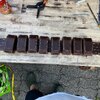
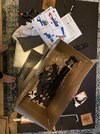
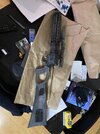
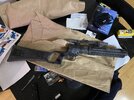
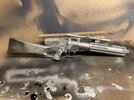
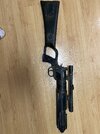
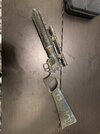
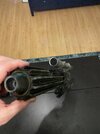
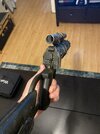
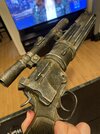
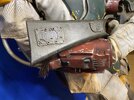
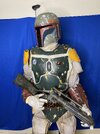
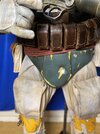
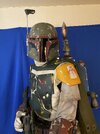
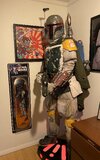
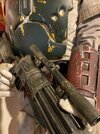
Hello fellow Fett builders! It’s been a long while since I have posted on dented helmet regarding my build, as I’m sure with a lot of you the last year has been a struggle! Well I’ve finally gotten around to putting my build together. The mail took a while to get the rest of my materials to complete the over all look of my ROTJ fett. In the mean time I decided to make the ammo belt myself out of some leather and wooden blocks with the help of RafalFett templates and a friend who had a sewing machine. I added the grommets after and will be finding some leather string rope for the back of the belt detail. It was a tricky process but I am happy with how they turned out. After the ammo belt was completed I received my EE-3 blaster from imperial arms. This was a pretty painless process gluing all the prices together and painting. I primed the blaster with black rattle an primer from mr. Paint and metallic rattle cans from rustoleum. From there I used the smallest amount of masking fluid to show some exposed metal underneath and then mr paint matte black, I then used several airbrush paints to achieve a weathered look. Specifically raw umber, sand, and even a bit of grey. Then I added a lense on the scope from thin plastic from a fridge magnet I bought at a dollar store that I cut with my dremel to fit snuggly in the ends of the scope.
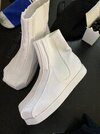
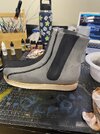
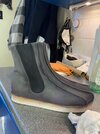
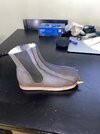
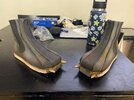
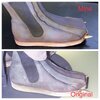
Next were the awesome boots I grabbed from Fandango Fett. I wet the boots down and used acrylic grey model paint and covered the whole boot, obviously I used painters tape for the sole, then set them to dry for 24 hours, the next day I applied the black. Then using mostly airbrush acrylics I added some purple misting and raw umber for weathering on the boot and around the toe spikes.
It was few months before I received any other parts but then the flood gates opened (also known as the border) and my girth belt and Wookiee braids arrived from the super talented woodman. And my flak vest, flight suit and helmet from bobamaker came shortly there after.
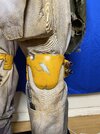
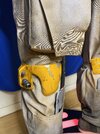
My friend Steve who is part of the 501 and super rad dude printed the shin tools for me on his 3d printer, I painted those as closely to the references as possible. I might actually buy man of wars shin tools some day and paint those up, but these will do for now.
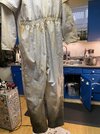
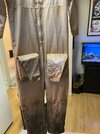
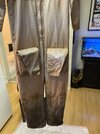
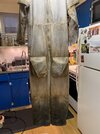
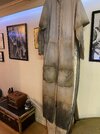
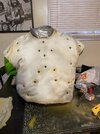
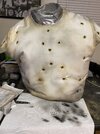
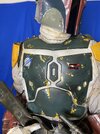
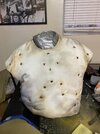
I’ve never been more nervous about ugh this build then when doing the grommets for the flak vest. Luckily I had already build a duct tape mannequin and used the torso the assure the placement was correct for the grommets. It was easily the most difficult thing ensuring the placement was spot on. After the grommets were hammered in, I weathered the flak vest, spats, gloves and flight suit at the same time. Using raw umber, sand, and greys and blacks. Wetting the flight suit, spats and gloves and went to town. I might add a bit more weathering down the road to certain areas. I also dyed my spats with rit dye pearl grey, I don’t know if I like the tone it came out as, so I will be buying a pair of beige ones down the line, just to have them if I want to mix up the look.
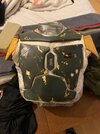
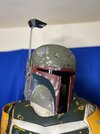
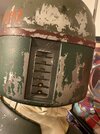
Finally, I opted to have boba maker paint my helmet as this is my first build and when I ordered it I wasn’t confident in my airbrushing/masking skills. I will take a crack at painting a helmet on my second build.
I think that’s the jist of it. I’m sure I could go into more detail but that’s all I can think of right now!
Oh and I built the light box/mannequin stand on the weekend. Pretty easy and small enough to fit in the corner of my home office!
Cheers
Donavon
Attachments
-
 68EF7C36-9799-4625-85D4-176BB3185ED3.jpeg3.2 MB · Views: 256
 -
 F3DEC9D3-D6AA-435B-8A90-2FC4E29A999A.jpeg2.2 MB · Views: 235
 -
 97DA7BFB-29B4-4B87-B35B-9C8E20753D7D.jpeg2.4 MB · Views: 226
 -
 355CF24D-5796-4DBC-8AA9-9ED502AD9A87.jpeg1.6 MB · Views: 205
 -
 A7839FDC-A3C5-4793-B94C-7C1713A176AC.jpeg674.9 KB · Views: 206
 -
 0A7B8632-2ECC-4D20-83F4-CFD9841CE05D.jpeg588.5 KB · Views: 221
 -
 173F311D-0313-4201-9683-C3F04BE94747.jpeg1.8 MB · Views: 210
 -
 50149D89-E71A-4D99-B542-E6933CD21C52.jpeg1.9 MB · Views: 228
 -
 DDD20BCC-6EB5-4298-8E30-04BC9AC9EA35.jpeg1.6 MB · Views: 230
 -
 C9E2A8D6-4195-4DF6-99DB-C556F0689F4D.jpeg488.6 KB · Views: 193
 -
 22A308E4-2419-41C0-86C7-FBF24DA99002.jpeg2.9 MB · Views: 200
 -
 81D65CF5-4301-415D-BDB8-ED3784F900C0.jpeg459.6 KB · Views: 203
 -
 D90F472A-4EF0-46A2-8D56-141663CCE65C.jpeg1.8 MB · Views: 194
 -
 D4231E19-45EE-452A-A3F8-C8144C2E95B8.jpeg1.8 MB · Views: 218
 -
 16250936-1854-4F76-9F36-E2EE4205841F.jpeg3 MB · Views: 204
 -
 377DB647-2318-495F-9DF2-A739B15A86B8.jpeg4 MB · Views: 203
 -
 BDAD5877-B20D-4F4A-B539-3C2A026E0BEE.jpeg2 MB · Views: 206
 -
 B2926EFC-6845-497F-A8D5-C736A8AC5FCC.jpeg1.9 MB · Views: 196
 -
 0C6EAF0A-BDFE-4156-B244-04FE6A949242.jpeg1.6 MB · Views: 196
 -
 EE695796-2D4C-4D04-B260-AD296C67541D.jpeg1.6 MB · Views: 256
 -
 3291CFD1-D19B-46EC-A76D-6E75F2D06468.jpeg1.7 MB · Views: 205
 -
 8097F0D9-8627-4B3A-B941-17DBEF028342.jpeg1.8 MB · Views: 220
 -
 87F93D38-4654-4CB5-B859-13712FEBE75B.jpeg1.7 MB · Views: 210
 -
 79729B31-242E-455F-A6E2-33F41C0C0827.jpeg1.4 MB · Views: 212
 -
 33E3737D-9243-458D-8188-591EAB5E0C3F.jpeg1.7 MB · Views: 216
 -
 61B3B250-02DC-4709-B8A9-3C3914AC609F.jpeg1.5 MB · Views: 217
 -
 8C0AA23B-4BC0-48B8-91B5-F3A5CF11D907.jpeg1.7 MB · Views: 204
 -
 4C2E84E6-F247-4BD3-93A3-60B0423F96FF.jpeg1.7 MB · Views: 215
 -
 6E012720-A083-4CB5-92BE-746D286F35FE.jpeg1.9 MB · Views: 231
 -
 F27D1A13-16F5-4FA7-8F41-9475A6555C4B.jpeg2.6 MB · Views: 210
 -
 98FF1B17-AB1B-44AC-86DB-3A23819446CD.jpeg2.2 MB · Views: 233
 -
 7D8D5C5B-8272-4551-8B40-D33108043D92.jpeg3.6 MB · Views: 225
 -
 1FF013D1-4BC5-460E-92C9-1E67EE2F3438.jpeg1.8 MB · Views: 237
 -
 0D22AF07-C4A8-4E65-965C-6D2519CD4FAD.jpeg1.6 MB · Views: 228
 -
 42AAD008-7E94-4965-B739-0396D3A773DB.jpeg3 MB · Views: 218
 -
 0634889F-A727-4A7F-A79A-24B14CF321EF.jpeg2.9 MB · Views: 211
 -
 9D94E815-CB78-47F2-A76C-F090EAA33C1F.jpeg1.6 MB · Views: 228
 -
 1B8AD97C-40A8-40A1-B3E8-065A516CB907.jpeg1.6 MB · Views: 247
 -
 46277FFA-C532-4EAD-8D92-C31DD603B163.jpeg2.1 MB · Views: 235
 -
 0954222A-AA37-44B7-8E95-EA3C93548CFD.jpeg1.9 MB · Views: 227
 -
 DEA5B9E9-B204-4252-8264-22E32A8EEACE.jpeg2.6 MB · Views: 266
 -
 B76DA2B2-44DF-454D-A58E-8C85B667B9CB.jpeg1.7 MB · Views: 229
