3D Printing parts to fit existing equipment - Tutorial

Lazerjock

Active Hunter
This tutorial may be helpful if you have damaged or missing parts and access to a 3D printer.
Boochman & I are working together to replace missing parts for his jet pack. There was some interest in seeing the process.

I will be doing the printing and Boochman will do the final assembly and paint work. The 3D models were created by RafalFett and are available for download from his Shapeways page here:

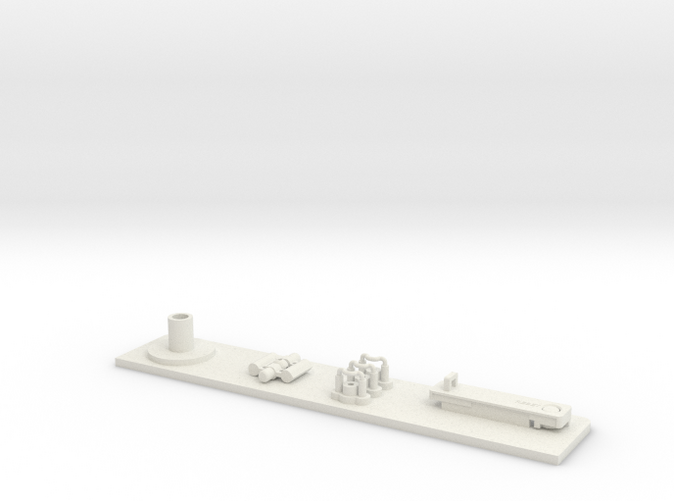
I will be printing 3 models.
Jet Pack Rocket
Rocket Base
Thruster Nozzles

The models will need to be modified in order to mate properly with Boochman's jet pack and the metal parts he already has. So the first step is to get the dimensions. When doing this type of work digital calipers are required. A ruler or tape measure is not accurate enough. Inexpensive digital calipers can be picked up at Harbor Freight for around $20.

I will need to know these dimensions:

Rocket Base.jpg
Rocket.jpg
Thruster.jpg
 
This afternoon we took to ZOOM, and Lazerjock and I reviewed the critical dimensions of the pack and the greeblies.

Since I already have some amazing parts from MachineCraft - we have to ensure they will align with the 3D printed parts! Each piece was measured, as well as the areas on the pack itself where the 3D printed parts will be mounted. A lot of recesses, and “steps” to make sure we measured to ensure proper fit.

Using digital calipers, I was guided through this process, and all dimensions were documented. We are ready to start the printing process!
4B4DB872-20ED-4ECD-B78F-48C7744B13B4.jpeg
63AE839D-58C4-4AD9-99AE-A4A657A1CE41.jpeg
6708FA79-B6A7-479C-BC74-DDA5A22AE0E9.jpeg
2EE017D7-D7F0-4C5B-A184-DC572FEA7BD0.jpeg
1550AB7D-631C-4226-98D4-A6CF539217E7.jpeg
D64EA510-A0F6-4C1E-B66B-A35783FB7BD2.jpeg
21AA24A0-0714-485E-B90D-F0E0FE0D1655.jpeg
C1E8C3F4-FF27-4EEC-A4EE-D3DBAEEFA0DA.jpeg
23CECDF1-F22C-4A12-A2D6-619DC65FFB35.jpeg
FF6E954F-CD1D-4E00-8399-EEA6B5F946DA.jpeg
28C5371B-AF2C-4772-9C8D-9F3179F93FDA.jpeg
EE5928FF-AB03-4818-9A02-E83DBBFD04E7.jpeg
BFEF2CC8-A178-4EB5-BBE3-298116BBA0DD.jpeg
462D0F2A-1766-4B58-9A71-446D3B9C8651.jpeg
 
The rocket and base are ready for printing.
I use Sketckup to do the proper scaling and Windows 3D Builder to slice the model to fit my printer.
Here is what they look like before importing them into my printer software.

Rocket Base sliced.jpg
Rocket Bottom.jpg
Rocket Top.jpg


Once loaded into the 3D printer software I am able to hollow the model and add drain holes to allow the resin to empty.
The software gives me an estimate of the print time. Each piece will take 7-8 hours.
Here is a screen shot of the 3D printer software with the 2 rocket halves. Note the drain hole on the top of the left part. It will not be seen once the rocket is assembled.

ChituBox Screen Shot.jpg


Next the thrusters.
 
The thrusters are sliced to fit the printer and supports are added. During the printing process supports are necessary when there is an overhang exceeding 45 degrees off vertical. The supports are removed after the print finishes. They easily pop off with just your hand, some nubs might hang on but nothing that an Exacto blade can't take care of.

ChituBox Screen Shot 2.jpg
 
Incredible Lazerjock ! I feel like if it were me printing it, all you’d see in the time lapse would be the reflection of my face, watching it print for 10 hours...
 
Incredible Lazerjock ! I feel like if it were me printing it, all you’d see in the time lapse would be the reflection of my face, watching it print for 10 hours...
Thank you!
You can see me in a few shots. Bed head and all. Lol
It is such a slow process it's kinda like watching grass grow. The other extrusion printer is much more fun to watch and listen to the stepper motors.
 
Here is the time lapse of the first 1/2 of the Rocket base. I let it run over night. Lighting was much better and less reflection. This was a 6 hr print.

 
Last edited:
Great information and fascinating videos.
I imagine I too would sit and watch the print. I do that with my filament printers. I find the process fascinating to watch. One of my printers sounds a little like it is singing.
 
Yesterday afternoon I was able to print both halves of the rocket base at the same time by nesting them.
Here is the time lapse video.


Over night I printed 1/2 of the thruster nozzle. These are 12 hours each. You get a good view of the supports in this video.

 
Here is the last time lapse video. It is the other half of the thruster nozzle.
I still have 2 more to print but they will look the same, so no need for a video.

Next step is to assemble all of the parts and do final filling and sanding of the seams.

 
All of the parts have been printed.
The thruster nozzles had a slight issue during printing. The tube that slides into the jet pack is slightly deformed. I quickly modeled 2 new tubes to Boochman's specs and printed them at the same time I did the rocket hooks. I just need to cut off the deformed tube and replace them.

20200826_103214.jpg
 
This thread is more than 3 years old.

Your message may be considered spam for the following reasons:

  1. This thread hasn't been active in some time. A new post in this thread might not contribute constructively to this discussion after so long.
If you wish to reply despite these issues, check the box below before replying.
Be aware that malicious compliance may result in more severe penalties.
Back
Top