Blaster Convergence Props: ESB EE-3 Boba Fett Blaster Filming Configuration Guides

ConvergenceProp

Active Hunter
Hey guys
Some of you already probably saw these on FB and such, but this is the official post for this little side research project I've been doing for my favorite prop.

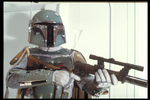
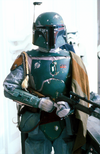
These are all the configurations for the ESB Boba Fett Blaster as seen on screen throughout Empire Strikes Back, which I have divided up into Early, Mid and Late Filming configurations using the help of RafalFett 's wonderful research here The Empire Strikes Back - Boba Fett's on stage chronology , to which I've no idea why it doesn't have its own sticky

I did my best to replicate all these changes as accurately as possible in regards to what happened and where/how parts moved or disappeared. Oddly the Mid filming configuration is what looks to be on screen the most, and is what most people do for their stock greeblies configuration.
Hope these all help you in recreating whichever variant of this prop you like. I'm kind of slightly more partial towards Mid configuration myself where it has slightly more "character" with all the wonky stuff

Early Configuration: (The original state of this prop, but least seen in the film)
Early Filming ESB Boba Fett Blaster - Small .JPG

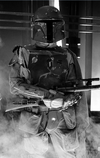
Boba-Fett-Costume-Empire-Strikes-Back-10a.pngBoba-Fett-Costume-Empire-Strikes-Back-Hallway-05.png242696881_10216189032917512_5050138368941033000_n.jpgBoba-Fett-Costume-Empire-Strikes-Back-Executor-07.jpg

Mid Filming Configuration: (What's seen on screen the most in ESB)
Mid Filming ESB Boba Fett Blaster - Small .JPG

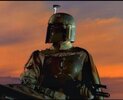
Boba-Fett-Costume-Empire-Strikes-Back-Executor-16.pngBoba-Fett-ESB-Gary-Kurtz-1-ABC-News.jpgMovies & TV 10_1_2021 10_55_49 PM.png242875252_10216189034197544_7564964933894543346_n.jpg

Late Filming Configuration: (the infamous missing molex variant)
Late Filming ESB Boba Fett Blaster - Small .JPG

Boba-Fett-Costume-Empire-Strikes-Back-Carbon-Chamber-22.pngBoba-Fett-Costume-Empire-Strikes-Back-Carbon-Chamber-24.JPG242751764_10216189035117567_5389481774191640170_n.jpg

All Versions Combined
All Filming ESB Boba Fett Blaster Configurations - Small  .JPG
 
Last edited:
Thank you very much for sharing! One question though: what exactly are the two orange lines extending from the rear AM plug on the EE-3's right side? I'm working on an ESB replica now and while studying movie stills I actually noticed a blurred, orange, stringy-looking 'something' in the same area as where you've placed them - but thought I was just seeing things until running across your build.
 
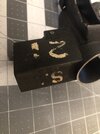
Those are actually 2 numbers engraved on the stock (probably done by Bapty, a film armorer in the UK, who also rented lots of weapons for ANH and ESB) and might be 69 or 67.
 
Interesting! Thank you for clarifying! Am I seeing it clearly that it might even extend all the way to the middle of the center greeblie?
 
Those are actually 2 numbers engraved on the stock (probably done by Bapty, a film armorer in the UK, who also rented lots of weapons for ANH and ESB) and might be 69 or 67.
Regarding what I believe to be Armory Depot numbers, if they are indeed numbers (Initials is also a distinct possibility), they should actually be from the application of a thick ugly yellow paint, probably from a vintage style paint marking pen (wouldn’t be surprised if theres lead in it lol)
It’s possible they were applied by Bapty or the Film armorer but its more likely in my mind its a little older than that. Probably from its Military days in the 20’s-60’s I imagine before it finally ended up in the film house. There’s actually a little bit preserved on one of the ROTJ stunt casts of it along with the deep Webley&Scott stamp they were also trying to cover up with the greeblies. Whether the rest lifted off with the removal of the ESB greeblies or is just obscured by glue residue its hard to tell
4BA57EDD-2EF4-465F-B292-FDCCDB37AF3B.jpeg

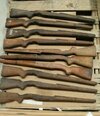
I collect a lot of vintage pew pew related stuff from the same era the Hero Webley lived in before its filming days, and come across these kinds of armory markings quite a bit. Usually its just a ugly plain white, blue or yellow marking color (although I have seen other colors used) as a means for the military units to easily account for all pieces they’re responsible for at the time that they are in possession of them; sometimes they're hand drawn, sometimes stenciled and sprayed.
Even one of my Sterling parts kits that im turning into a ANH foundpart build has some depot numbers crudely slapped on it hahaha.

6FC95741-388E-473E-918E-D799927DB642.jpeg168E05CA-F662-46AF-807C-903A764E9257.jpeg1D61E519-702B-47E3-B51E-369D7CF3064F.jpeg
 
Last edited:
Very informative! Thank you all very much!! Now to add that to the build... =)
Yeah i had this little detail documented on my build page and on a tutorial for doing the missing chunk. Both are buried in the forum pages hahaha
I actually completely redid and reshaped my stock one more time after taking these photos, along with the “67”/“69”
This time I made it a lot more haphazardly “hand drawn” looking when doing it. I’ve still gotta 3d print a stamp for doing the Webley manufacturing marking as well, but I’ll probably redo these photo’s once more after I finish all that


Feel free to make a template of this if you guys like it! :)
*Helpful Tip* Id recommend drawing it in pencil first. That way the graphite acts as a barrier between the wood and paint in case you decide you aren’t happy with the placement or something. I keep redoing it because im a purist POS :lol:
801D3164-1138-40E6-8E8E-3C21B5A50DCC.jpeg
129207B4-6CB5-4B28-B1AF-A0F02047F1D6.jpeg
F517313C-879A-461A-A7BE-8DB16027E05B.jpeg

65C4EE37-2136-4085-A6B4-134837AB4D82.jpeg
28DE8221-19DC-4DD4-8332-3F5D7E5ACC3E.jpeg
 
Last edited:
i had this little detail documented on my build page and on a tutorial for doing the missing chunk.
While I found (and used; Thank you for that!!) the missing chunk tutorial, I unfortunately didn't find the details within your build thread but will certainly check that out before doing any more work to mine!

Feel free to make a template of this if you guys like it!

I so would've done that if I hadn't already painted mine. After hearing that there was no definitive answer for exactly what's there, I decided to make it into my initials. =)

Initials.jpg
 
Nice guide, thank you for your work !

Still have a question regarding the EE3 : could someone tell me in which direction the screws of the legs of the scope should be mounted?

I am confuse as I have seen screws mounted in the same direction, from left to right (like on this model from Convergence prop or the build from Fettastic) and other builds where the direction of the screws is reversed between the two legs...
 
This thread is more than 5 months old.

Your message may be considered spam for the following reasons:

  1. This thread hasn't been active in some time. A new post in this thread might not contribute constructively to this discussion after so long.
If you wish to reply despite these issues, check the box below before replying.
Be aware that malicious compliance may result in more severe penalties.
Back
Top