Trooper Trent
New Hunter
Hey guys, long time lurker.
I finally have a couple of things worth sharing so I figured I'd post a couple of projects I've been working on.
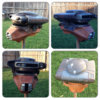
I started a Star Wars helmet collection for my home office. I'm mounting them to the wall kind of like trophy heads using custom wall-mounted stands I built out of PVC.
I just finished my Boba Fett helmet, which was my first attempt at building / painting anything of that complexity. Overall I'm very happy with it.
I then started working on my Boushh helmet. This is one of Todd's excellent kits and I am super thrilled with the quality. I can't say enough good things about him and his kits.
Here's the helmet as it comes in the kit. Such a great sculpt and casting.

I drew out the shapes that needed to be cut out for the visor and scanner sections.

Scanner cut out

Next I cut out the visor area. A tiny dremel grinder bit worked really well here.

At this point, I assembled the ear greeblies and used a dremel cutting bit to score out the scratches, dents, and blaster marks. I then followed that with a coat of primer. I left the snout clean so that I won't be gluing the leather directly to a layer of primer.
Ear Greeblies

Scope

Scratches

sanded, primed and test fit the snout piece

Then today, I hit it with the first base coat of brown.


After the base coat, I went over it with some steel wool to dull the sheen (the casting is almost TOO clean) then hit it with a lighter brown along the edges and in random spots to break up the single brown color, then I hit it with a light mist of black to darken it to the correct color. This gives it a nice color mix of shades.
Light brown mist


Black Mist


One of my good friends used some pictures of the screen used helmet to make me some vinyl stick-on decals.


Next, I masked off basically the whole thing so that I could mist the grooves with a gray to give it that dirty, oxidized look of the screen used helmet.


And here's the result of the gray misting.


And about 2 hours later, She's starting to look recognizable.
hand brushed the silver, rust, and light brown. Still need to do a couple of areas in gray.


I finally have a couple of things worth sharing so I figured I'd post a couple of projects I've been working on.
I started a Star Wars helmet collection for my home office. I'm mounting them to the wall kind of like trophy heads using custom wall-mounted stands I built out of PVC.
I just finished my Boba Fett helmet, which was my first attempt at building / painting anything of that complexity. Overall I'm very happy with it.
I then started working on my Boushh helmet. This is one of Todd's excellent kits and I am super thrilled with the quality. I can't say enough good things about him and his kits.
Here's the helmet as it comes in the kit. Such a great sculpt and casting.
I drew out the shapes that needed to be cut out for the visor and scanner sections.
Scanner cut out
Next I cut out the visor area. A tiny dremel grinder bit worked really well here.
At this point, I assembled the ear greeblies and used a dremel cutting bit to score out the scratches, dents, and blaster marks. I then followed that with a coat of primer. I left the snout clean so that I won't be gluing the leather directly to a layer of primer.
Ear Greeblies
Scope
Scratches
sanded, primed and test fit the snout piece
Then today, I hit it with the first base coat of brown.
After the base coat, I went over it with some steel wool to dull the sheen (the casting is almost TOO clean) then hit it with a lighter brown along the edges and in random spots to break up the single brown color, then I hit it with a light mist of black to darken it to the correct color. This gives it a nice color mix of shades.
Light brown mist
Black Mist
One of my good friends used some pictures of the screen used helmet to make me some vinyl stick-on decals.
Next, I masked off basically the whole thing so that I could mist the grooves with a gray to give it that dirty, oxidized look of the screen used helmet.
And here's the result of the gray misting.
And about 2 hours later, She's starting to look recognizable.
hand brushed the silver, rust, and light brown. Still need to do a couple of areas in gray.

