ConvergenceProp
Active Hunter
Helping a buddy upgrade his EE-3 with a spare Woodman walnut stock I had laying around, so I figured I'd make a tutorial for this little known feature while I was at it.
Before going any further though...
PLEASE PLEASE PLEASE
DO NOT DO THIS TO AN ORIGINAL WEBLEY STOCK
If you’re one of the lucky few to have an original Webley, please get yourself a new stock instead of butchering the 100+ year old original. The cost of a new stock is a small price to pay for helping preserve that rare piece of history.
Ok now with that out of the way, lol
The missing chunk from the Stock on the Hero ESB Webley is a feature I debated adding to my own build for years simply because there are so few photos showing it; so little in fact that I wasn't even sure if it was actually there or just discoloring to the wood of the stock. Especially where the ROTJ casting of the same Webley doesn't show this missing chunk in the stock. The only real shot where it shows up more or less clear is the torture scene. So a couple years back when I was finishing up my own build I decided to comb through any and all reference photos available looking for any further evidence of the missing chunk existing.
Here's what I found

Not only does the missing chunk exist, but its actually pretty damn big; extending from the butt of the stock all the way up to about the middle of the rear most AM plug. And its pretty deep too going off these images. Since it sits mostly on the top left side of the stock, its able to hide in most all other images given the way he holds the blaster. As for the chunk being missing on the hero ROTJ casting, I can only assume that they filled it in with putty or something first in order to make casting easier. Im still almost certain they’re the same Webley base given the “J” curve to the butt thats unique to the Hero Webley as well as the presence of the 3 chamfers on the D-Bracket lug which appears to be a rarer variant of the bracket.
Here's what I did to my build.


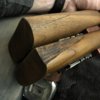
To start, you'll want to sand the butt of the stock to give it that unique “J" curve seen on the Hero. I suspect this “J” curve is in part the result of the missing stock chunk as most all other Webleys have the typical cupped ")" curve. Start with a low grade sandpaper something like 80-120 grit, and move up to 320 to finish while focusing sanding on the top of the butt of the stock.


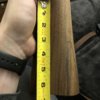
Once that's done you can move onto sketching out where the missing chunk is gonna go. Depending on who you get a stock from there may be slight differences in overall length, so I'd recommend measuring from a fixed point like where the D-bracket tang stops vs trying to measure out the length from the actual butt of the stock.
On mine and my buddies stock that ended up being roughly 3" from the end of the tang.


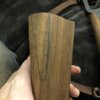
Once you've finished sketching out where the missing chunk is going to go, use a strong knife and work your way around the pattern line you drew. (I don’t recommend using a razor knife or exacto blade. Too little control) The goal here is to make sure that once you start removing chunks, it doesn't accidentally split outside of your pattern. Its wood so splits are going to want to follow the grain. Once thats done you can start going hog-wild removing large chunks until you're happy with it


Now that you have the chunk out, you can go back over it with whatever stain you prefer. (For my builds I use a light coat of Boiled Linseed Oil followed immediately with another light coat of Watco Danish Oil: Dark Walnut) Afterwards you'll want to give the missing chunk that dark look. You can either do this with a little bit of propane torch work, or acrylic paints. For this one I used Apple Barn: Pavement followed by a few dabs of Black (you can pick it up at Walmart), then wiped it down with a towel


And that's it, you're done!
I hope this helps some of you who would like to add this neat little detail to your blasters.
Before going any further though...
PLEASE PLEASE PLEASE
DO NOT DO THIS TO AN ORIGINAL WEBLEY STOCK
If you’re one of the lucky few to have an original Webley, please get yourself a new stock instead of butchering the 100+ year old original. The cost of a new stock is a small price to pay for helping preserve that rare piece of history.
Ok now with that out of the way, lol
The missing chunk from the Stock on the Hero ESB Webley is a feature I debated adding to my own build for years simply because there are so few photos showing it; so little in fact that I wasn't even sure if it was actually there or just discoloring to the wood of the stock. Especially where the ROTJ casting of the same Webley doesn't show this missing chunk in the stock. The only real shot where it shows up more or less clear is the torture scene. So a couple years back when I was finishing up my own build I decided to comb through any and all reference photos available looking for any further evidence of the missing chunk existing.
Here's what I found
Not only does the missing chunk exist, but its actually pretty damn big; extending from the butt of the stock all the way up to about the middle of the rear most AM plug. And its pretty deep too going off these images. Since it sits mostly on the top left side of the stock, its able to hide in most all other images given the way he holds the blaster. As for the chunk being missing on the hero ROTJ casting, I can only assume that they filled it in with putty or something first in order to make casting easier. Im still almost certain they’re the same Webley base given the “J” curve to the butt thats unique to the Hero Webley as well as the presence of the 3 chamfers on the D-Bracket lug which appears to be a rarer variant of the bracket.
Here's what I did to my build.


To start, you'll want to sand the butt of the stock to give it that unique “J" curve seen on the Hero. I suspect this “J” curve is in part the result of the missing stock chunk as most all other Webleys have the typical cupped ")" curve. Start with a low grade sandpaper something like 80-120 grit, and move up to 320 to finish while focusing sanding on the top of the butt of the stock.


Once that's done you can move onto sketching out where the missing chunk is gonna go. Depending on who you get a stock from there may be slight differences in overall length, so I'd recommend measuring from a fixed point like where the D-bracket tang stops vs trying to measure out the length from the actual butt of the stock.
On mine and my buddies stock that ended up being roughly 3" from the end of the tang.


Once you've finished sketching out where the missing chunk is going to go, use a strong knife and work your way around the pattern line you drew. (I don’t recommend using a razor knife or exacto blade. Too little control) The goal here is to make sure that once you start removing chunks, it doesn't accidentally split outside of your pattern. Its wood so splits are going to want to follow the grain. Once thats done you can start going hog-wild removing large chunks until you're happy with it


Now that you have the chunk out, you can go back over it with whatever stain you prefer. (For my builds I use a light coat of Boiled Linseed Oil followed immediately with another light coat of Watco Danish Oil: Dark Walnut) Afterwards you'll want to give the missing chunk that dark look. You can either do this with a little bit of propane torch work, or acrylic paints. For this one I used Apple Barn: Pavement followed by a few dabs of Black (you can pick it up at Walmart), then wiped it down with a towel


And that's it, you're done!
I hope this helps some of you who would like to add this neat little detail to your blasters.
Last edited:
