You are using an out of date browser. It may not display this or other websites correctly.
You should upgrade or use an alternative browser.
You should upgrade or use an alternative browser.
My ROTJ Boba Build
- Thread starter Mythosaur
- Start date
AlphaCloneFett
Hunter
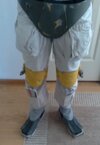
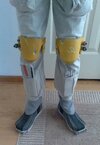
If you have an airbrush, fade in some brown misting around the edges and the sidesCouple more pictures with them on me, I guess they came out a little fuzzy but you get the idea.
View attachment 240574 View attachment 240575
Very happy with how they came out, and best of all, I'm not getting the squeegee caught under when I walk around!
Mythosaur
Active Hunter
Wish I did, I've been thinking about getting one lately though. I do have a little brown on there, probably could use a little more, thanks for the advice!If you have an airbrush, fade in some brown misting around the edges and the sides
Mythosaur
Active Hunter
Went back over with some more brown, best I can do without an airbrush.
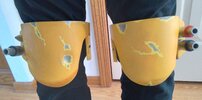
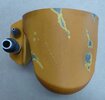
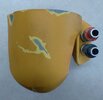
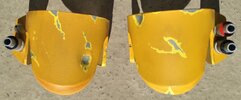
I believe I got it a little closer, didn't want to put too much on, especially on the left one. what do you think AlphaCloneFett?


I believe I got it a little closer, didn't want to put too much on, especially on the left one. what do you think AlphaCloneFett?
Last edited:
AlphaCloneFett
Hunter
Better!
Mythosaur
Active Hunter
I have been working on revamping my collar & cod studs, the ones I've been using are modern keyboard keys which I always thought was a nice little homage to where they originally came from, but they obviously don't look correct. I've kinda been holding out to do this because I wanted metal ones, but I don't think anyone makes them anymore. Anyway, I thought I would share how I made them because I think they're gonna work out great!
I first needed to figure out how to do the threading, I originally thought of thread inserts but the ones I found would need some modifying. I then found these...
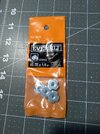 Tee nuts that are just perfect! They are the threading I needed and they fit perfectly in 2 layers of sintra being 1/4" tall (the keys are 9mm tall or 3 layers of sintra giving me a layer on top to cover the thread.)
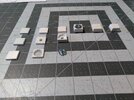 I cut a bunch of 18mm squares all of which came from my scrap bucket. The first layer got a hole the diameter of the tee nut, the second got a hole the size of the outer diameter of the threading, and then were glued together with super glue. I put a generous amount of E6000 around the inside of the large hole and pushed in the tee nut. After waiting for them to dry I went back over with some super glue to help keep the tee nuts in place, and sanded down the sides to get the angles.
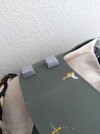
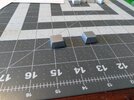 Here are the couple I have completed so far, much closer to the old school keyboard keys!
I first needed to figure out how to do the threading, I originally thought of thread inserts but the ones I found would need some modifying. I then found these...
 Tee nuts that are just perfect! They are the threading I needed and they fit perfectly in 2 layers of sintra being 1/4" tall (the keys are 9mm tall or 3 layers of sintra giving me a layer on top to cover the thread.)
 I cut a bunch of 18mm squares all of which came from my scrap bucket. The first layer got a hole the diameter of the tee nut, the second got a hole the size of the outer diameter of the threading, and then were glued together with super glue. I put a generous amount of E6000 around the inside of the large hole and pushed in the tee nut. After waiting for them to dry I went back over with some super glue to help keep the tee nuts in place, and sanded down the sides to get the angles.
 Here are the couple I have completed so far, much closer to the old school keyboard keys!
Mythosaur
Active Hunter
Decided it was time to grey up the tanks and thrusters on my jetpack, it's bothered me for long enough. I had originally planned to spray it when I was finishing up my pack, but the grey I have is a little too dark. I ended up mixing the color with some acrylics and doing it by hand, came out pretty decent I think and at least it isn't silver anymore.
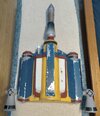
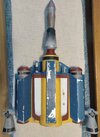 I also did the blue strip around the beacon too.

 I also did the blue strip around the beacon too.
AlphaCloneFett
Hunter
They should be painted with a base white, just like the panels on the body and then misted with some greysDecided it was time to grey up the tanks and thrusters on my jetpack, it's bothered me for long enough. I had originally planned to spray it when I was finishing up my pack, but the grey I have is a little too dark. I ended up mixing the color with some acrylics and doing it by hand, came out pretty decent I think and at least it isn't silver anymore.
View attachment 240809 View attachment 240810 I also did the blue strip around the beacon too.
Mythosaur
Active Hunter
I know we all will probably endlessly argue over the color, but I've always been of the opinion that they look light grey. Especially when compared to the panels.They should be painted with a base white, just like the panels on the body and then misted with some greys
AlphaCloneFett
Hunter
Because they are heavily weathered. It's not a matter of opinion, it's based on facts. There is photographic evidence of this, unfortunately cannot be shared publicly, maybe in the future....but if you want to do it wrong, then go for itI know we all will probably endlessly argue over the color, but I've always been of the opinion that they look light grey. Especially when compared to the panels.
Mythosaur
Active Hunter
I was honestly unaware that anybody actually knew how the jetpack was painted, hence why it's debated so often. I've also most commonly seen them referred to as being gray, first I've actually seen of anyone saying they should be white. I also didn't mean to offend you, I'm almost always willing to be wrong.Because they are heavily weathered. It's not a matter of opinion, it's based on facts. There is photographic evidence of this, unfortunately cannot be shared publicly, maybe in the future....but if you want to do it wrong, then go for it
I've gone through the images so much man, and they still look pretty gray to me. I think I'm also skeptical about being able to make it look right by doing it that way, but I'm willing to give it a shot for the sake of accuracy.You can also tell from the images in the galleries they're heavily weathered. If you're in a pinch for time I guess a light grey base would work.
ShortFuse
Well-Known Hunter
My philosophy has always been (which sometimes may be viewed as unpopular) is that this is your kit and you are free to paint it as you choose. I like to be accurate as well, but at the end of the day the only person you have to please is yourself. Not anyone else. For my jetpack I painted the side tanks white and added heavy weathering, but you should do what works best for you.
AlphaCloneFett
Hunter
That's a great philosophy, so just do an OC Mando! lolMy philosophy has always been (which sometimes may be viewed as unpopular) is that this is your kit and you are free to paint it as you choose. I like to be accurate as well, but at the end of the day the only person you have to please is yourself. Not anyone else. For my jetpack I painted the side tanks white and added heavy weathering, but you should do what works best for you.
This philosophy is not to be encouraged when building an on screen character...this is the way! lol
Rue1977
Hunter
Heh, but Boba makes his own way. (That's actually what I tell people who say 'this is the way' to me when I'm in costume.... Except kids.)This is the way! lol
I take it as do the color that looks right to you, which is still working toward screen accuracy.
AlphaCloneFett
Hunter
On the right track, there will be pure white chipping on the thrusters and on the red end caps as well, this JP is just loaded with details, so keep chipping away!
Mythosaur
Active Hunter
Pretty sure I'm done with my jetpack, I feel as if I've said this before though... 
Couple more pictures:
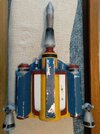
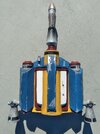
I also finally took the plunge and bought an airbrush!
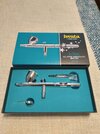
Just got it in the mail and am pretty excited! I still need to get some cleaner and up my acrylic paint collection, but I have a couple ideas for my first projects with it. I also got the Ninja Jet compressor, I liked that it's small and portable, it will also fit nicely on my workbench where it will most likely live. I really questioned whether I would need anything more powerful than what it is capable of, and I figured my big tank compressor is probably a little overkill, so we'll see after I use it some.
I do have to say though that this airbrush already seems worth the money, it just feels nice. Other cheaper ones just feel like junk to me, this has a nice weight to it and looks like a quality instrument.
Couple more pictures:


I also finally took the plunge and bought an airbrush!

Just got it in the mail and am pretty excited! I still need to get some cleaner and up my acrylic paint collection, but I have a couple ideas for my first projects with it. I also got the Ninja Jet compressor, I liked that it's small and portable, it will also fit nicely on my workbench where it will most likely live. I really questioned whether I would need anything more powerful than what it is capable of, and I figured my big tank compressor is probably a little overkill, so we'll see after I use it some.
I do have to say though that this airbrush already seems worth the money, it just feels nice. Other cheaper ones just feel like junk to me, this has a nice weight to it and looks like a quality instrument.
Mythosaur
Active Hunter
Ok, first airbrush project: I felt that my blaster should be darker, so I used shading grey to help get it there. Pretty happy with the results, did pretty much exactly what I wanted.


inside with not the best lighting and outside full sun, looks a lot less like straight primer.
I also recently bought the Han Solo Holocomm, which I had intended to use with the costume, thought it would be funny. Well now that I have it, I think it would be a little big to put in one of my pouches to carry around. Still, it's a pretty cool figure.
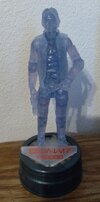

Mythosaur
Active Hunter
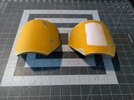
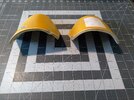
I've been thinking my armor looks thin, so I did some digging around an here and it looks like 1/4" or 6 mm is a more appropriate thickness. I've started on the shoulders, adding a layer of sintra to the edges. Still have a little fill and sand before I start repainting, my hope is to be able to just do a slight repaint for most of the pieces but, we will see about that... the shoulders are going to probably undergo the biggest makeover simply because I think I can paint them better than when I first did them. Hopefully I can get started on the other pieces tomorrow.


Similar threads
- Replies
- 3
- Views
- 166

