Hames13
Jr Hunter
ESB Boba Build
It's time to do a build feed. I've finished my Fett and have some time. I had way more photos, half of them disappeared when I moved things between storage devices. I'll try to keep it short and to the point then you can ask questions. Bear in mind this was done in the U.K.
Helmet
I bought the helmet on e-bay for £70, was a bit disappointed with how thin it was but endeavoured to make it more solid. (This was before reading the TDH tutorial.)


I thought about using the inside of a combat helmet, but changed it to a construction helmet. I cut out the slots that the helmet inner attach to and glued them into the helmet.

I Found some dark smoke perspex for the visor, (preferred it to the usual green) bending the stuff isn’t easy. (It helped when I bent it first, then cut it out.)


And I reinforced the inside with more epoxy putty and foamex (pvc foam board).

I filled in the mandibles with epoxy putty and countersunk some M4 nuts to attach the visor.

Then a layer of white primer. Prototype Fett next?
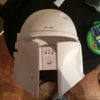
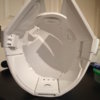
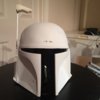
A base coat of silver before masking. I used model spray cans, mostly Humbrol. Not cheap but the paint goes on so well, dries quickly and is not too thick.


Then the mandibles and backing first. I used masking fluid to mark off the damage, with help from reference drawings and movie stills. It's not exact. It was difficult to find a model paint in that dark red/ wine colour. I used rustoleum wine red (all I could find) the problem was it went on a bit thick, and ended up with a very grainy/bumpy finish, which I've grown to love.
The cheeks, dome and back panels are done with grey and the masking removed after drying. I got a bit happy with the masking fluid on the cheeks, but changed that.
Humbrol 30 spray over the top, after masking everything. Humbrol 30 is what I used for the whole thing, yes...it probably isn't correct overall.


The rangefinder is just resin cast with a bit of green Perspex and the RF stalk made of foamex (the resin one wasn't so good). Stuck a wire through the RF stalk and an LED in the Rangefinder. The whole thing wobbles a bit when I walk, I need to find an aluminium one.


The finished product.


Armour
I used Wizardofflight's templates for the armour and used 5mm pvc foam board, cut out and bent with a heat gun. For the back I used one big piece of 5mm pvc board and threw it in the oven on low heat, it shrank a little (as with most pvc board when heated and re-heated) but it ended up working out ok.


For the paint I used the same technique as with the helmet. A layer of silver, then mask the silver, a layer of Matt grey, more masking fluid, Tamiya TS-3 dark yellow, masking again then Humbrol 30 dark green. The right chest armour plate was done with a dark grey and darker green under the main green (as per TDH paint by numbers chart...mostly). I bought printer decal paper for the Mandalorian emblem but it wasn't white so I had to paint a white circle before applying the decal.


10mm poppers where counter sunk into the armour, hot glued and corresponding poppers attached to the flak vest. For the chest display I printed the symbols for the screen, cut out the numbers and painted the outer parts black and with the paint still wet I stuck them to the transparent pieces of plastic. The lighting is just a button battery attached to a line of red LED's on a backing of cardboard taped to the rear of the chest plate.


The right shoulder plate is silver masked over with Tamiya TS-33 flat dull red, then Humbrol 46 orange matt (tinlet airbrushed) and weathered with black spray (same as the knee armour). The left is silver with a dark grey and Revell 15 Matt yellow weathered with black. The Mandalorian symbol is painted on white with a stencilled mythosaur skull.

The COD armour is also a Wizzardofflight template, the middle part is the centre piece layered with 5mm pvc foam board. Then I used epoxy putty on the sides, smoothed them round and painted. Tamiya TS-3 dark yellow and Humbrol 30 dark green masked over silver. The elastic is attached with poppers and Velcro, same as the sides. I've since added poppers onto the waist of my flightsuit and inside the COD armour which stops things moving around.
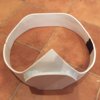
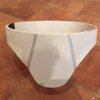


The Knee armour is 5mm Pvc foam cut from wizzardofflight templates, with silver spray under Tamiya TS-33 flat dull red, and Humbrol 46 orange matt tinlet airbrushed and weathered. I used elastic and poppers for the rear straps and poppers to attach the knee pads to the flightsuit (poppers on the flightsuit knee really help with moving knee armour syndrome). I bought the aluminium knee darts from Evoluion props.


This concludes part 1, I can only add so many pictures. Part 2 will have the jetpack, gauntlets, sidearm and blaster. Enjoy


It's time to do a build feed. I've finished my Fett and have some time. I had way more photos, half of them disappeared when I moved things between storage devices. I'll try to keep it short and to the point then you can ask questions. Bear in mind this was done in the U.K.
Helmet
I bought the helmet on e-bay for £70, was a bit disappointed with how thin it was but endeavoured to make it more solid. (This was before reading the TDH tutorial.)


I thought about using the inside of a combat helmet, but changed it to a construction helmet. I cut out the slots that the helmet inner attach to and glued them into the helmet.

I Found some dark smoke perspex for the visor, (preferred it to the usual green) bending the stuff isn’t easy. (It helped when I bent it first, then cut it out.)


And I reinforced the inside with more epoxy putty and foamex (pvc foam board).

I filled in the mandibles with epoxy putty and countersunk some M4 nuts to attach the visor.

Then a layer of white primer. Prototype Fett next?


A base coat of silver before masking. I used model spray cans, mostly Humbrol. Not cheap but the paint goes on so well, dries quickly and is not too thick.


Then the mandibles and backing first. I used masking fluid to mark off the damage, with help from reference drawings and movie stills. It's not exact. It was difficult to find a model paint in that dark red/ wine colour. I used rustoleum wine red (all I could find) the problem was it went on a bit thick, and ended up with a very grainy/bumpy finish, which I've grown to love.
The cheeks, dome and back panels are done with grey and the masking removed after drying. I got a bit happy with the masking fluid on the cheeks, but changed that.
Humbrol 30 spray over the top, after masking everything. Humbrol 30 is what I used for the whole thing, yes...it probably isn't correct overall.


The rangefinder is just resin cast with a bit of green Perspex and the RF stalk made of foamex (the resin one wasn't so good). Stuck a wire through the RF stalk and an LED in the Rangefinder. The whole thing wobbles a bit when I walk, I need to find an aluminium one.


The finished product.


Armour
I used Wizardofflight's templates for the armour and used 5mm pvc foam board, cut out and bent with a heat gun. For the back I used one big piece of 5mm pvc board and threw it in the oven on low heat, it shrank a little (as with most pvc board when heated and re-heated) but it ended up working out ok.


For the paint I used the same technique as with the helmet. A layer of silver, then mask the silver, a layer of Matt grey, more masking fluid, Tamiya TS-3 dark yellow, masking again then Humbrol 30 dark green. The right chest armour plate was done with a dark grey and darker green under the main green (as per TDH paint by numbers chart...mostly). I bought printer decal paper for the Mandalorian emblem but it wasn't white so I had to paint a white circle before applying the decal.


10mm poppers where counter sunk into the armour, hot glued and corresponding poppers attached to the flak vest. For the chest display I printed the symbols for the screen, cut out the numbers and painted the outer parts black and with the paint still wet I stuck them to the transparent pieces of plastic. The lighting is just a button battery attached to a line of red LED's on a backing of cardboard taped to the rear of the chest plate.


The right shoulder plate is silver masked over with Tamiya TS-33 flat dull red, then Humbrol 46 orange matt (tinlet airbrushed) and weathered with black spray (same as the knee armour). The left is silver with a dark grey and Revell 15 Matt yellow weathered with black. The Mandalorian symbol is painted on white with a stencilled mythosaur skull.

The COD armour is also a Wizzardofflight template, the middle part is the centre piece layered with 5mm pvc foam board. Then I used epoxy putty on the sides, smoothed them round and painted. Tamiya TS-3 dark yellow and Humbrol 30 dark green masked over silver. The elastic is attached with poppers and Velcro, same as the sides. I've since added poppers onto the waist of my flightsuit and inside the COD armour which stops things moving around.


The Knee armour is 5mm Pvc foam cut from wizzardofflight templates, with silver spray under Tamiya TS-33 flat dull red, and Humbrol 46 orange matt tinlet airbrushed and weathered. I used elastic and poppers for the rear straps and poppers to attach the knee pads to the flightsuit (poppers on the flightsuit knee really help with moving knee armour syndrome). I bought the aluminium knee darts from Evoluion props.


This concludes part 1, I can only add so many pictures. Part 2 will have the jetpack, gauntlets, sidearm and blaster. Enjoy
