Boba Fett ESB Helmet Paint Up by Fettastic

Fettastic

Active Hunter
Hey Team,

I finally decided to start working on my personal FPH2. While I'm working on other TDH members Fetts, I'm going to try and have my personal bucket done by December 22 which is my birthday.

I have already done prep work for the ears, visor and range finder including a servo kit with wireless correct momentary switches on my right gauntlet. Silver damage is applied and ready to mask off.

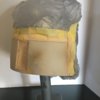
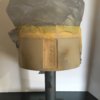
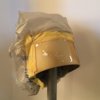
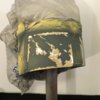
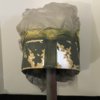
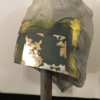
I'll be starting with the back panels.


image_zps3jsviusw.jpg


image_zpsgkuun3pb.jpg


image_zpsrxgsaaan.jpg


image.jpeg


View attachment 66397

View attachment 66398

View attachment 66399

View attachment 66400

Here is the finished product:

Cameron's Boba Fett Helmet as seen in EMPIRE STRIKES BACK 1 Bright Natural 2.jpg


Cameron's Boba Fett Helmet as seen in EMPIRE STRIKES BACK 2 Bright Natural.jpg


Cameron's Boba Fett Helmet as seen in EMPIRE STRIKES BACK 3 Bright Natural.jpg


Cameron's Boba Fett Helmet as seen in EMPIRE STRIKES BACK 4. bright natural 1.jpg


---

Fettastic Boba Fett Helmet as seen in EMPIRE STRIKES BACK 8.jpg


Fettastic Boba Fett Helmet as seen in EMPIRE STRIKES BACK 12.jpg


Fettastic Boba Fett Helmet as seen in EMPIRE STRIKES BACK 10.jpg


Fettastic Boba Fett Helmet as seen in EMPIRE STRIKES BACK 9.jpg


Fettastic Boba Fett Helmet as seen in EMPIRE STRIKES BACK 11.jpg
 
Last edited:
I'm doing things a little differently this time so bare with me if the steps seem a little unconventional to traditional bucket paint ups. The results I'm hoping are just as good if not better.

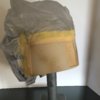
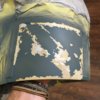
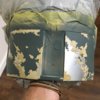
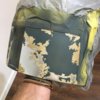
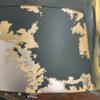
On the back panels I masked off the silver damage using stencils for the most part but also looking at reference photos and improvising larger silver damage areas (meaning if the stencil shows a small silver area but in the reference photo you can see that it was clearly a larger silver area that would get smaller pieces of damage painted on top, I would try and draw out what the large area should be) hope this makes sense as I will most likely be doing this with other layers as well.

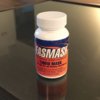
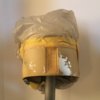
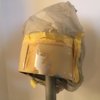
Regarding masking fluid. I like to use Fasmask liquid mask for very small details because it's clumpier and dries slower. This allows me to either put some of the fluid on the larger area I want to mask off and very finely drag it to really small areas and be more precise...or just put a little on the tip and not quite touch the area with the rubber applicator but just enough to transfer the masking fluid to the finer detailing. Sometimes on the smaller pieces I'll have to go back and add another layer because it's so thin...just to be safe. I have to do the latter if there is no connecting larger body of damage.

image.jpeg

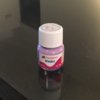
For larger not so precise areas I like to use the fan favorite humbrol maskol. It really covers larger areas very well but because its more runny and dries so quickly, it's not the best in my opinion for very small details. I find that parts of it will dry and then accidentally stick to my applicator and then pull a small string of masking fluid and flick it any which way...frustrating.

image.jpeg

So so with that being said I do a hybrid of both depending on what is called for.

image.jpeg

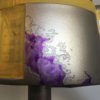
After the the silver was masked off I applied a custom mix for the concrete color and misted grey and light brown weathering to get the effect of inconsistency and wear. I do this after the base color has dried and after I have very lightly wire wooled the area taking precaution trying not to accidentally rough up any of the masking fluid.

image.jpeg image.jpeg image.jpeg

Then the fun part!!! Peel up the masking fluid very very carefully. After it's peeled off I'll go over the area lightly with 0000 steel wool.

image.jpeg image.jpeg image.jpeg

I I like my silver damage to be super bright and smooth to mimic metal. Not saying this can't be acomplished topically with a brush (superjedi cough cough) but I'm just not skilled enough in that department and I'm currently lacking the proper paint to attempt such a talent requiring feat.

image.jpeg


image.jpeg


image.jpeg


image.jpeg


image.jpeg


image.jpeg


image.jpeg


image.jpeg


image.jpeg
 
Last edited by a moderator:
Hey Team,

I finally decided to start working on my personal FPH2. While I'm working on other TDH members Fetts, I'm going to try and have my personal bucket done by December 22 which is my birthday.

I have already done prep work for the ears, visor and range finder including a servo kit with wireless correct momentary switches on my right gauntlet. Silver damage is applied and ready to mask off.

I'll be starting with the back panels.

View attachment 104578

that's my birthday too! Lol. (And I'm not kidding this time!)

I've noticed adhesion issues for the colors following the silver. Have you had any problems with this? I used some testors silver or aluminum around my dent and had bad luck with my green sticking to it.
 
Last edited by a moderator:
that's my birthday too! Lol. (And I'm not kidding this time!)

I've noticed adhesion issues for the colors following the silver. Have you had any problems with this? I used some testors silver or aluminum around my dent and had bad luck with my green sticking to it.

What!?! We share the same birthday!

Yes, silver is not ideal for a base layer and I have in the past experienced the same problem. But I have found ways to minimize this. If you do thinner coats and peel up the masking fluid before the paint has fully cured it tears much easier and you're less at risk. Wait until the paint has fully cured before cleaning up the damage areas with 0000 wool. Go lightly with the wool. Also minimize taping over any small pieces...instead use paper towels and only tape to larger painted areas if necessary.
 
Last edited by a moderator:
Ok, I'm done with the airbrush for now! Until I do some final misting and weathering on these back panels.

At this point I have not done any topical painting and there is still pretty good detail on the edges. I'll go back through and adjust with a brush if needed but for now I might give my eyes a days rest.

FullSizeRender (8).jpg FullSizeRender (6).jpg FullSizeRender (7).jpg

FullSizeRender (2).jpg FullSizeRender (3).jpg FullSizeRender.jpg

I'm not sure I could have done much better detail with a paint brush. The advantage to the masking fluid is that your colors and coats are so even and smooth since your spraying the coats on with an airbrush. It's very, very time consuming but for these layers I think it is totally worth it.

FullSizeRender (4).jpg

FullSizeRender (6).jpg


FullSizeRender (7).jpg


FullSizeRender (8).jpg


FullSizeRender (2).jpg


FullSizeRender (3).jpg


FullSizeRender.jpg


FullSizeRender (4).jpg
 
Last edited by a moderator:
Against my better judgment I decided to go at it again with these back panels in attempt to finish the grey topical damage. It looks a little dark but it should lighten up and dull out a bit after it has fully cured and I've given it a very light rub with 0000.


image_zps7dug3o7r.jpg


image_zpsbmyjw4fz.jpg


image_zpse9igstca.jpg
 
Last edited by a moderator:
Looks great! I am studying closely as I am about to embark on my first paint up. And it is on an FPH2. I don't know if I am worthy.

Completely off topic, but what do you use to lift up the mask? I have been using an exacto knife, but found that I leave little scratches sometimes when I do that. I am looking for an alternative. Toothpicks, maybe?

First Timer Whoohoo!!! You're gonna love it! I use my finger nail and an exacto knife as well depending on the size and precise the detailed area is but I make sure not to angle the knife in a downward position as to go through the masking fluid and into the bottom layer of paint. It does take a level of precision but it works. I feel a tooth pic might work for a little bit but will probably break often and may not be strong enough to continue lifting the dried masking fluid.

I will say that the quicker you can paint over the masking fluid before it has fully dried and the quicker you can start lifting the masking fluid will minimize the risk of pulling up previous layers of paint. Especially with the fasmask that I use. If I wait too too long, that stuff loves to really stick to the surface it has dried to. That's why I only use it where I need sharp details. The Maskol dries slower and is less adhesive.

Looking good there bud!

Thanks brother!
 
Last edited by a moderator:
I had a little time after work last week and finished up these back panels.

topically added the small base color damage.
topically added the small silver scratches
topically added the scuffs
airbrushed some light weathering

image_zpseu8e46ui.jpg


image_zps0wyafbnc.jpg


image_zpsysuczdyf.jpg


image_zpsdcrmrgqg.jpg


image_zpsbeql8aaf.jpg


image_zps0q0huzn8.jpg


image_zpswaqrgwgz.jpg


image_zps6cbwbdtu.jpg
 
Last edited by a moderator:
Alrighty!!! It's moving along! My deadline for this lid is December 14th and it's coming oh too quickly. I had a minor setback...I had planned to have the killstripes done this past weekend and the entire dome completed...but my eagerness got the best of me. I spend almost two hours prepping the masking tape and masking fluid for the killstripes. I even used a blowdryer between coats...but...YELLOW ACRYLIC PAINT IS THE WORST!!!! Lol. It somehow found it's way in between non existent and merely impossible crevices. This isn't the first time I've had problems with the killstripes too. So I ended up sanding the area down, started over and blended the section. Two days later it's as if it never happened. I am re-thinking my technique on these dang killstripes.

Anyways, I'm going to wait on the killstripe area to fully cure for a couple days and have finished up the rest of the dome grey damage and have moved on to the cheeks. I'm planning on hopefully getting the red on tonight. "I'm not afraid"...."oh....you will be....you will be." In my best Yoda voice ;)

thumbnail_FullSizeRender%201_zpsxlawnpej.jpg


thumbnail_FullSizeRender%202_zpsxxmubtrd.jpg


thumbnail_FullSizeRender%203_zpsolzw39at.jpg


thumbnail_FullSizeRender%206_zpsrvcwgwka.jpg


thumbnail_FullSizeRender%205_zpsktzz5ldr.jpg


thumbnail_FullSizeRender%204_zpslsupnh06.jpg


thumbnail_FullSizeRender%207_zpsrzmnfh6i.jpg
 
This thread is more than 6 years old.

Your message may be considered spam for the following reasons:

  1. This thread hasn't been active in some time. A new post in this thread might not contribute constructively to this discussion after so long.
If you wish to reply despite these issues, check the box below before replying.
Be aware that malicious compliance may result in more severe penalties.
Back
Top