Custom Mandalorian SKYFIRE Mando lid build

Skyfire

Active Hunter
I currently have a Jango and ESB build in work, Sleepalot is finishing my Cruzer Jango armor and gauntlets plus he will be doing the paints on my Animefan ESB lid. My RDK ESB V3 armor is getting done by Darthvoorhees, so while these parts are out getting done by real artists, I decided to do a custom Mando helmet for fun and as a skill building exercise. I aquired a cheap bucket for this exercise and you can tell it is a cheap bucket, so it will be a fun-ish challenge.


"Gator" helmet next to a Animefan helmet.
imagejpg22_zps81e61b08.jpg

So holding this thing up to the light is like looking at a planetarium. It is very thin and full of air, and pretty fragile. The vertical part of the visor opening popped out on its own.
imagejpg33_zps249953b1.jpg

Surface needs a lot of work.
imagejpg25_zps854ddec4.jpg

I used 3M Glazing and Spot Putty.

imagejpg3_zps5f6ef680.jpg

Cold out in the garage, so why not sand in the sink to keep dust non existent.
imagejpg35_zps6a82c671.jpg

Did this 3x times to get to get the pin holes filled and to smooth out the top of the helmet.
imagejpg44_zpsff43a4e2.jpg
imagejpg43_zps4b4b08a6.jpgimagejpg39_zps97fa7b33.jpg

Lots of work to go!
 
Last edited by a moderator:
So after triming the bottom flange and taking out the coin slots (going a difrent route on the back), I had a crack on the front left lower lip of the lid, so I had to do a fiberglass reinforcement on the inside. The helmet was starting to look like the head of the Newcomer alien cop from the 90's Alien Nation TV show. This gave me a hard time getting a good read of the topography of the top of the helmet visualy. So I did a first coat of primer with some Duplicolor filler primer that I had on hand. This made a instant difference, the defects and low spots were now easy to see with the uniform color applied.
C3998708-F790-43A0-98D2-AB69CE1EEF37_zpsjvh4lyqa.jpg
3FA40473-46D5-4218-8880-FA76AD24CFDC_zpsix6a2u85.jpg
 
Filled in the former coin slot opening with epoxy and fiberglass cloth and then smoothed out the area, but not too crazy since it is being covered.
D91AE4D7-5A13-4220-9842-DE90C625E024_zpsomqn2cc1.jpgE73E95D7-43F1-470C-A052-2D66E81585BD_zps2asqhlao.jpg

I had an extra left ear in the parts bin, so I decided to add it to the back of the helmet to give it a slightly different look.
FB3C27EA-4463-486D-B692-04EF4C212783_zpse0pragyn.jpg

Trying to to find center on a non-symmetrical helmet back is a pain, I had to throw out my precision measurements and switch to using the old mark 1 eyeball instead. The modified ear piece got cheated to the left hand side of the old coin slot opening, to try and balance out the asymmetry. I don't love the look yet, but I will keep on tweeking it as I build.
 
Last edited by a moderator:
I'm assuming the "Gator" bucket was the cheap one? That is really thin material? Is it vac-formed polystyrene or just really thin slush cast? For a custom Mando, would a Hasbro helmet have worked or just been too small?
 
I'm assuming the "Gator" bucket was the cheap one? That is really thin material? Is it vac-formed polystyrene or just really thin slush cast? For a custom Mando, would a Hasbro helmet have worked or just been too small?

This helmet is a very thin slush cast with a ton of air bubbles in it. I would highly recomend that someone starts a project off with a Animefan or similar quality helmet. I intentionally took on this project knowing it would be a big challenge to make something out of its fragile state and I wanted to do some skill building.

So after reenforcing the the inside with more resin, filling the voids and the hills and valleys on the outside of the helmet, I have spent probably another $30 in supplies, plus spent another $25 for missing ear and rangefinder parts and have spent a good 8-10 hours of my life, just to get close to a starting point of a quality helmet.

It is way more cost effective to buy quality from a starting point and go from there in my opinion. I have not checked out the rubies or the Hasbro helmets much. I did not want to go within plastic and some of the ones I have seen online look like a toy and have weird shaped visors and etc. Not sure about their size, the might be fine on that end, this one and my Animefan are both plenty big enough for me.
 
Last edited by a moderator:
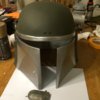
Final smoothing and priming is done, it's not perfect, but it has come a long way. Tamiya model putty was a huge help, I should not have tried to do so much preliminary work with the 3M spot putty. I also had a few accidental hits with the Dremel on the eyebrow and left face, when I lost situational awareness. These accident spots are going to make for some good weathering/battle damage, sometimes mistakes just work out better than planing.
E1D615BF-873B-4DAF-B3C2-98A787232ECF_zps57hn3k23.jpgEFE3FE89-E3F1-45CE-914A-E735A3440915_zpsuozt4zgh.jpg
1C92A28C-17DC-4BA0-8315-BC7062C453E6_zpssqxjbk68.jpgD2AD5955-AF68-4DA7-BC56-0DAA401B326B_zpsfvk9oaig.jpg

A little wet sanding after this and the first coat of Duplicolor Ford metallic Silver has been applied.
2A459BC0-A041-4B62-8C0A-9D1AD7430BE2_zpsfituxvmz.jpg17168B98-663E-4336-A134-1E95135D1651_zpsnhjxft09.jpg

My awesome new cold cast Jango gauntlet is shown next to the ford silver metallic. I wanted to show some color comparison, plus get to show off my newest toy that was done with great work by sleepalot.
 
Last edited by a moderator:
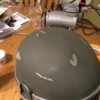
More painting and a comparison to a Jango lid. My masking skills are in need of work. I plan on airbrushing the color transitions to soften the lines and blend everything in better, plus much weathering Is needed.
2B153BC4-BA8F-4805-92D4-8876394345C0_zpsv4nx2lpo.jpg8F12E632-3517-4DDF-BAB8-A36675DC2504_zpsjkk2usmg.jpg
32D010A4-4792-489C-B82D-4E490164A86D_zpsvl6oekkt.jpg3BF0CD8D-494C-4A46-9841-2F302CA9AF98_zpspegde43k.jpg
 
Last edited by a moderator:
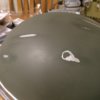
Been away from this for a few weeks, so with a little free time on my hands tonight I got a little buck bore and went maybe a little too nuts on the weathering. It was the first time I have used an airbrush and let's just say I am not quiting my day job anytime soon. I need to learn how to steady my hands and not to do the incorrect action on the airbrush trigger mid way through a detail. Used a lot of paper towels and mineral spirts to undo my mistakes, then a few brush stiple and cast off methods, followed by more paper towels and mineral spirts. Need to take it out into the daylight to get a fresh perspective. Then maybe some dull coat before I mount the RF and install the visior.
9C28788C-12C0-423C-ADEC-F9D4C02C19D2_zpsy2xjibbq.jpg4DDB0FEF-2360-47B3-B140-C57D2924C9D6_zpshqzjq2jv.jpg
0B206D1B-9820-4CCB-93D8-66B33AA91D4E_zps3x9coayv.jpg708625E6-1B5D-4851-A50E-5E9276058C39_zpsoule7oot.jpg
.
 
Last edited by a moderator:
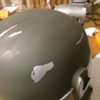
This thread is more than 9 years old.

Your message may be considered spam for the following reasons:

  1. This thread hasn't been active in some time. A new post in this thread might not contribute constructively to this discussion after so long.
If you wish to reply despite these issues, check the box below before replying.
Be aware that malicious compliance may result in more severe penalties.
Back
Top