Pinface's Jango Fett Costume WIP

Pinface

Hunter
Hey guys!

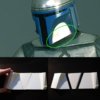
I've started the journey of becoming a part of the Star wars universe, with my own made Jango Fett costume!

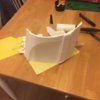
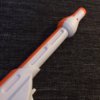
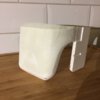
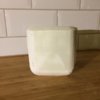
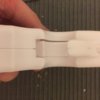
This will be my first ever build, so I'm both excited and anxious about taking this on :wacko :D I started a couple of days ago with the bucket, which I decided to print on my 3D-printer. So far I've done about 50% of the helmet, scaled to fit my head, and also divided into several pieces to fit in the printer.

I hope to get to know you guys at TDH and that you can share your wisdom and knowledge to a newbie like me :D

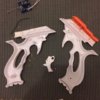
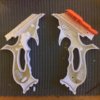
16111266_1525353254196223_1344490256_n.jpg16118522_1525657897499092_771013460_n.jpg16144013_1530513090346906_677975520_n.jpg16176897_1530513760346839_811569360_n.jpg16144815_1530513757013506_1698387804_n.jpg


// Pinface

16111266_1525353254196223_1344490256_n.jpg


16118522_1525657897499092_771013460_n.jpg


16144013_1530513090346906_677975520_n.jpg


16176897_1530513760346839_811569360_n.jpg


16144815_1530513757013506_1698387804_n.jpg
 
Last edited by a moderator:
Welcome to the forums and good luck on your build. I have no knowledge of 3D printing but I know a little about Jango.


The only word of caution I would throw out that I see in your first post is that scaling the helmet to fit your head may not be the best path forward. The helmet will need to be the right proportions to your shoulders and the rest of your body. In other words the helmet could "fit your head" but still look like a pin head when in full kit. It is a bit weird when sizing a helmet because out of armor you can look like a bobble head but in armor it looks perfect.

Good luck with your build, I look forward to seeing how the 3D printing turns out.
 
Yeah, that was the biggest cookie to bite.. me and a friend have been calculating the S#@& out of the scale, enough so it's gonna fit right on the head, and also close enough to the original. Lets just wait and see how it fits when the other half is finished :)

It's a classic case of "failing forward", lets just hope that it looks good with full armor on!

I Appreciate the constructive criticism, thanks!

// Pinface
 
Putting up a video aswell, started to putty and sand the crevices that occured during the assembly. Looks a little rough, but a lot of love and care goes a long way.

(will be replacing the ear with a standalone print)


[video]https://www.instagram.com/p/BPcuAgjAK6u/[/video]

// Pinface
 
Last edited by a moderator:
PROGRESS TIME!

Been busy printing like crazy, and slowly and steady making my way through the other half of the helmet! I realized after the print that the borden connector was there, but with a little sanding and cutting it will be gone in no time. (for some stupid reason I believed for a second that Jango also had one, don't ask)

TDH.jpgTDH2.jpgTDH3.jpg

Really exciting to see how it slowly builds up to a complete model!

// Pinface
 
The flightsuit arrived the other day, fits like a charm! I bought a postman blue Red Kap men's twill action back coverall from Amazon (and also an extra to attach the short sleeves).
Just wondering about one thing; How baggy is the flightsuit supposed to be when worn? I know that it got to be a little baggy, would be great if someone got a picture wearing just their own flightsuit so that I can get a better picture of how it should fit.

As I am running short of Westars, a handy finger gun will do just fine!
16295172_1537711506293731_467837177_n.jpg 16358845_1537711109627104_2059837710_n.jpg
(The helmet I'm wearing is a test helmet made from cardboard and glue, just to get the idea of how it will work together with the finished helmet)


Another thing I've been testing is the chest armor, trying on the size that is recommended for my height. The templates are from WOF with the 6'3" dimensions (Size X-Large).

16358576_1537711106293771_463272307_n.jpg AA.jpg

Obviously I didn't make the stomach part, so it may be a little hard to get the full preview of the fit. Is it to big or too small? Personally I think that it's pretty close, did a quick Photoshop to compare the size and positioning.

// Pinface

16295172_1537711506293731_467837177_n.jpg


16358845_1537711109627104_2059837710_n.jpg


16358576_1537711106293771_463272307_n.jpg


AA.jpg
 
Last edited by a moderator:
The flight suit looks pretty good. You are right it will always be just a bit baggy with out the armor on. But yours looks snug enough without being too baggy.

Here is mine from a few years ago when I was working on the build
dsc00158n.jpg


Which looked like this when I got close to finished.......
frontwxr.jpg


That was about 6 years ago so my kit has changed quite a bit but that is the only shots I have that would give you the comparisons you are asking for. Hopefully that puts your mind at ease. I really think that yours will work out perfect.
 
Taking a little break from the helmet as I take on the knee armor. Talked to Alan (WOF) and he was kind enough to share the blueprints of his design on the knee armor, so all I had to do was to convert it all into a 3D model. Since then I've been printing the front and the inside so far, making sure that it will fit as pleased. So far it's fits the knee pretty well, so we'll see how it will fit when the outer side is printed.

1.jpg3.jpg2.jpg

Still need a little love with the sanding and filling.

11.jpg

The flight suit that I bought earlier is also in working progress. The other day I decided to remove the back pockets when I had a little extra time over. It was simple enough to remove the pockets once you got comfortable with the seam remover tool. Up next on the flight suit is to add the correct sleeves and the vertical seam that goes on the front on each arm, and if the knee armor fits, adding the holes in the knee section for the strap to pass under.

5.jpg 6.jpg 7.jpg

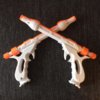
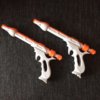
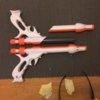
I also got the blasters! Arrived in the mail a few days ago. Rubies blasters with sound triggers, simple and acceptable price for a quick customization. A new paintjob is mandatory on these babies, aswell as extending the barrels a few centimeters (inches), and a few other nick-nacks to be added/removed. Other than that, they are relatively close to the screen used props, and I think it's a great alternative for a first time user WIP'er.

8.jpg 9.jpg 10.jpg

// Pinface
 
Last edited by a moderator:
The shape on the knees doesn't look quite right. It looks a bit too blocky and square. You might do some visual comparisons and see if you can sand the shape out a bit better...
 
The shape on the knees doesn't look quite right. It looks a bit too blocky and square. You might do some visual comparisons and see if you can sand the shape out a bit better...

Yes sir! Thanks for pointing that out, I also noticed that after the print. Will tackle that as soon as I know that the knee will fit with the last part.
 
Hey guys, wanted to post a little update on the de-edging on the knee armor:

22.jpg23.jpg

How much more should I take off, or is it acceptable as it is? I feel like I should cut it a little more, but it takes so darn long to sand the PLA-Plastic, even with a dremel haha.

All feedback is appriciated!

// Pinface
 
Last edited by a moderator:
Update on the blasters!

Been busy digging up old threads in hope of finding a little information about the measurements on the barrel, as the rubies version is a little short. Bought a PVC pipe to replace the existing barrel. When finished the whole length of the blasters will end up around 13,5 inches. You can see on the picture that it will make a whole lot to the aesthetics.

Further down the line I will bondo the seams so it will be clean and to get rid of the holes and crevices, especially around the trigger.

Added a little extra weight aswell with some screws I found and simply put some hot glue inside the handle. Now it doesn't feel like a toy anymore, so that's great.

Other than that I will dremel out the elongated holes on the barrels, attach the nozzle, replace some screws and paint the whole thing. Will be working on one blaster at the time so that I can take some comparison pictures during the process.

6.jpg7.jpg8.jpg9.jpg10.jpg11.jpg

// Pinface


12.jpg
 
Last edited by a moderator:
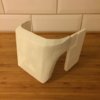
Right Gauntlet:

1 (2).jpg2 (2).jpg3 (2).jpg4 (2).jpg5 (2).jpg6 (2).jpg

Thoughts? Let me know if anything needs tweaking, will be printing this once it's finished. (Forgot to add the grappling dart housing to the assembly)
 
Last edited by a moderator:
This thread is more than 6 years old.

Your message may be considered spam for the following reasons:

  1. This thread hasn't been active in some time. A new post in this thread might not contribute constructively to this discussion after so long.
If you wish to reply despite these issues, check the box below before replying.
Be aware that malicious compliance may result in more severe penalties.
Back
Top