Fettastic
Active Hunter
Hey Team,
I have been looking into different ways to attach the armor to the flak vest. My goal was to find an easier way to attach the armor while still being able to make small adjustments and fine tune the placement while keeping the flak vest in tact. This is my solution for Easy, Cheap, Fast and Effective placement and attachment of armor.
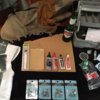
Things you will need:
-Cardboard or Disposable Surface
-Bead Landing pins with clutch back (Jewelry Pins) -Note- you can find these at pretty much any fabric store. Michael's has 10 for $2.99
-Clutch Backs (I found these fairly cheap on ebay)
-5M Quik-Cure or JB Weld
-Sand Paper
-Cheap brush or something to mix and apply the glue to the armor
-Sharpie
-Beer

-Armor
-Flak Vest
![FullSizeRender[1].jpg FullSizeRender[1].jpg](https://thedentedhelmet-f28a.kxcdn.com/forums/data/attachments/63/63443-5069c477e4c910e0dbe051df20346c33.jpg?hash=UGnEd-TJEO)
With the sharpie, mark out the areas you wish to apply the glue and metal tack from the jewelry pin.
![FullSizeRender[2].jpg FullSizeRender[2].jpg](https://thedentedhelmet-f28a.kxcdn.com/forums/data/attachments/63/63444-35c2a8db46bd02864079933c5535718a.jpg?hash=NcKo20a9Ao)
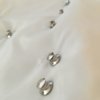
Sand these areas to create a tacky surface for the glue to bond to. Then clean the sanded areas with a wet towel and dry it off.
![FullSizeRender[3].jpg FullSizeRender[3].jpg](https://thedentedhelmet-f28a.kxcdn.com/forums/data/attachments/63/63445-6d4ed5e9837d41b553d8193bdbabff12.jpg?hash=bU7V6YN9Qb)
Also sand the bottom of the tack from the jewelry pin to create a tacky surface for the glue to bond to.
![FullSizeRender[4].jpg FullSizeRender[4].jpg](https://thedentedhelmet-f28a.kxcdn.com/forums/data/attachments/63/63446-e071a62f47e0ba771c590eaba98dce06.jpg?hash=4HGmL0fgun)
Mix the 5m Quik-Cure with a disposable brush and apply to the areas designated for the tack of the jewelry pin.
Set the tack on the glue that has been applied to the designated areas.
Only mix enough glue to do 2-3 tacks at a time and keep in place for 5 minutes. This stuff cures really quickly but the tack will slide around if you don't keep it in place for a minute.
![FullSizeRender[5].jpg FullSizeRender[5].jpg](https://thedentedhelmet-f28a.kxcdn.com/forums/data/attachments/63/63447-5ef249281327dd1859c3bd577470c842.jpg?hash=XvJJKBMn3R)
Let the glue dry for at least an hour before securing armor to the vest.
Place the armor in the desired placement and push the pin through the flak vest.

Secure the pin with the improved locking clutch backs to the jewelry pins.
IMPORTANT: You need to purchase locking clutch backsinstead of the standard backs for the jewelry pins. The standard pins are apoor design and will pop off even with the slightest rubbing of materialagainst the backs.
There are two types that I have tried with success. Thelocking clutch backs, as pictured below, and the locking pin backs with set screws. You can purchase these on Ebay, they are readily available and are fairly inexpensive. Follow the links below.
Clutch Backs
Locking Pin Backs


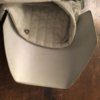
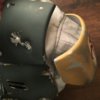
For the shoulders, placement is pretty important. If you install your pins too high on the shoulders, or too close to the edge, when you mount the armor in the correct location of the flak vest, the armor will stick out like wings. It's going to be a little different for everyone depending on the armor used and the size of the flak vest. For my gear I ended up going about 2" - 2 1/2" from the top edge of the shoulder bell and just above the hem of the flak vest sleeve. I only used two pins because you don't want these to be super stiff but instead you want them to be able to move freely when raising and moving your arms.

This shows that they can lay down against your shoulder if installed properly.

Wear, observe, reference and make adjustments where needed. That's the great thing about this method. If you don't like the placement...just adjust it and punch a new hole with the jewelry pin. No big deal.
I do recommend once you've decided and are happy with the placement to mark on the back side of the vest where the pins are. I just used a sharpie to mark the holes. This will allow you to remove the armor when needed and repeat the placement process with ease.


I've been able to troop using this method for a good 15 hours of troop time now and not one of the clutch backs have been able to come off. None have bent or broken either. If you have any ideas on how to improve this method please chime in and advise. Cheers!
-Cameron-

![FullSizeRender[1].jpg FullSizeRender[1].jpg](https://www.thedentedhelmet.com/forums/attachments/fullsizerender-1-jpg.63443/)
![FullSizeRender[2].jpg FullSizeRender[2].jpg](https://www.thedentedhelmet.com/forums/attachments/fullsizerender-2-jpg.63444/)
![FullSizeRender[3].jpg FullSizeRender[3].jpg](https://www.thedentedhelmet.com/forums/attachments/fullsizerender-3-jpg.63445/)
![FullSizeRender[4].jpg FullSizeRender[4].jpg](https://www.thedentedhelmet.com/forums/attachments/fullsizerender-4-jpg.63446/)
![FullSizeRender[5].jpg FullSizeRender[5].jpg](https://www.thedentedhelmet.com/forums/attachments/fullsizerender-5-jpg.63447/)


I have been looking into different ways to attach the armor to the flak vest. My goal was to find an easier way to attach the armor while still being able to make small adjustments and fine tune the placement while keeping the flak vest in tact. This is my solution for Easy, Cheap, Fast and Effective placement and attachment of armor.
Things you will need:
-Cardboard or Disposable Surface
-Bead Landing pins with clutch back (Jewelry Pins) -Note- you can find these at pretty much any fabric store. Michael's has 10 for $2.99
-Clutch Backs (I found these fairly cheap on ebay)
-5M Quik-Cure or JB Weld
-Sand Paper
-Cheap brush or something to mix and apply the glue to the armor
-Sharpie
-Beer

-Armor
-Flak Vest
![FullSizeRender[1].jpg FullSizeRender[1].jpg](https://thedentedhelmet-f28a.kxcdn.com/forums/data/attachments/63/63443-5069c477e4c910e0dbe051df20346c33.jpg?hash=UGnEd-TJEO)
With the sharpie, mark out the areas you wish to apply the glue and metal tack from the jewelry pin.
![FullSizeRender[2].jpg FullSizeRender[2].jpg](https://thedentedhelmet-f28a.kxcdn.com/forums/data/attachments/63/63444-35c2a8db46bd02864079933c5535718a.jpg?hash=NcKo20a9Ao)
Sand these areas to create a tacky surface for the glue to bond to. Then clean the sanded areas with a wet towel and dry it off.
![FullSizeRender[3].jpg FullSizeRender[3].jpg](https://thedentedhelmet-f28a.kxcdn.com/forums/data/attachments/63/63445-6d4ed5e9837d41b553d8193bdbabff12.jpg?hash=bU7V6YN9Qb)
Also sand the bottom of the tack from the jewelry pin to create a tacky surface for the glue to bond to.
![FullSizeRender[4].jpg FullSizeRender[4].jpg](https://thedentedhelmet-f28a.kxcdn.com/forums/data/attachments/63/63446-e071a62f47e0ba771c590eaba98dce06.jpg?hash=4HGmL0fgun)
Mix the 5m Quik-Cure with a disposable brush and apply to the areas designated for the tack of the jewelry pin.
Set the tack on the glue that has been applied to the designated areas.
Only mix enough glue to do 2-3 tacks at a time and keep in place for 5 minutes. This stuff cures really quickly but the tack will slide around if you don't keep it in place for a minute.
![FullSizeRender[5].jpg FullSizeRender[5].jpg](https://thedentedhelmet-f28a.kxcdn.com/forums/data/attachments/63/63447-5ef249281327dd1859c3bd577470c842.jpg?hash=XvJJKBMn3R)
Let the glue dry for at least an hour before securing armor to the vest.
Place the armor in the desired placement and push the pin through the flak vest.

Secure the pin with the improved locking clutch backs to the jewelry pins.
IMPORTANT: You need to purchase locking clutch backsinstead of the standard backs for the jewelry pins. The standard pins are apoor design and will pop off even with the slightest rubbing of materialagainst the backs.
There are two types that I have tried with success. Thelocking clutch backs, as pictured below, and the locking pin backs with set screws. You can purchase these on Ebay, they are readily available and are fairly inexpensive. Follow the links below.
Clutch Backs
Locking Pin Backs


For the shoulders, placement is pretty important. If you install your pins too high on the shoulders, or too close to the edge, when you mount the armor in the correct location of the flak vest, the armor will stick out like wings. It's going to be a little different for everyone depending on the armor used and the size of the flak vest. For my gear I ended up going about 2" - 2 1/2" from the top edge of the shoulder bell and just above the hem of the flak vest sleeve. I only used two pins because you don't want these to be super stiff but instead you want them to be able to move freely when raising and moving your arms.

This shows that they can lay down against your shoulder if installed properly.

Wear, observe, reference and make adjustments where needed. That's the great thing about this method. If you don't like the placement...just adjust it and punch a new hole with the jewelry pin. No big deal.
I do recommend once you've decided and are happy with the placement to mark on the back side of the vest where the pins are. I just used a sharpie to mark the holes. This will allow you to remove the armor when needed and repeat the placement process with ease.


I've been able to troop using this method for a good 15 hours of troop time now and not one of the clutch backs have been able to come off. None have bent or broken either. If you have any ideas on how to improve this method please chime in and advise. Cheers!
-Cameron-
Last edited:


