Boba Fett Rifle

Radioman1017

New Hunter
So I'm starting on my Boba Fett rifle today. (/applause)

I'm going to 3D print many of the elements. I'm using files I found on Thingiverse. I assembled them in Autodesk 123D and they seem to fit. As for screen accuracy, it's hard to tell.

That said, the stock won't fit on my 10x10x10 print bed. That's ok, because I had kind of thought of doing this out of wood anyway. As for the site and mounts, it seems like people are getting that for cheap on ebay.

Does anyone have a good pattern for the stock? I glanced around but didn't see one. And, is there a preferred site available that people gravitate to?

Thanks all!

Mark
 
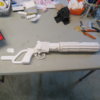
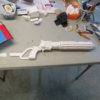
Progress, thus far.

IMG_7267.JPGIMG_7266.JPGIMG_7268.JPG

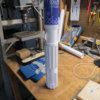
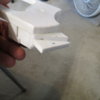
This represents about 15 hours of printing for those of you not familiar with this process. I was considering doing the barrel in PVC and then adding the various bits but since I have the files I just figured I'd go for it. There are three more sections of the barrel to go (another 10+ hours) then the tip, trigger guard, scope mount and a few bits here and there. I've been studying up on making wood rifle stocks so that will be more manual work. Fortunately, I have a decent shop so that's just a matter of time and skill. Any recommendations on the type of wood I should use?

Mark
 
Deceptively light, yes. You can make it heavier by incresing the infill but that increases your cost by a bit but your print time by a LOT. Im a little worried about the structural integrity here. Also, with a weapon, you want a little heft. Hope to get from the stock.
 
Quick update. Everything is printed except the site clips because I'm waiting for my site to arrive from Amazon. Depending upon how big that is, I might need to change up the design a bit.

This is what I ordered as it seemed the closest to reference that I could find.

Amazon.com : Crosman 0410 Targetfinder Rifle Scope : Airsoft Gun Scopes : Sports & Outdoors

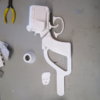
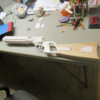
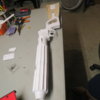
Here are the pieces laid out. (Not necessarily in the right order.)

IMG_7276.JPGIMG_7275.JPG

I began the terrifying process of gluing this all together last night. The attach point between the grip and chamber pieces is stressing me just a bit. It will be tough to clamp because any leakage will glue the clamp to the piece.

IMG_7280.JPGIMG_7278.JPG

My daughter was very upset I was using her earring treatment solution to hold the glue together. I find her lack of faith disturbing. ;)

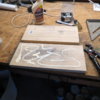
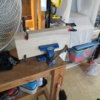
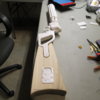
I picked up a piece of poplar for my gun stock. Each piece is .75" thick and I wanted a 1.5" stock so I cut two 12" lengths and am wood gluing those together. I'll probably leave that in the vise until tomorrow just to make sure it's solid.

IMG_7277.JPGIMG_7279.JPG

If this turns out well, I'm going to be debating whether or not to just spray paint this black with the rest of the gun or stain and varnish a dark brown. I would love a nice looking stock but there's always the issue of screen accuracy. Boo.

More updates coming.

Mark
 
So a lot happened today.


As I expected, gluing the handle grip to the trigger chamber was simply not going to work. So, I constructed a "tab" to slide into the a space left by the designer of this file. I suspect the original designer had intended for something of this sort but didn't include it in the file upload. Regardless, the tab worked beautifully and really helped gluing that connection.

IMG_7281.JPG

I cut and started sanding the stock today. I have every tool in the world except a planer and a router table. Do you know what are the most critical tools needed to make a rifle stock? A planer and a router table. Sigh. Still, I had a dremel and a drill press so I was able to get a good start on the cutout for the stock holder.


IMG_7282.JPGIMG_7283.JPGIMG_7284.JPG

I want to do a lot more sanding and shaping on the stock but my belt sander needs a new sanding belt. A quick trip to Home Depot in the morning and I'll get that wrapped up. Hopefully, I can begin painting tomorrow.

Thanks for reading. Any comments or suggestions are always welcome. This is my first EE-3 so I can't guarantee it'll be perfect.

Mark
 
IMG_7285.JPG

Started painting! Primer is done and I'm on the second coat of black. Yes, I have some blobs that I need to sand out. One more coat of black and I'll start detailing.


I got my scope from Amazon yesterday. However, the clip in the 3D file wasn't as strong as I liked, so I had to create a new "stand" to attach to the gun so I could mount the scope. Took a while to get the odd angles right but it came out nice. (And yes, I know I need to paint over the Crossman logo.)

IMG_7286.JPG

I did a lot of work on the stock yesterday. This part has actually been a lot of fun. I picked up new belts for my sander and it's just a matter of patience. It's still too thick so I'm going through the whole process of planing that down.

IMG_7287.JPG

Mark
 
It's looking really good! Hard to believe that was 3D printed. Not to sound old, but these newfangled 3D printers are something else!

Plenty of elbow grease and finesse too, I see. The painting is coming along nicely.
 
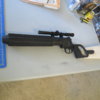
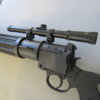
And we're pretty much done! (Although, as artists we are NEVER done, right?)

IMG_7374.JPGIMG_7375.JPGIMG_7376.JPGIMG_7377.JPGIMG_7378.JPGIMG_7379.JPG


I still need to dirty up the gun scope but I'm not 100% sure I like the one I used.

Today I finished up the stock coating, screwed in and painted the greeblies and did some last minute aging. I'm not happy with some of it so I'll be noodling with it in the weeks to come. When I age, I hold the gun a lot and go through the motions that Boba Fett might go through so I can see where the wear might be. Where are his fingers? Where does it bump against the armor on his chest? When he sets the gun down in Slave 1 how and where would it ding around? Maybe that's overkill but for me, it was part of the fun.

Total time on this project would probably be over 100 hours. Materials were probably 1/3 of a roll of 3D filament, a 2' foot piece of poplar, glue, paint, some screws and a scope.

Hope you all enjoy and thanks for reading. Happy to answer any questions.

Mark
 
And we're pretty much done! (Although, as artists we are NEVER done, right?)

View attachment 92109View attachment 92110View attachment 92111View attachment 92112View attachment 92113View attachment 92114


I still need to dirty up the gun scope but I'm not 100% sure I like the one I used.

Today I finished up the stock coating, screwed in and painted the greeblies and did some last minute aging. I'm not happy with some of it so I'll be noodling with it in the weeks to come. When I age, I hold the gun a lot and go through the motions that Boba Fett might go through so I can see where the wear might be. Where are his fingers? Where does it bump against the armor on his chest? When he sets the gun down in Slave 1 how and where would it ding around? Maybe that's overkill but for me, it was part of the fun.

Total time on this project would probably be over 100 hours. Materials were probably 1/3 of a roll of 3D filament, a 2' foot piece of poplar, glue, paint, some screws and a scope.

Hope you all enjoy and thanks for reading. Happy to answer any questions.

Mark

Wow, really fabulous job Mark! I'm 3D printing mine too, so we'll see how that goes...
 
This thread is more than 8 years old.

Your message may be considered spam for the following reasons:

  1. This thread hasn't been active in some time. A new post in this thread might not contribute constructively to this discussion after so long.
If you wish to reply despite these issues, check the box below before replying.
Be aware that malicious compliance may result in more severe penalties.
Back
Top