rudy skirata
New Hunter
First of all Id like to thank WOF if it werent for him none of this would be possible.
with that said, heres what i got.
(bear in mind this is my first ever attempt)
Ive made it all out of different kinds of posterboards and cardboards and im using plaster to smooth out the joints.
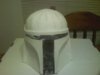
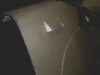
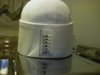
this is the progress i have so far on the helmet.

Q:i know it still needs some work but is ive read that you have to/should seal cardboard scratchbuilds, but the problem is 1. what type of sealant should i use and 2. do i primer b4 1 seal or after, or how does it work?
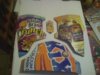
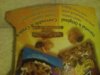
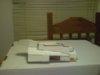
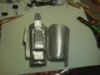
now on to the chest plates

yes i know its a bit funny to look at cause its cereal boxes, but it makes the cardboard smooth, now all i have to do is smooth out the edges so it doesnt look like cardboard anymore.
and as a bonus of having two layers i can make the details easier

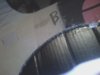
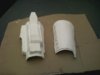
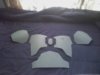
the back piece i had some trouble with seeing as how i couldnt find carboard big enough but heres what i got

its actually made out of 6 pieces "spliced" together with hot glue from the inside

on the outside part i put a ridge because on a picutre i noticed that there a lot of depth in the back plate, so to make it seem like theres depth i put the ledge

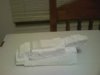
and this is where i stand today with it

all plastered up and ready for a sanding.
i even made the slots for the jet pack hardness

with that said, heres what i got.
(bear in mind this is my first ever attempt)
Ive made it all out of different kinds of posterboards and cardboards and im using plaster to smooth out the joints.
this is the progress i have so far on the helmet.
Q:i know it still needs some work but is ive read that you have to/should seal cardboard scratchbuilds, but the problem is 1. what type of sealant should i use and 2. do i primer b4 1 seal or after, or how does it work?
now on to the chest plates
yes i know its a bit funny to look at cause its cereal boxes, but it makes the cardboard smooth, now all i have to do is smooth out the edges so it doesnt look like cardboard anymore.
and as a bonus of having two layers i can make the details easier
the back piece i had some trouble with seeing as how i couldnt find carboard big enough but heres what i got
its actually made out of 6 pieces "spliced" together with hot glue from the inside
on the outside part i put a ridge because on a picutre i noticed that there a lot of depth in the back plate, so to make it seem like theres depth i put the ledge
and this is where i stand today with it
all plastered up and ready for a sanding.
i even made the slots for the jet pack hardness