Boushh first try at a helmet build

alvomedia

Hunter
Hey everyone, new to the forum and to helmet builds! My brother has been doing a lot of pepakura builds and that got me interested in doing one myself!! Not pepakura necessarily, but something to keep me busy when I have some down time.

I've always loved the Boushh character growing up so this has been a lot of fun to do. This is my first experience with an airbrush etc. so I have to give a lot of credit to merkava74 and his own Boushh build thread. He laid everything out so incredibly well that it was really a godsend for a newbie like me. If you haven't seen the thread, go check it out here (it is really worth a look!):

http://www.thedentedhelmet.com/f68/todds-sandman-boushh-helmet-build-52474/

Thanks merkava74!!

I got my resin kit from Todd (sandman). There really isn't enough good I can say about the kit and about Todd. Great guy, even better kit!! They run about $300 and worth every penny!
IMG_5527.JPG


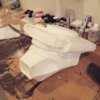
First task was to cut out where the lenses will be installed. A little tricky, but as long as you keep dry fitting the lenses while you go you shouldn't have a problem. I used a cutting wheel on my dremel tool and sanding wheel.
IMG_5529.JPG


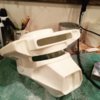
Todd's kits come with everything you need for the ear pieces. Very straight forward and he has very easy to follow instructions.

IMG_5533.JPG
 
For the next part of my build I added the battle scars and dents. This really was a fun part! I used a pencil to draw them on before, then used a cutting wheel on my dremel to make the scars.

FullSizeRender.jpgIMG_5538.JPGIMG_5539.JPGIMG_5545.JPG
 
Last edited by a moderator:
Next came the sanding! I went through a couple rounds of sanding, then priming, then sanding again. The nice thing about a helmet like the Boushh bounty hunter helmet is that because of its worn out, dented and paint chipped appearance I wasn't really crazy concerned about getting it perfectly smooth. I did work hard to get the seams smoothed over though. So after the final sanding I gave it a good wash, let it dry, then primed it ready for paint.

IMG_5551.JPG
 
Last edited by a moderator:
Next came the airbrushing. Again, thanks to merkava74 and his thread ( http://www.thedentedhelmet.com/f68/todds-sandman-boushh-helmet-build-52474/ ) I was really able to tackle this next part with confidence. All the paint chips were hand painted.

There were really about 14 or 15 different layers of paint. Some were just for tone/depth and others were for paint chips, dry brushing or washes.


The first few layers were just to get a base tone with some depth to it.
IMG_5552.JPGIMG_5553.JPG


Next I started to add some paint chip details. I know it seems like a lot of detail, but this really served as a great base to add more layers to and have those paint chips show through as a subtle detail.
IMG_5554.JPGIMG_5556.JPGIMG_5557.JPG
 
Last edited by a moderator:
Next I misted it with a bit of grey for more depth and to also tone down the paint chips. Also added some black to the battle scars and recessed areas.

IMG_5558.JPGIMG_5559.JPG


Don't forget to mask off the visor when you airbrush it silver!
IMG_5561.JPG
 
Last edited by a moderator:
Next came more paint chips. This time I used the silver/aluminum color. After the paint chips were hand painted on, a bit more grey was misted on again to tone the chips down slightly and then some dry brushing. The dry brushing came out very nicely on the greebles.

IMG_5564.JPG
IMG_5565.JPGIMG_5566.JPGIMG_5563.JPG
IMG_5568.JPG


At this point in the build I felt like the back section of the helmet just wasn't quite right. Too light or something. I had to step away for a few days before I was able to come back and re-tool it.
IMG_5567.JPG
 
Last edited by a moderator:
After I fixed what was bothering me about the back section of the helmet, I was able to start on some of the decals. I don't have a vinyl cutter, so I had to mask of these parts by hand. I thought this would be very difficult, but with a little patience it came out very nicely.


IMG_5572.JPG
IMG_5574.JPG
IMG_5575.JPGIMG_5576.JPGIMG_5581.JPGIMG_5578.JPGIMG_5580.JPG
 
Last edited by a moderator:
This was right after an umber wash. The umber wash really toned everything and came out nicely. This far into the build and I was very please with the progress. Before the wash I sprayed the whole helmet with a matt clear coat. I also tried to weather it a bit further before the clear coat with some steel wool, which I half regret because I realized after that I probably should've used a finer quality of steel wool. It by no means ruined it, but when I look at it with my critical eye I wish the weathering was a bit finer.

IMG_5585.JPGIMG_5583.JPG
 
Last edited by a moderator:
Fixing the leather pieces to the snout was a bit tricky. There has been some debate over the type of leather to use here. Deer skin vs. cow hide. I ended up using a lightweight deer skin (about 3-4oz.).

The deer skin was very easy to work with. Has a little bit of stretch to it too, which proved both helpful and a problem at times.

I started by making a template and transferring that to the deer skin to cut out. I applied the top half first. Because of the stretch in the leather it was very easy to line everything up and fold it into the end of the snout area.

The bottom half was a different story. I started by attaching the leather to the sides of the helmet and sort of working my way down. This is where the stretch in the leather caused some problems for me. By the time I got to the underside/chin I had quite a bit of extra "sag" in the leather. I had no use for a jowly Boushh, so I ended up having to cut the piece under the chin down the middle and line it up that way. It ended up working very well, although I know this isn't true to the original Boushh helmet used in the Star Wars movies. It's a small deviation that I think could be forgiven.
 
Here are just a couple pictures from the leather process. I should also mention that I didn't have any good contact cement for attaching the leather, but I found that using some CA glue worked really quite well.

After the leather was attached I further weathered it with an umber wash and a bit of sand paper.

IMG_5604.JPG

Template for the bottom leather piece.
IMG_5608.JPGIMG_5606.JPG

This was after the wash and a bit of weathering.
IMG_5609.JPG
 
Last edited by a moderator:
The tusk part (at the end of the snout) was a tight fit once the leather was attached. It was simply painted black, dry brushed with an aluminum paint and it also got an umber wash. This part was attached using 4 small screws. Be careful if you screw this part onto the helmet, always pilot your holes and don't use screws that are too long.

The scope type piece also received some black paint with dry brushing and a wash. It was also attached with one screw through the back.

IMG_5610.JPGIMG_5611.JPG
 
Last edited by a moderator:
The neck cowl on the back of the helmet was pretty straight forward. Make a template, then cut it out giving yourself a little bit of extra room for "in case of" situations.

The neck piece is actually two leather pieces sewn together in the back. Just a small detail to pay attention to.

IMG_5613.JPG

The strap that runs along the back of the helmet is about an inch wide with 5 or 6 lines sewn down them. Both these pieces went through an umber wash as well, to give them a more weathered look.
IMG_5614.JPG
IMG_5619.JPG
 
Gluing in the lenses was far more difficult than I thought it would be. To my eternal frustration a bit of clue crept up the lens and can be seen on the top visor.


IMG_5639.JPG
IMG_5640.JPG
 
For a first time build I can't be anything but happy and satisfied with the final results. It was so much fun to put together and learn something new. As with anything, there are a few things I wish I would have done differently or that I'm not 100% satisfied with. But as a starting project this has been a great learning experience.

I am debating selling the helmet to help cover some of the costs from equipment purchases I made to complete the project. If I did sell it I would definitely do another one and keep it.

Next I'll have to start thinking about putting together some of the soft costume parts.


IMG_5623.JPG
IMG_5637.JPG
IMG_5634.JPGIMG_5643.JPG
 
This thread is more than 8 years old.

Your message may be considered spam for the following reasons:

  1. This thread hasn't been active in some time. A new post in this thread might not contribute constructively to this discussion after so long.
If you wish to reply despite these issues, check the box below before replying.
Be aware that malicious compliance may result in more severe penalties.
Back
Top