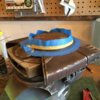
Boushh Boushh helmet build - commission for Darth Z

alvomedia

Hunter
Well, here we have another Boushh helmet build. This one is for the lucky darth z.

The kit is one of Todd's, and again I can't say enough good things about the kit. He's also made a couple of neat upgrades to the kit, which I'll feature later. Always good to see people striving to improve and perfect, which is what Todd's done with his upgrades.

The helmet is a nice resin cast. The first thing to do is cut the lens holes. This is the messiest part of the build. Use a cutting wheel and sanding drum on your dremel tool.

Take your time here! Please, for the love you bear for all things star wars, take your time and do this part right! As you are cutting the holes, you should also be going back and forth dry fitting the lens into the slot. Keep putting that lens in to make sure you have a good fit. You'll also have to trim the top lens a bit, so be careful you don't take too much off. This part takes me at least a couple of hours to get it just right. On the top lens you also have to create a sort of "rim" on the inside for the lens to sit up flush against. Again, use your dremel tool and take your time. I tried to get a good picture of what I mean for the "rim" on the inside. If you don't get the lenses to fit right you'll be mad at yourself later on. And honestly, you're paying a lot of money for a quality kit so do it right!

The next step will be sanding/filling the seams and working on the ear greebles.

IMG_5979.JPGIMG_5980.JPGIMG_5983.JPGIMG_5984.JPGIMG_5985.JPGIMG_5987.JPG
 
Finished off some sanding and filled in the seams with some putty and sanded them smooth.

Assembling the ear greebles is pretty straight forward. Some trimming here and there. I finished off the ear pieces by not only gluing them to the helmet with some CA glue, but also used some milliput to help solidify the bond. I also like the finished look with the putty, gives it a better fused look in my opinion. After the putty cures I'll be able to sand them down a bit more to smooth the bonds out a bit more. You have to be a bit careful/aware of the angle of the ear pieces when you put them on the helmet. By that I mean just be sure they have good symmetry to one another.

Sanding and filling the seams on the helmet took about an hour or less. The ear pieces took 1.5 - 2 hours to assemble, trim, fit and install with the glue/putty.

Tomorrow I should be able to prime, sand a bit more, then prime again to get ready for paint.

IMG_5988.JPGIMG_5989.JPGIMG_5992.JPGIMG_5994.JPGIMG_5996.JPGFullSizeRender 3.jpg
 
Just off hand what how big are these? .. I think i have a big head . :unsure They look great btw. Also does Todd sell unbuilt kits? You may PM me with answer if you'd like. Thanks!
 
Just off hand what how big are these? .. I think i have a big head . :unsure They look great btw. Also does Todd sell unbuilt kits? You may PM me with answer if you'd like. Thanks!

These helmets are definitely made for a smaller head. Think of the petite Leia, it is made for about that size of lady. BUT, I think you could potentially widen the opening a bit by grinding/sanding away some of the opening. How much, I'm not sure. I've got a pretty small peanut head and I can get the helmet on no problem. I'll maybe have my husband try it out and let you know.

The kits Todd sells are the helmet and all the pieces for the ears/rangefinder. So yea, he sells the unbuilt kits.
 
What did you use to remove the excess glue/putty?

Sand paper seems to do the trick for getting ride of any excess putty. Sands down nice and smooth. As for any excess glue, I try not to over do it. A little dab'll do ya. That doesn't sand away quite so nicely it seems.
 
Thanks for the response! I found him on RPF and sent him an email. I look forward to watching the build process!!! Looks great so far!
 
Had just a little bit of time to work on the helmet today. I sanded down the helmet using a fine grit paper and smoothed out some putty on the ear parts. I also masked off the snout area before priming.

Once primed I always find it a bit easier to see some of the missed imperfections that may need some extra sanding or putty. After those area's are addressed I give the whole helmet another once over with the sand paper. I decided this time around I would prime before I added the battle scars (beauty marks). This was just so I could see a better contrast while adding in the scars/dents. You'll see what I mean in the pictures. I used a pretty then cutting wheel on my dremel to make the marks. It is easy to get a bit carried away here. I may have overdone it on the top dent/scar so I'll probably go back and just finesse the area tomorrow or later tonight. Once everything is looking up to code I'll do one more prime and sand, then wash the whole bucket in some soapy water to get it ready for paint. (tip: give the whole helmet a once over with sand paper is a good idea before you prime. The sanded surface is better for the paint to adhere to. You can see in the pictures a couple places that didn't get sanded quite as well as the others.)

I also have to add one more piece to the top of the helmet, which will require some sanding and dry fitting before I can glue it on. That will probably be part of the next post.

Total time for priming, sanding and battle scars approx. 1.5 hours.

IMG_5997.JPGIMG_5998.JPGIMG_6001.JPGIMG_6003-1.jpgIMG_6004-1.jpgIMG_6006.JPGIMG_6007.JPGIMG_6010-1.jpgIMG_6011.JPG


IMG_6003.JPG


IMG_6004.JPG


IMG_6009.JPG


IMG_6010.JPG
 
So I thought now would be a good time to tackle what I'm calling the "hood" part of the helmet. It is just a little piece that needs to be trimmed and glued to the top of the helmet. And THIS part it actually the messiest part of the build.

I've found the easiest thing to do is cut an accurate template and trace it onto the back of the hood. Then get your dremel tool and start sanding away. Take some time here. Once you get close to your guideline start dry fitting it onto the helmet to make sure you get a good fit. There are also a few dot indents on the hood that I like to fill with putty.

Total time for trimming, filling the holes and priming was about 30 minutes.

FullSizeRender 5.jpgIMG_6012.JPGIMG_6014.JPGIMG_6015-1.jpgIMG_6016-1.jpgIMG_6017-1.jpgIMG_6018-1.jpg


IMG_6015.JPG
 
I just wanted to highlight the changes Todd made to the scope/rangefinder. I really admire the effort Todd has made to make his kit more accurate to the film version. He explains it best:

"You may notice a couple of differences in the kit...I have been working very hard to upgrade my kit to make it even more accurate and easier to build. Instead of the scope being a bunch of different parts, now there are only two...a main body and the antenna piece.

The antenna piece is now accurate to the original costume as it was cast from one of C3PO's chest rods. And now all of the original model pieces are now cast directly into the scope. I hope that this makes the kit not only easier to build but even more accurate to the original."


So there you have it. The previous kit had several small pieces to glue onto the scope piece, and the antenna piece was actually three pieces you had to put together (one rod and two resin pieces). This will take out virtually all of the guess work.

In the pictures you see the scope with all the smaller pieces cast directly onto the piece (there is actually one other small piece to glue to the scope) and you can also see the antenna which is now totally screen accurate. Just some cool little upgrades that any Star Wars connoisseur can appreciate.

IMG_6021-1.jpgIMG_6022-1.jpgIMG_6023-1.jpgIMG_6024-1.jpg

IMG_6021.JPG


IMG_6022.JPG


IMG_6023.JPG


IMG_6024.JPG
 
Thanks for the response! I found him on RPF and sent him an email. I look forward to watching the build process!!! Looks great so far!

Nice, Todd's kits are super.

Just a follow up on your question about the size... I had my husband try on the helmet and it was a VERY tight squeeze. He thought it could probably be sanded down a bit at the opening to help get his ears in. But even then his chin was nearly sticking out the bottom and his eyes didn't line up with the lens slot. It is like the helmet was just not quite "tall" enough, if that makes sense. This is definitely a helmet made for small heads, like a lady. Hope that gives you a bit more insight. (y)(y)
 
I've got most of the day set aside to work on the helmet, so I finished up with another layer of primer and light sanding, glued the hood into place then went to paint. While I was at it I also primed the snout piece, rangefinder pieces and leather strap "clasps".

The base layer is a dark brown (nearly black) and we tone up from there. I only got one toned layer on above the base coat before I decided to have a break for lunch. After lunch I'll get back to it! This is the fun part!

Total time spent this morning on last priming layer, sanding and a couple layers of air brush paint was 2 hours or slightly less. (I also count in time for clean up and fiddling with the airbrush to get things ready, in case anyone was wondering. It is my time, after all. I'm also trying to keep track of time spent for my personal curiosity, as well to show really how much time it does take to put one of these helmets together.)

IMG_6026.JPGIMG_6027.JPGIMG_6028.JPGIMG_6029.JPG
 
So I spent a lot of time this afternoon painting up the layers of the helmet. I find that there is a general process I like to follow here, but there are plenty of times where I jump back to add more of this color or that when I need to. But lots of layers here to create some depth. The hand painted chips take a lot of time. It's usually after the paint chips are added, and the dry brushing goes on that I sort of freak out because everything looks so stark. But I just have to remind myself that there is still a wash that it needs to go through that really blends things together, as well as a bit of steel wool to blend as well. The wash really brings it all together.

There are a couple spots I'm going to go back and finesse a bit, but otherwise the build is going along well.

Total time spent here was 3 hours.

IMG_6032.JPGIMG_6033.JPGIMG_6035.JPGIMG_6036.JPGIMG_6037.JPGIMG_6038.JPGIMG_6039.JPGIMG_6041.JPGIMG_6043.JPGIMG_6042.JPGIMG_6045.JPGIMG_6044.JPGIMG_6047.JPGIMG_6046.JPGIMG_6048.JPG
 
wow this looks great! Thank you btw for the head size info I think I measure around 24" . Todd sent me a bunch of info as well. I cant wait to see it all finished!
 
Tonight I spent some time blending things together a bit with some fine grade steel wool. The blending turned out real nice, and it also helps with smoothing things out. I also fixed up a couple spots that weren't quite up to code.

Next came the masking. I think I've got to find a more efficient way of doing this. It is a bit time consuming if you want it to come out right. I'm thinking that making a vinyl stencil is the way to go. Anyway, I got it all masked off and sprayed on the decals and stripes in the back. Tomorrow I will mask off the top band that goes around the helmet cap (again, time consuming), then spray with clear coat. Then it will be ready to go through a wash or two.

This session took 2 hours.

IMG_6049.JPGIMG_6050.JPGIMG_6051.JPGIMG_6052.JPGIMG_6053.JPG
 
Masked off the final head-band area and prepped the helmet for a clear coat. After the clear coat I went ahead and did a wash, which really helps bring the look all together. Once the wash is thoroughly dried I'll blend things down again with some steel wool and call it on paint.

Next I will be working on applying the leather to the snout area, which can be tedious.

Total time spent 1.5 hours.

IMG_6054.JPGIMG_6055.JPG
 
Ok, so after the wash I decided it came out a little dark around the decals. The decals just faded into the helmet too much and I need them to pop a bit more. SO, I re-masked the decals and re-painted them. I know it is a small detail but I think it is always worth it to get things right. The wash came out nicely, and I blended things together with some steel wool. I also put a bit more grey on the back.

Next came the leather process. I used painters tape to get an accurate template for the top and bottom snout areas. I transferred the templates onto some heavy paper so that they could be re-used for the next 2 builds I've got lines up. The templates will cut down on time considerably (about an hour).

For the leather I use a nice lightweight deerskin. This is nice and I find very easy to work with. There is some degree of flexibility with this leather, so it is easy to tuck and pull to get the seams and edges where they need to be. I glue the leather down a little bit at a time. The top snout it pretty easy to get down. I usually have a bit extra to trim at the seam where it meets the leather from the bottom snout, but that is just a matter of using an xacto blade. The bottom snout leather is tricky. I start on one side, where the two leather pieces come together (top and bottom) and work to the back. I don't tuck anything under till the end. After I get one side done I work the bottom of the "chin" and up to the other side. Tucking the leather under to finish it off is a bit tricky too. Because the leather is quite taut in some areas, you'll have to cut little notches to relieve some of the tension so you can tuck it. Don't cut your notches all the way to the helmet, you don't want to see them when everything is tucked under. There is one very tricky part here, the area behind the ears in the back. Because of the curve of the helmet it is pretty difficult to tuck the leather without getting a seam or fold showing on the outside. I can get mine pretty well without a fold showing. I have no really advice or technique here, I just try a few different ways until I find something that works THEN glue after I've found the best way. The leather really gets bunched in there in this particular area.

I'll do a wash later today on the leather and weather it a bit as well. This really looks good after it is done. We will be in the home stretch now. Just the lenses and a few items to attach to the helmet and this will be ready to ship off!

Total time for all processes described in this post was 4.5 hours.

IMG_6056.JPGIMG_6057.JPGIMG_6058.JPGIMG_6059.JPGIMG_6060.JPGIMG_6061.JPGIMG_6062.JPGIMG_6064.JPGIMG_6065.JPGIMG_6066.JPG
 
This thread is more than 8 years old.

Your message may be considered spam for the following reasons:

  1. This thread hasn't been active in some time. A new post in this thread might not contribute constructively to this discussion after so long.
If you wish to reply despite these issues, check the box below before replying.
Be aware that malicious compliance may result in more severe penalties.
Back
Top